It’s actually really easy to make birthday candles at home using a silicone mold. It’s much more straightforward than making a scented candle. Once you see how simple this is, you may never want to go back to the store-bought version.
I’m making a beeswax birthday candle for my daughter’s birthday and I thought I’d share my process. She’ll be 1 so the chances of her actually blowing out the candle are kind of slim, but I’m still very excited to customize it to match the decorations. We’re going with a strawberry theme so I might also add a few of the DIY strawberry candles to the cake!
If you want to skip all the tips and go straight to the tutorial, click here.
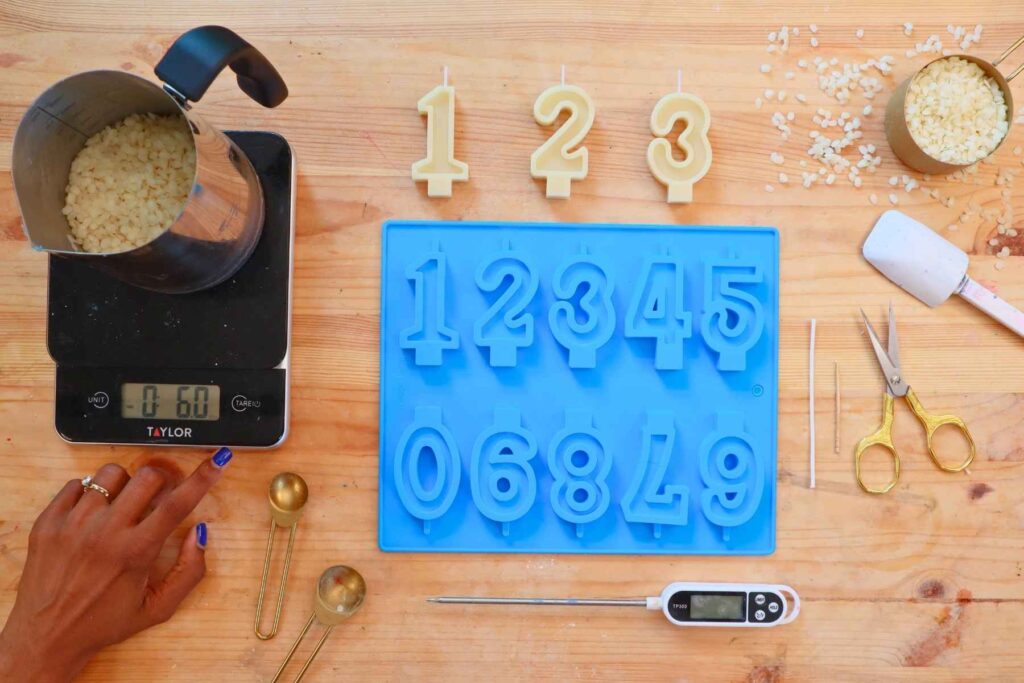
Everything You Need to Make Beeswax Birthday Candles
I love how short the list is for this project. You can skip the heat gun and the wick stickers and a lot of the other tools and ingredients you need for most candles. Here’s what you will need:
Essentials:
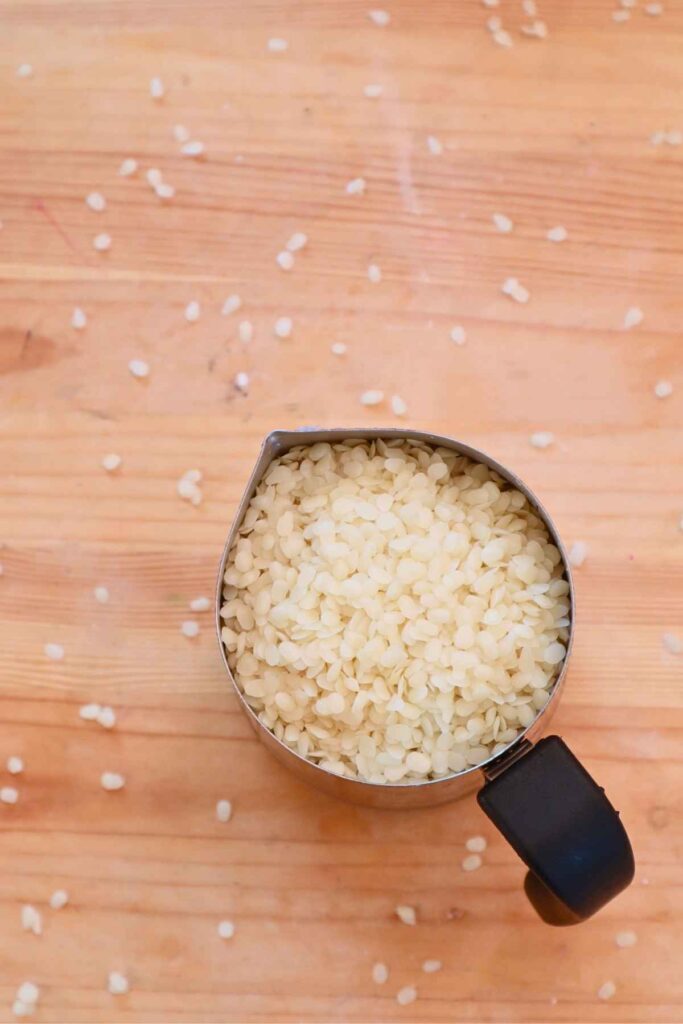
- Beeswax (pellets or blocks)
- Number candle mold
- Candle wicks (small size for small candles)
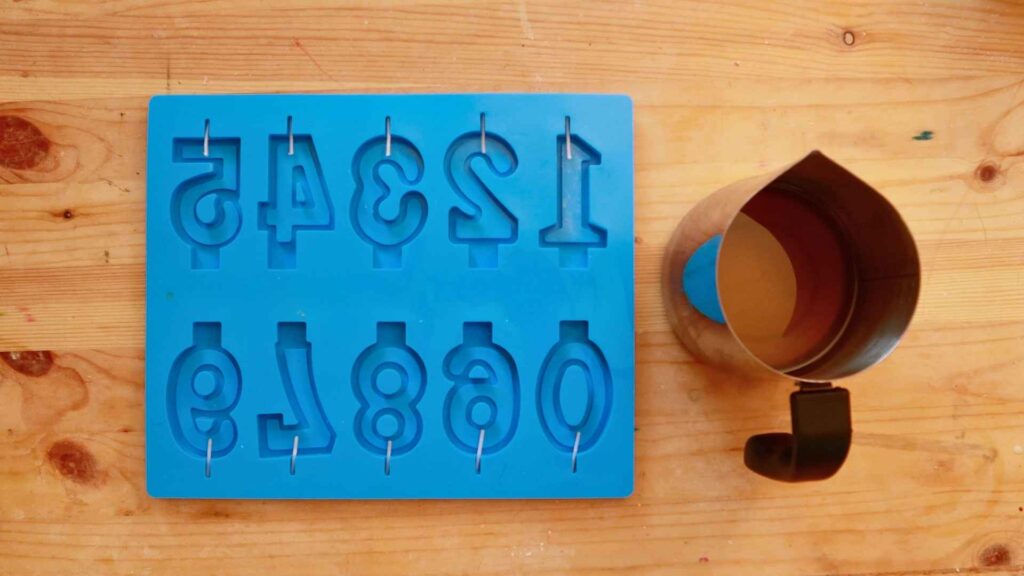
- Wax Melter or Double Boiler (pot + heat-safe pitcher or bowl)
- Thermometer (helpful but optional)
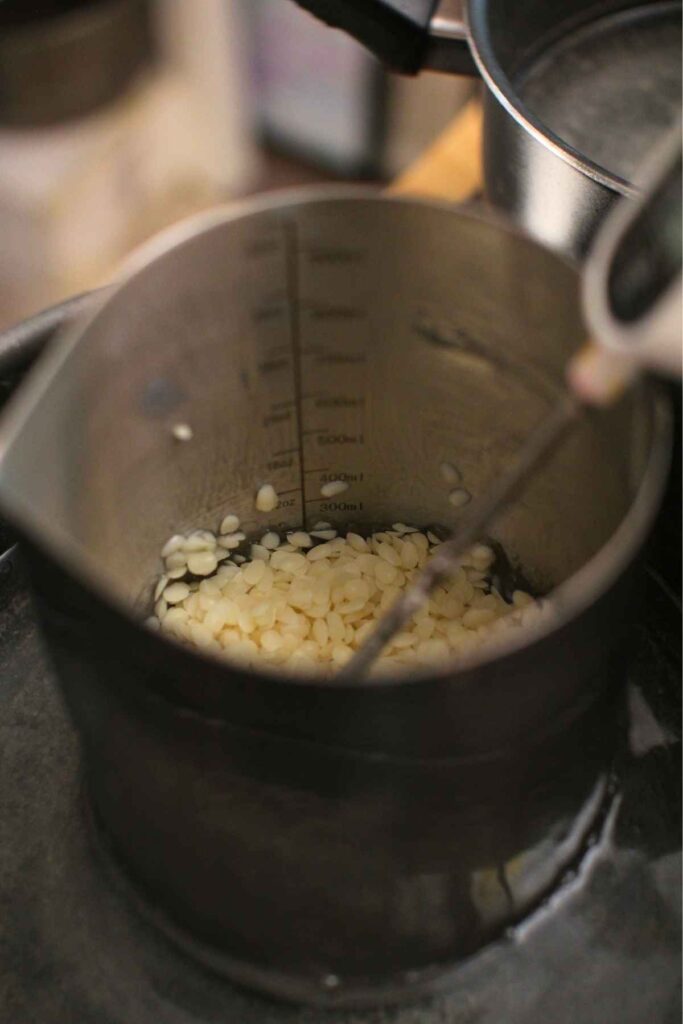
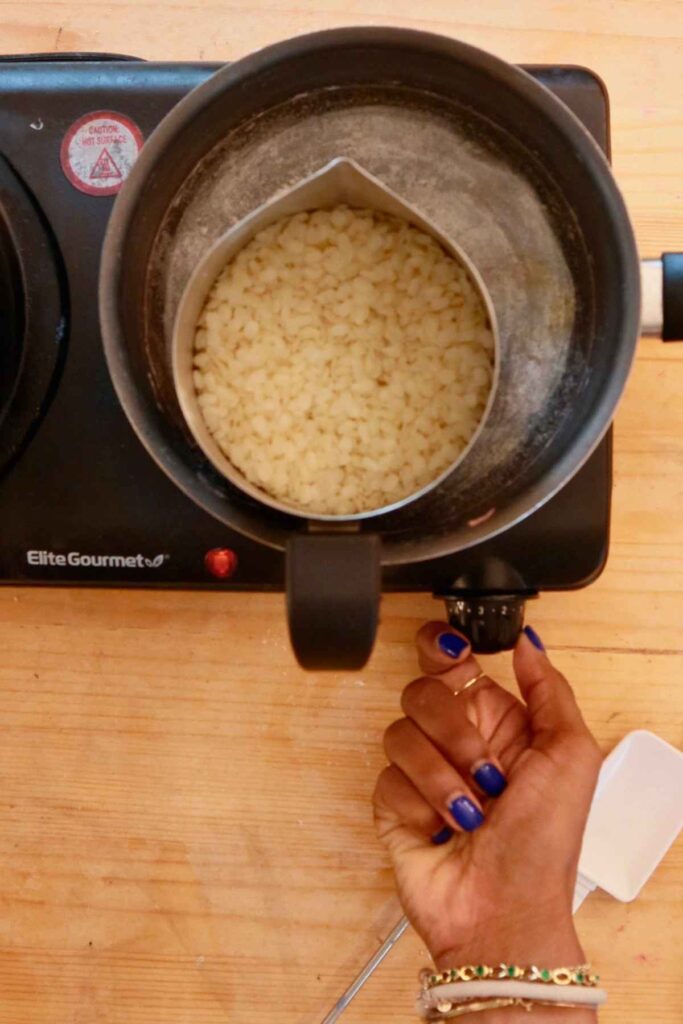
If you plan to make candles in your kitchen, you’ll need to set up a double boiler to melt the wax. It’s not hard. Just put a pot on the stove. Put a pitcher (or heat-safe container) inside the pot. The wax goes into the pitcher. A little bit of water goes into the pot. Turn the heat on and it will gently melt the wax (with indirect heat so that it doesn’t scorch).
You don’t have to use beeswax, but I recommend a harder wax type like paraffin, para-soy, or a pillar wax blend. Softer waxes like soy will not make a very stable birthday candle.
Optional:
- Candle dye
- Fragrance oil
I’m skipping fragrance oil because birthday candles don’t need to be scented (and beeswax already smells good). I didn’t use dye in this batch, but you can see some of the experiments I did with color if you keep reading.

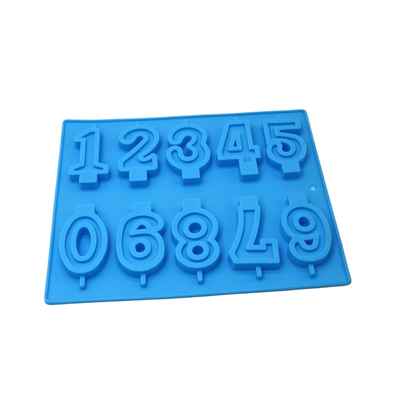


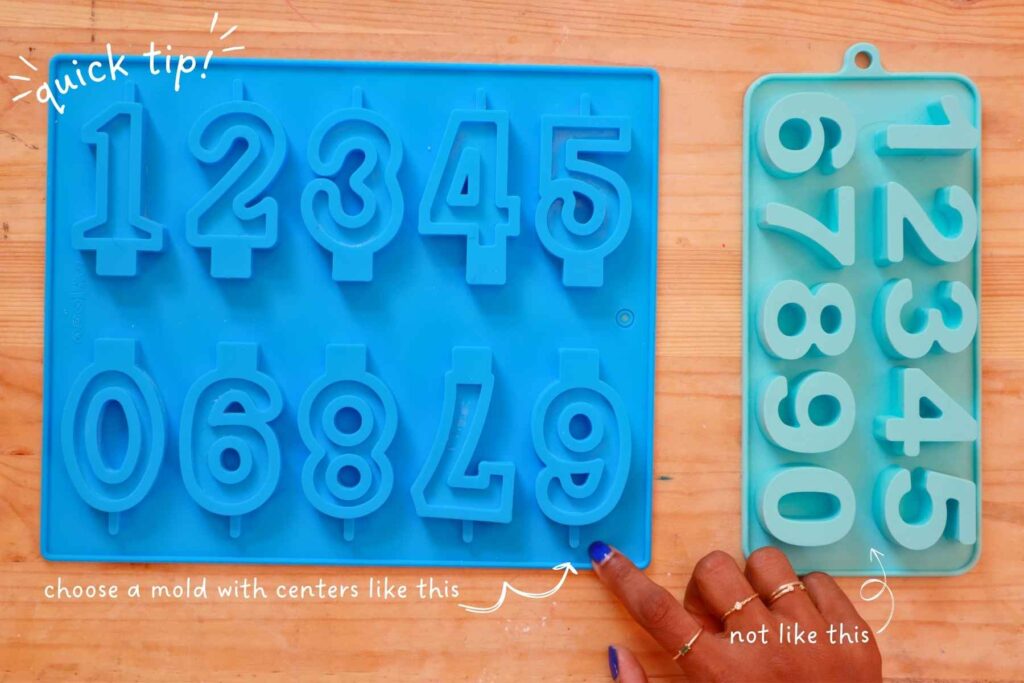
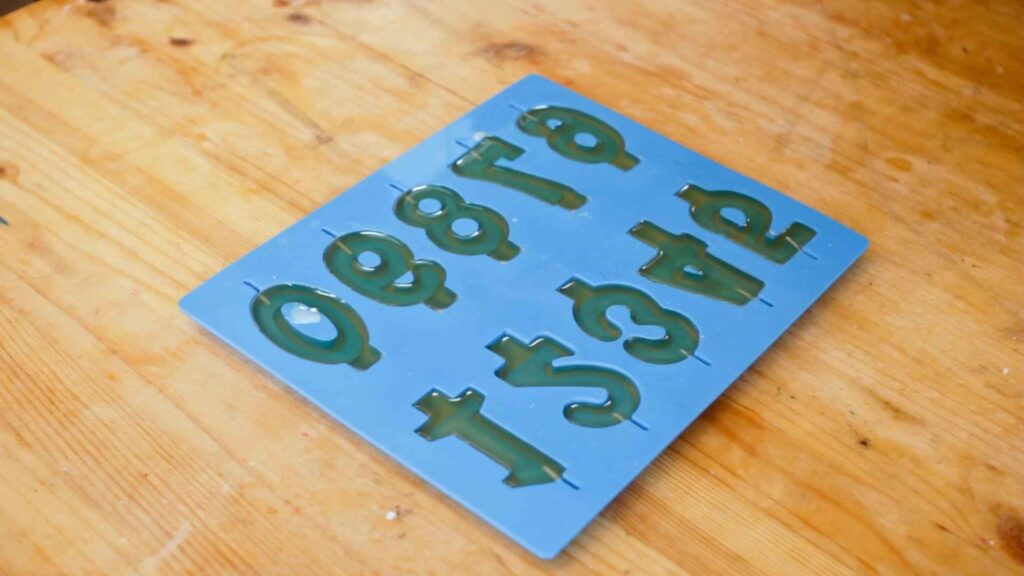
Choosing the Right Birthday Candle Mold
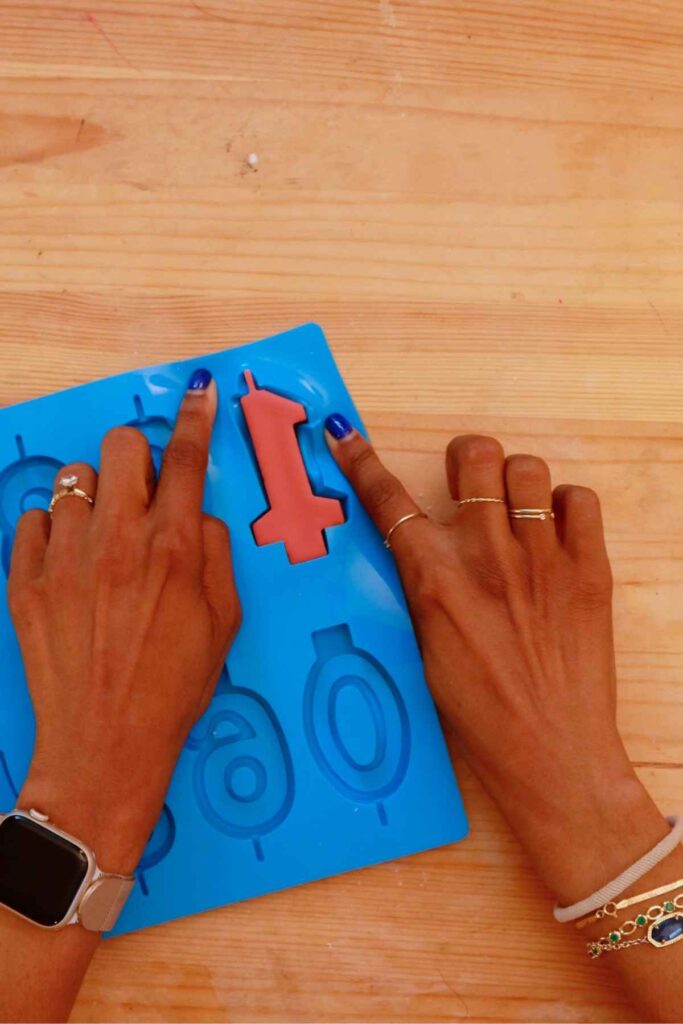
I used a silicone number mold. This is the one I used. It makes candles that are about 2.75 inches tall. It’s the perfect size. Avoid getting a silicone number mold that does not have the center section for the wick. It is way easier to wick each candle when the center is already marked.
Silicone versus Metal Birthday Candle Molds
I personally don’t recommend using a metal mold for this project. It’s much harder than working with a flexible silicone mold.
- Silicone molds – easiest for beginners, flexible, easy release
- Metal molds – more durable but mold release is harder and candles are more likely to get stuck
Tips
- Look for molds with a clear wick hole
- Avoid overly thin numbers (they can break easily)
- Choose slightly thicker numbers for sturdier candles
How to Wick a Birthday Candle Mold
If you use a quick melting method (e.g. the microwave, a wax melter pot, etc), wick the candle mold before you start melting the wax. You don’t want to have to rush to do this while the wax is waiting at the right pour temperature.
I’m using the double boiler method to melt the wax. That gives me plenty of time to wick the mold while I’m waiting (about 25 minutes) for the beeswax to melt.
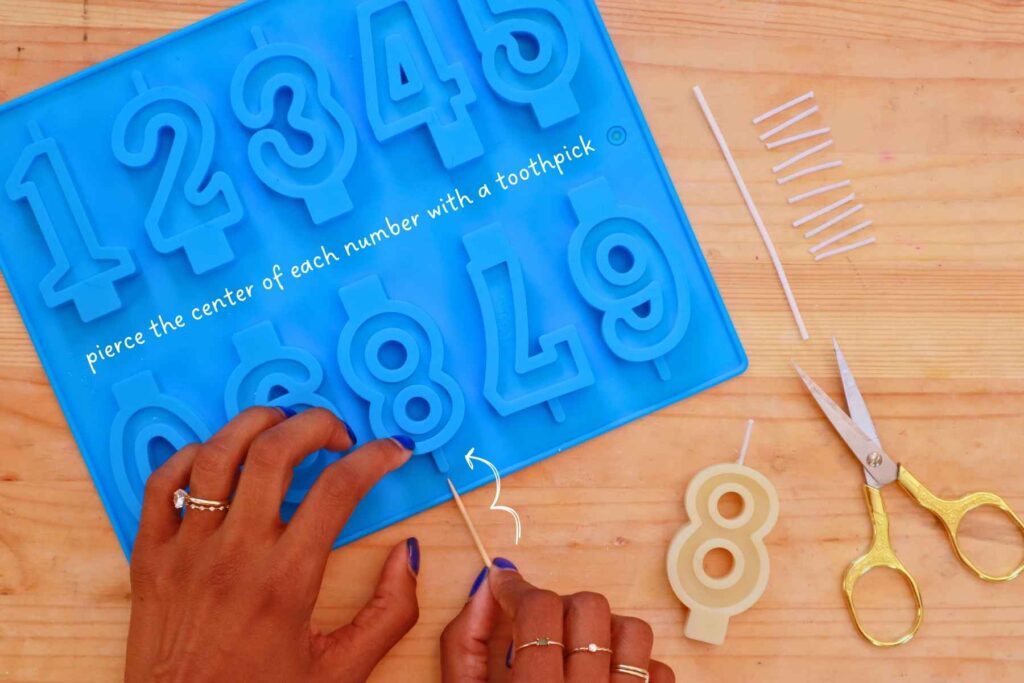
Steps:
- On your first time using the mold, pierce a hole in the center at the top of each number (using a toothpick or a needle).
- Push the wick through the hole. Trim if necessary. The wick doesn’t need to reach the bottom of the candle.
- Make sure the wick is centered. This ensures an even burn.
How Much Beeswax (and Other Ingredients) to Use
To make the whole tray of birthday candles, you’ll need 6 ounces of beeswax. I recommend using 6.5 ounces to account for spills. (If you’re only making one number, you will need about 0.6 ounces of beeswax. The numbers obviously vary in size, but 0.6 ounces gives you enough to fill the larger numbers).
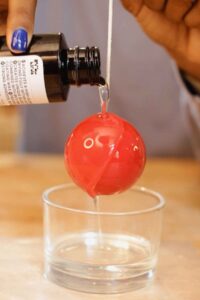
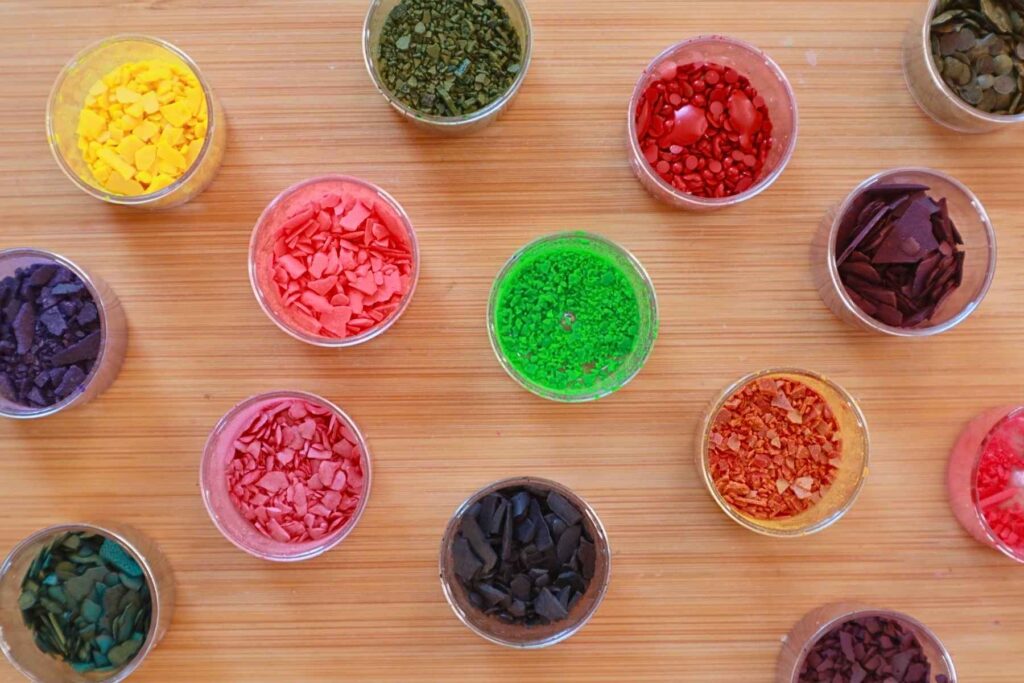
How to Add Color
Want colorful birthday candles? Here’s how:
- Use candle-specific dyes (blocks or liquid). Don’t use food coloring (it doesn’t mix properly).
- Dye blocks or dye chips will create softer tones. Liquid dyes tend to create more bold tones.
- Add dye after wax is fully melted (around 165°F/73°C).
- Start with a tiny amount and then test the color. Color builds quickly.
- Stir thoroughly for even color.
Other Ingredients
This batch will be 100% beeswax. I’m not adding any additives or fragrance oil because I don’t think it’s necessary, but if you want to do so, here are my recommendations:
- Fragrance Oil: I’d suggest 1-2 drops max for a 6 ounce batch of candles.
- Additives: If you plan to add dye, you might consider using stearic acid to improve the color. I’d suggest 0.6 ounces of stearic acid for a 6 ounce batch.
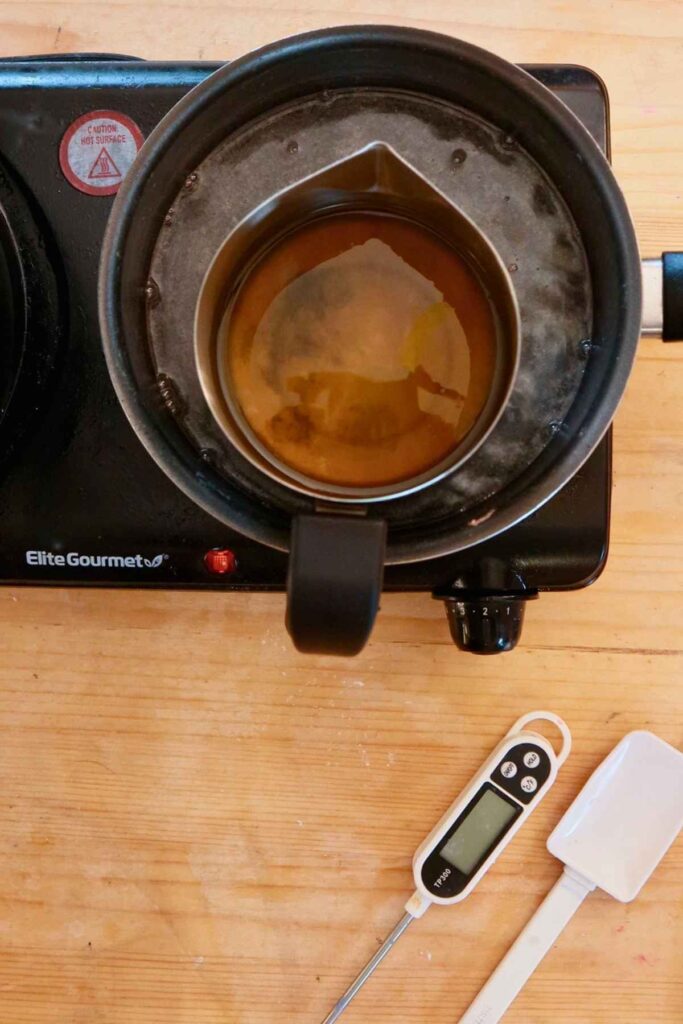
Best Temperature for Melting & Pouring Beeswax
There are 2 temperatures you need to pay attention to:
- Melt beeswax between ~155–165°F (68–73°C). Remove from the heat source.
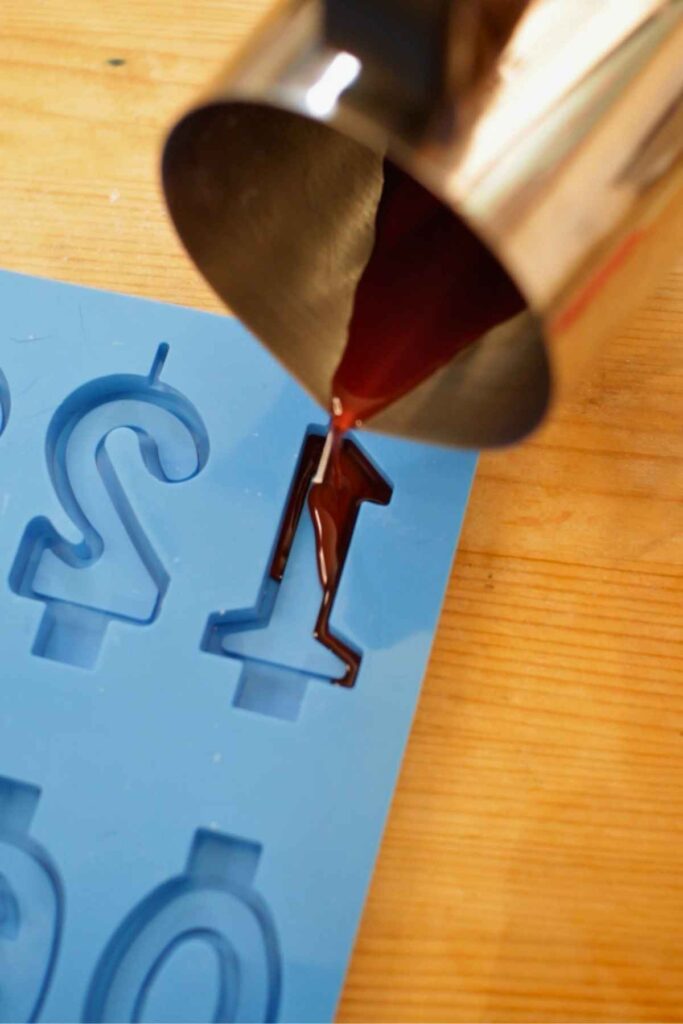
- Pour beeswax into the mold at around 155°F (68°C).
Avoid overheating. It can darken the wax and mess with the natural honey scent.
Step-by-Step: How to Make Beeswax Birthday Candles
Let’s get started!
1. Wick the mold
Thread and secure the wick in each number cavity.
2. Melt the beeswax
Use a wax melter or a double boiler to gently melt the wax. It should be fully melted around 165°F (73°C), plus or minus 5 degrees.
3. Add color (optional)
Mix in dye once the wax is fully melted.
4. Remove the wax from the heat source
Let it cool down to a good pouring temperature – around 155°F (68°C).
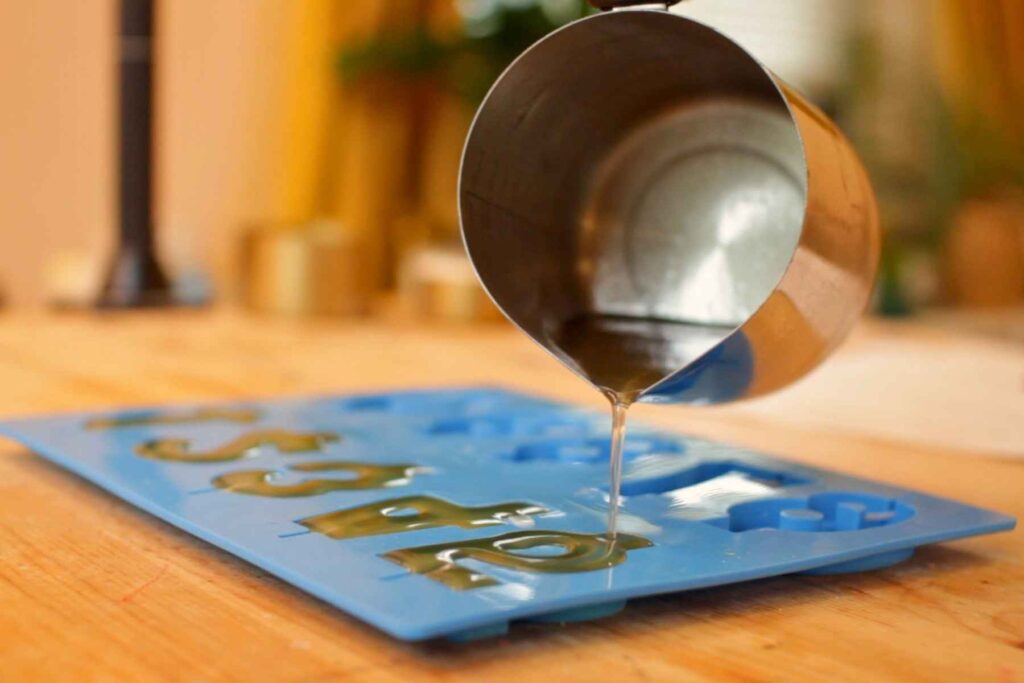
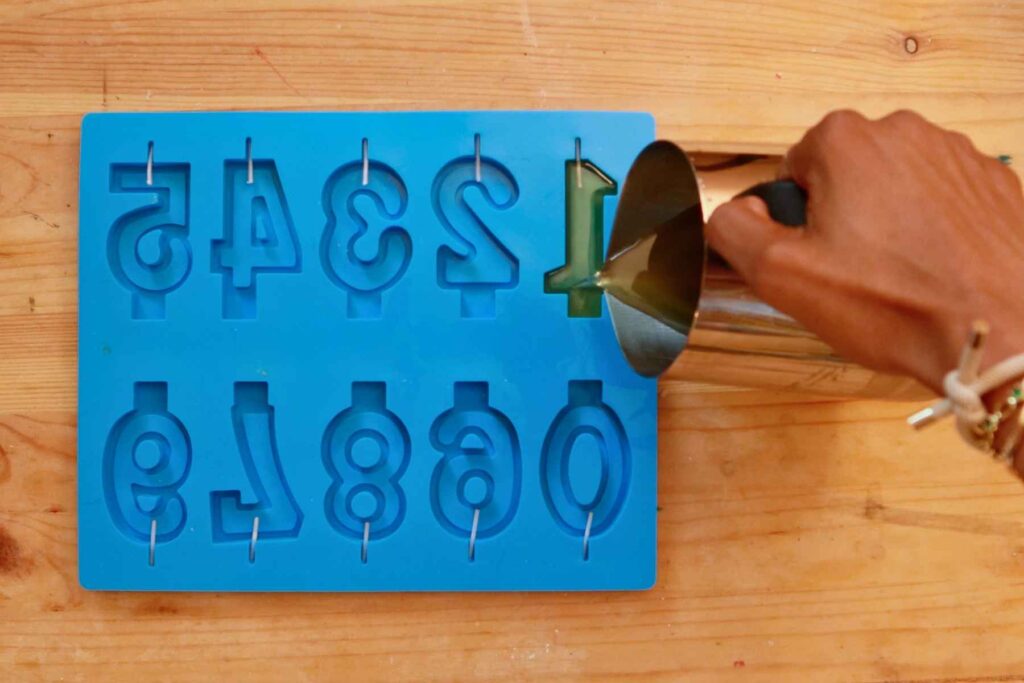
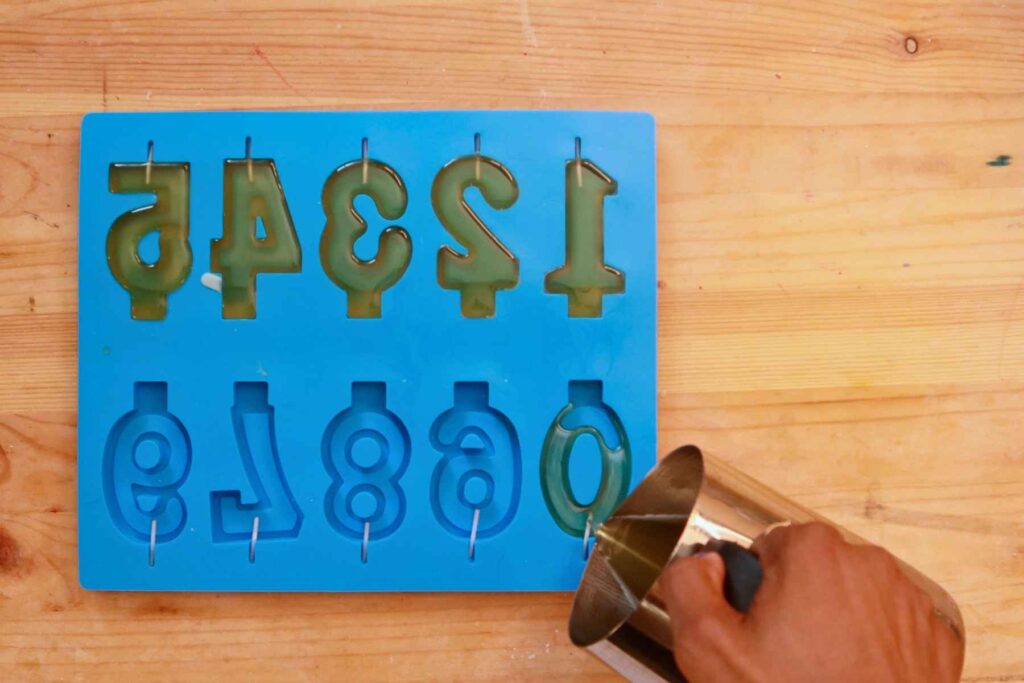
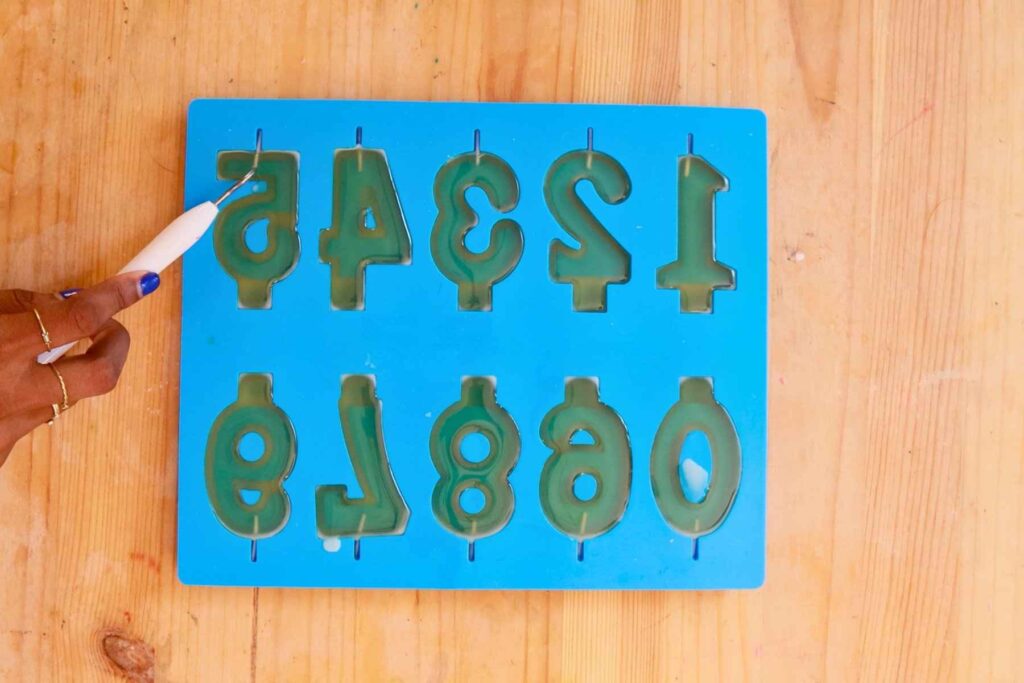
5. Pour the wax
Slowly pour into the mold until each number is filled. I like to slightly overfill each one because the wax will settle down slightly as it cures.
6. Let candles cool
Allow to cool completely at room temperature. Don’t rush this. Leave the candle alone for at least 4 hours. I recommend 6 total.
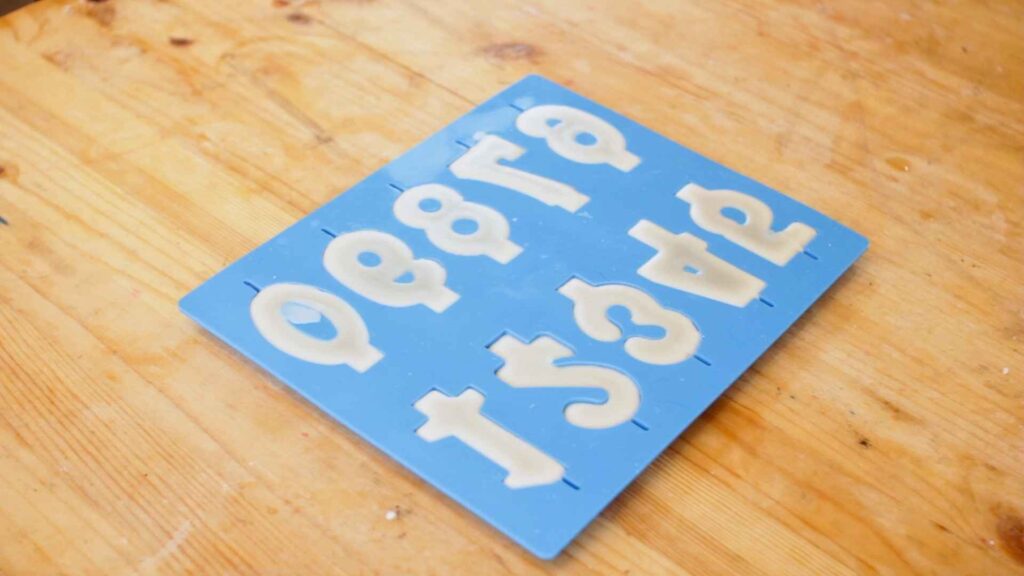
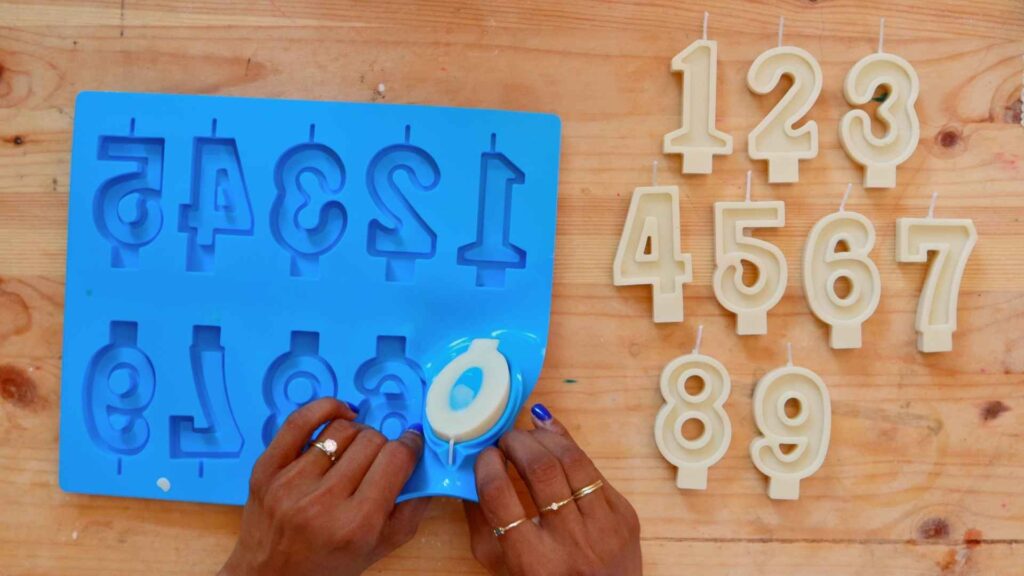
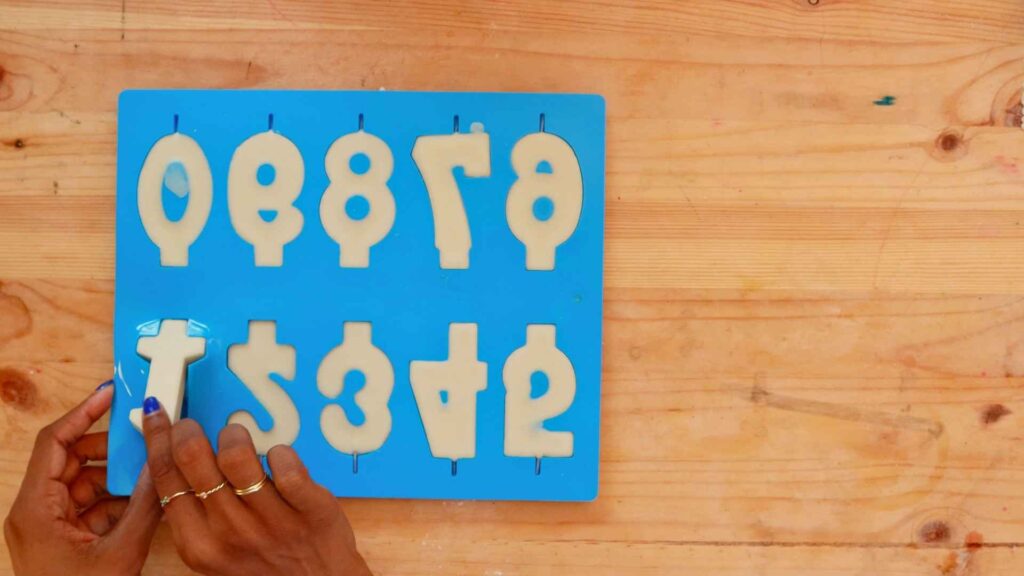
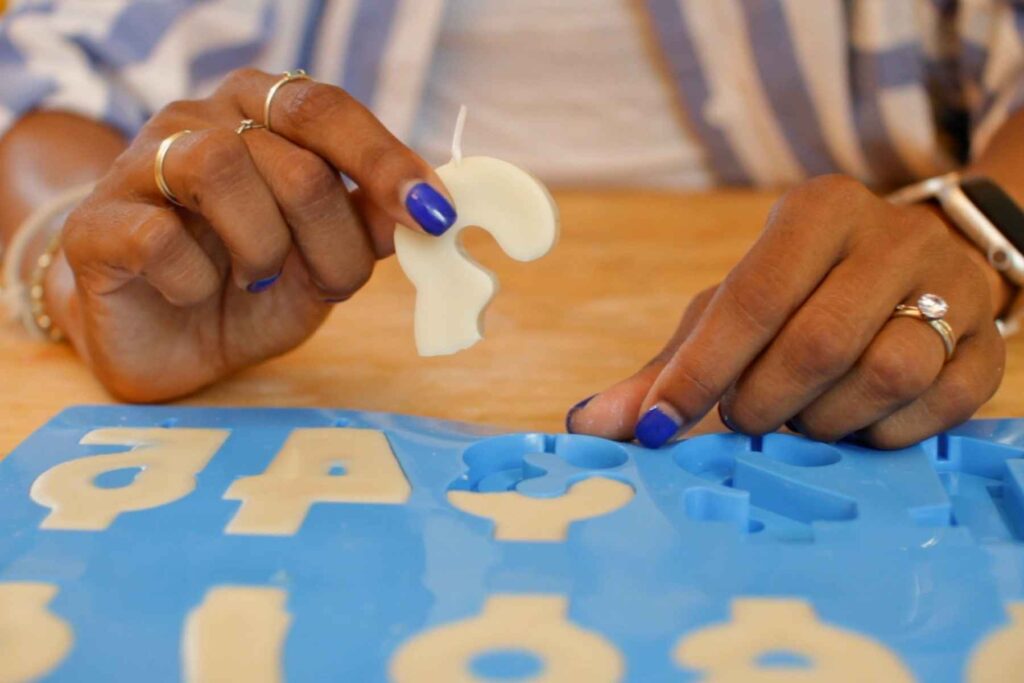
7. Remove from mold
Gently flex the silicone mold to release each candle. Don’t be too rough! The candles can snap if you’re not careful.
8. Trim the wick
Cut to about ¼ inch above the candle.
Common Mistakes & How To Fix Them
Here’s how to fix common issues:
Broken Candles
Candles can snap during the de-molding process. The 3 and the 8 were the numbers that I had the most trouble with. If your candles are consistently snapping:
- Wait longer to de-mold. That gives the wax more time to cure and harden.
- Use an additive like stearic acid to harden the wax.
- Be gentle during the de-molding process!
Cracking
If you see cracks in the surface of the beeswax, it likely happened because you poured too hot. I doubt that this will happen to you with this project because it tends to occur in larger diameter candles, but if it does, try pouring at a slightly cooler temperature next time.
Candle stuck in mold
The candle might get stuck if you’re using a hard mold (metal or acrylic). If this happens:
- Pop the mold in the fridge for a few hours. Cold makes the wax contract slightly which should help you shake the candle free.
- Next time, spray mold release spray (or any cooking oil spray) on the inside of the mold before you pour.
- Or… use a silicone mold for easier release.
Off-center wick
Don’t just pour and walk away. Take a few seconds to look at the wicks. A few of my wicks drifted slightly after the pour, so I used a thin metal tool to quickly push them back to the center before the wax hardened.
Frequently Asked Questions
How long did it take to make a full set of birthday number candles?
Total time: about 50 minutes of working + 6 hours of waiting
- 10 minutes to wick the candle mold
- 25 minutes to melt the beeswax
- 5 minutes to pour the beeswax
- 6 hour wait for the candles to harden
- 10 minutes to de-mold the candles & trim the wicks
You can save time by wicking the birthday candle mold while your wax is melting.
Do you have to wait 6 hours for the birthday candles to harden before you de-mold them?
I tested this out by de-molding a set at 2 hours, at 4 hours, and at 6 hours. At 2 hours, several of the candles snapped. At 4 hours, I got most of them out but had 2 snap. At 6 hours, I was able to easily de-mold all 10 with no broken candles. That’s why I recommend waiting.
Note that this answer only applies to beeswax. If you are using a softer wax/wax blend, you should wait even longer. If you are using a similarly hard wax like paraffin, this timing will probably work for you.
Why use beeswax for birthday candles?
They burn mores slowly and evenly compared to soy wax so I personally prefer it because I hate when wax drips onto the cake. Beeswax is also a natural byproduct of honey production so I feel more comfortable if it does end up getting on the cake. 🐝
What’s the difference between yellow beeswax and white beeswax?
The short answer is that yellow beeswax is the natural form so it has that honey color and scent. White beeswax has been processed to remove the yellow color. Unfortunately it also loses the honey scent.
I normally prefer yellow, but today I used white beeswax because I want to dip dye a few of them.
Can I re-use the candle mold?
Yes! My one tip is that you should store it so that it lays flat. Don’t fold it up in a drawer somewhere because the silicone cavities can get misshapen.
Do beeswax candles drip?
Yes, but not as much as other wax types.