I never thought I’d be the kind of person who glosses candles. Candle making already involves so many steps (and so much time)! Waiting another 24 hours for varnish to dry was not something I wanted to do until pictures of glossy candles took over my Pinterest feed. I became obsessed and so even though I don’t usually have the time or patience for extra steps, I finally tried candle gloss and I’m here to share all of the tips, tricks, and things you need to know.
How It Works
The concept is simple. Take a finished candle and apply a varnish that dries down to a shiny finish.
You can:
- Brush it on
- Dip the candle directly
- Or pour it over the surface
I tried multiple methods. Not all of them went smoothly. More on that, later.
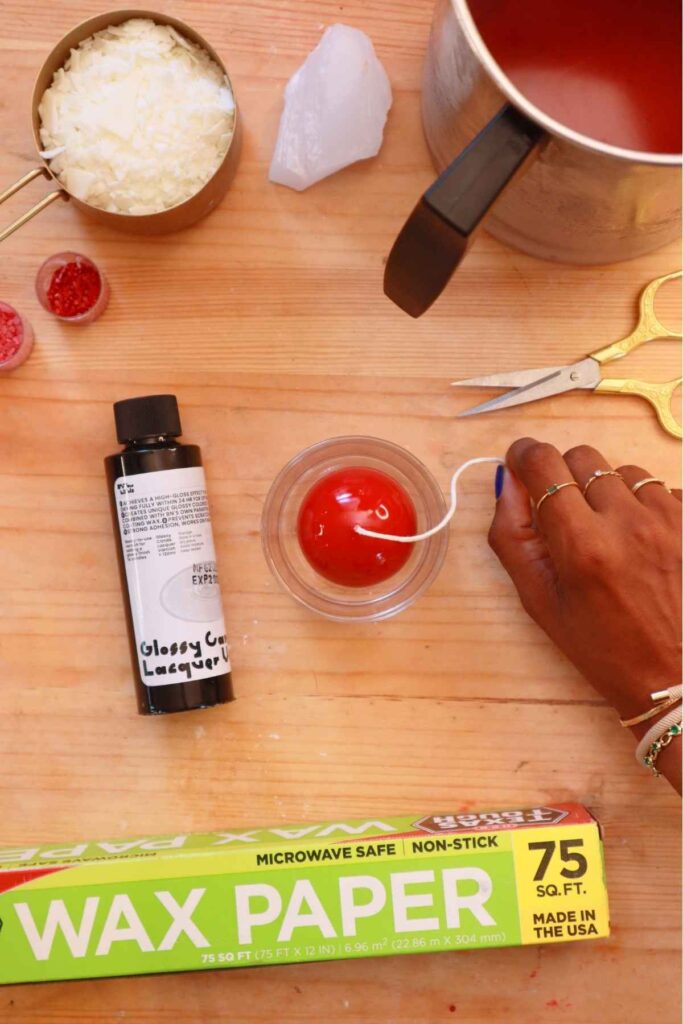
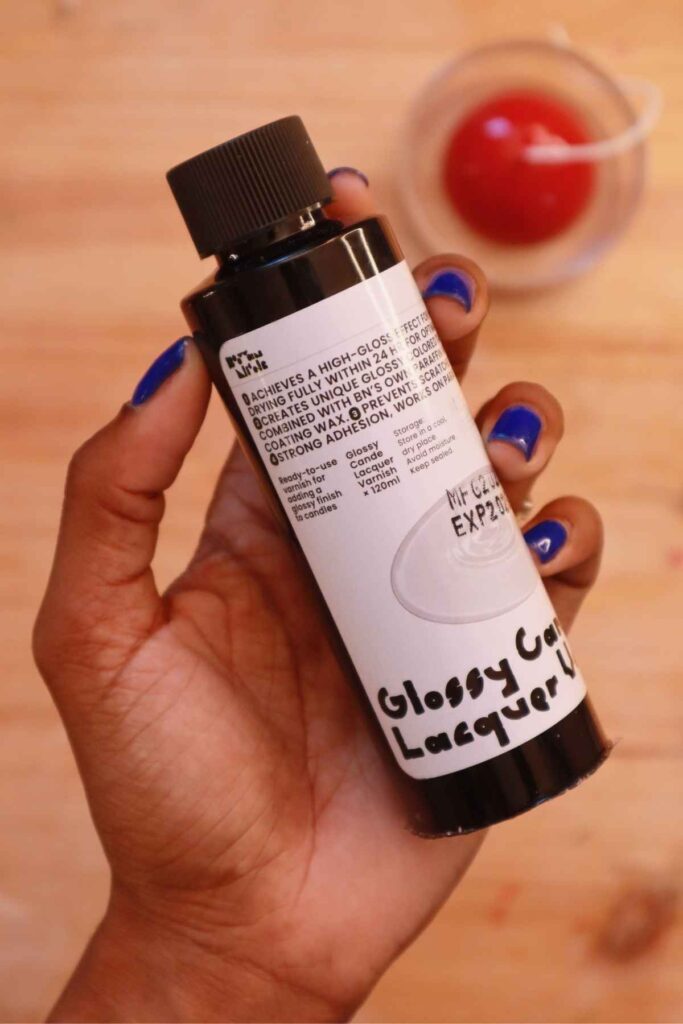
Multiple brands make their own version of a candle gloss. If you search for “candle gloss” or “candle varnish”, you’ll find plenty of options. I tested the Boowan Nicole Glossy Candle Lacquer Varnish because I’ve used and liked their products before. This post is not sponsored.
My Candle Gloss Experiment
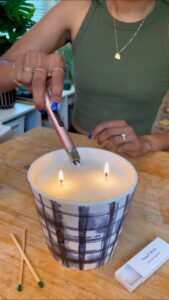
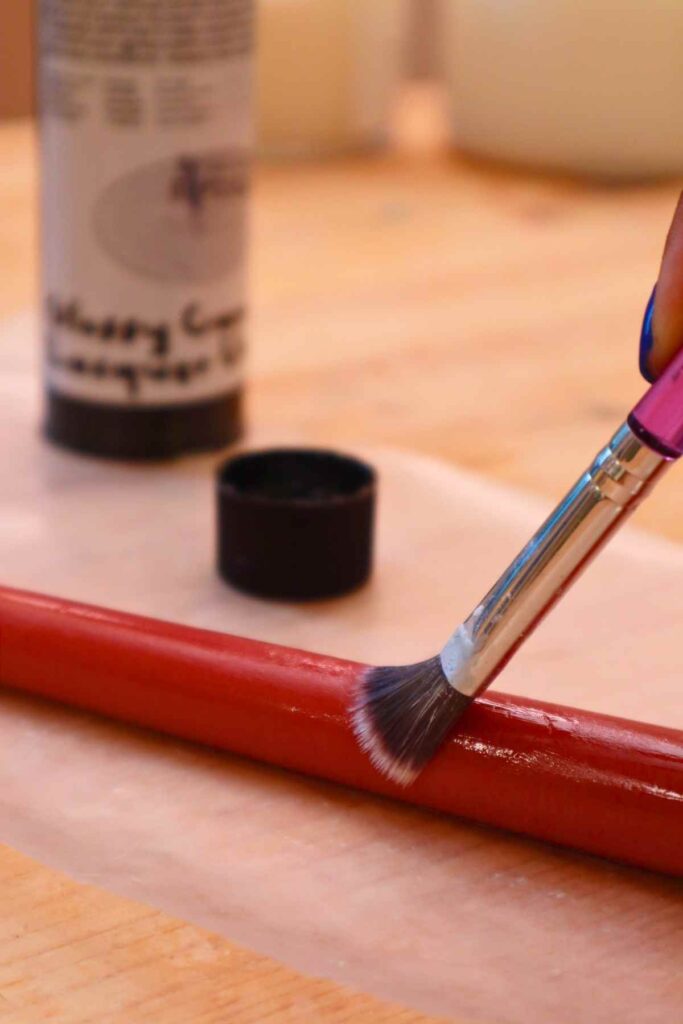
Test 1: Brushing (my first mistake)
I thought that dipping would be too messy so I started by brushing the varnish onto a taper candle. That was not ideal.
The varnish dries quickly and is almost invisible while wet, so I couldn’t tell where I had already applied it. I did what I thought was one coat, waited 5 hours, and came back to a patchy result. The instructions say that you can do multiple coats, but that felt tedious and inconsistent.
I tried a second coat just to see what the result would be. While slightly better, it was still mostly patchy and not as glossy as I had hoped.

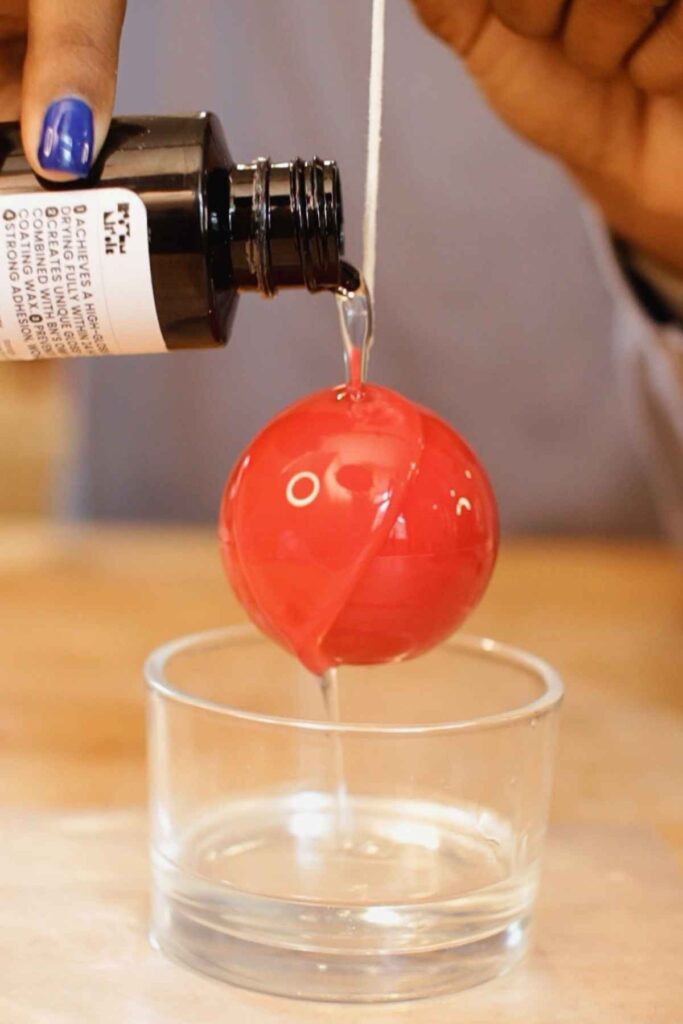
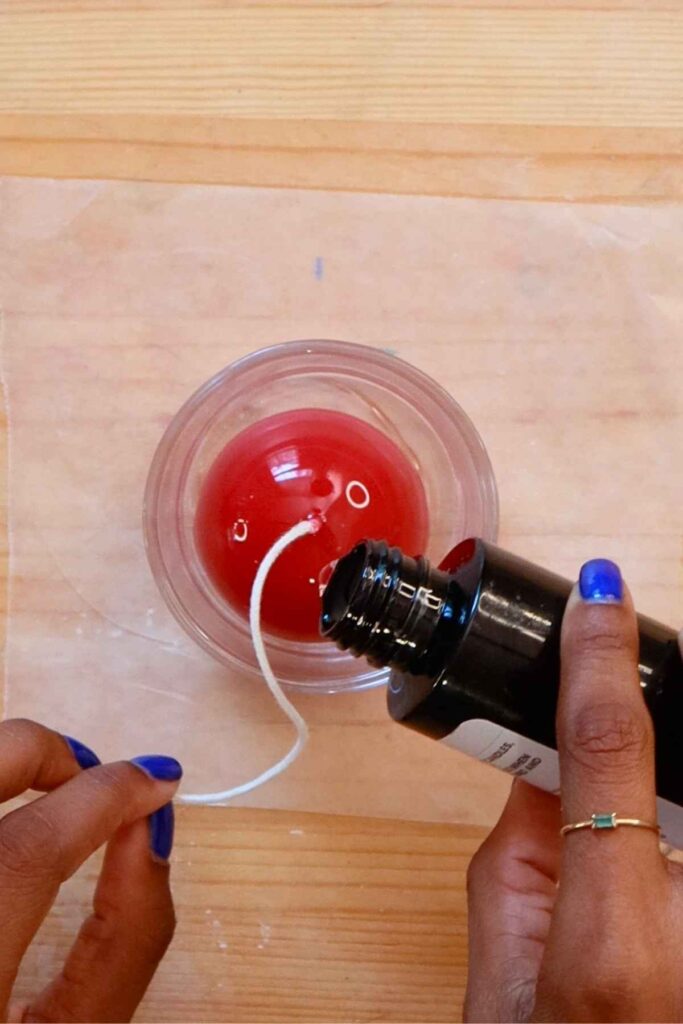
Test 2: Pouring Over a Candle (much better!)
The height of the taper candle prevented me from dipping. I also didn’t know whether I had enough gloss to fully submerge any of my candles so I pivoted to something easier. I used a smaller candle and decided to pour the gloss over it. Here’s what worked:
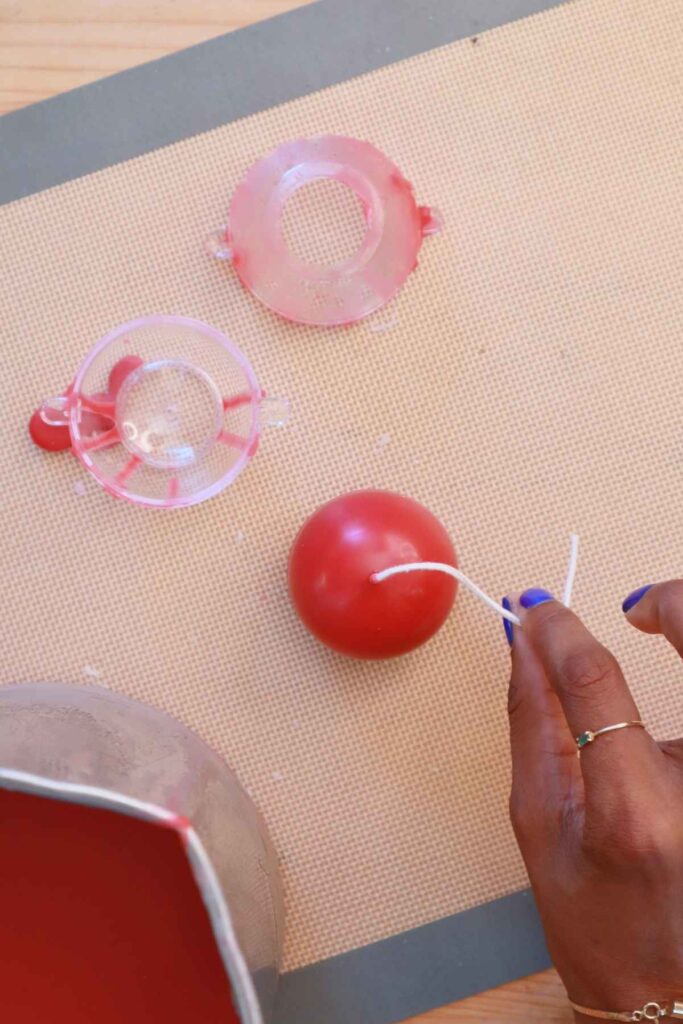
- Made a small candle using a spherical candle mold.
- Let the candle fully set (for 12 hours) before de-molding.
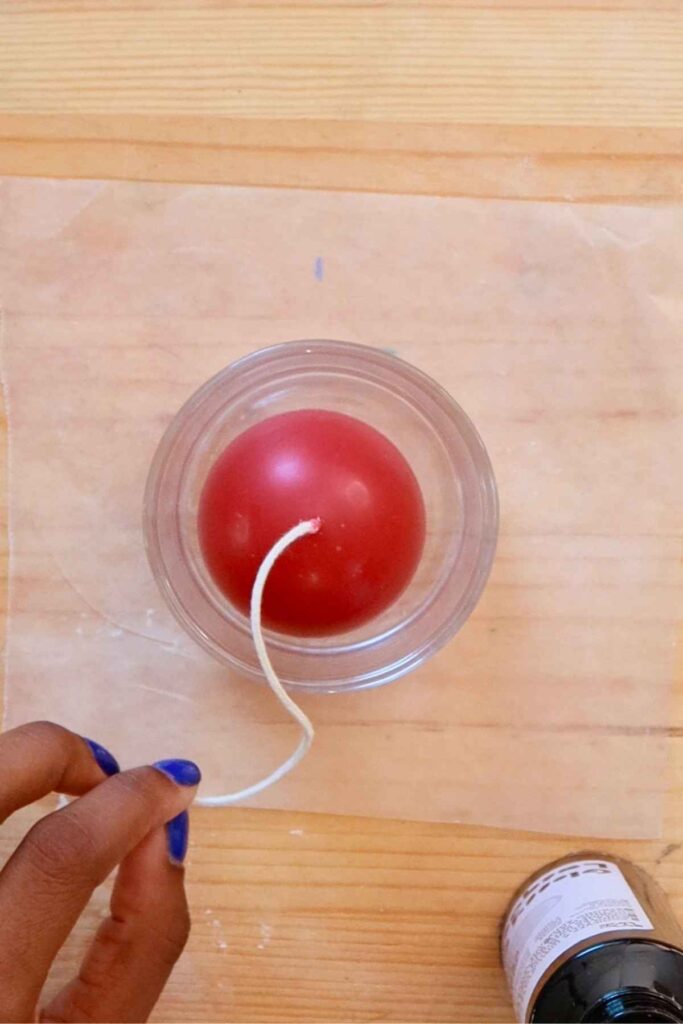
- Placed the candle into a glass container.
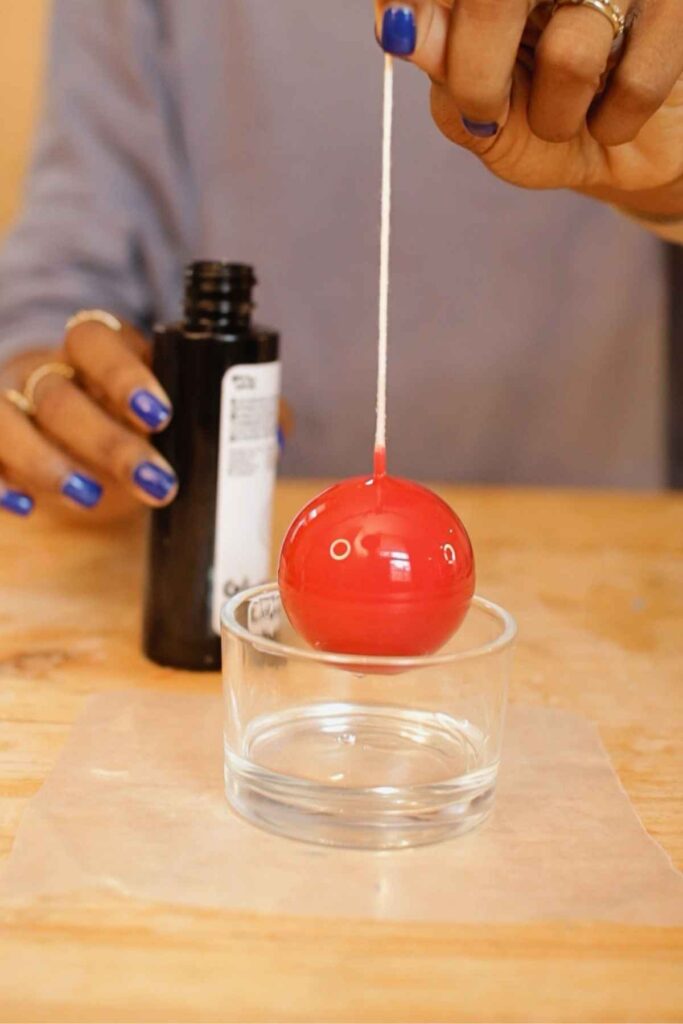
- Held the candle by the wick (which is why I kept the wick long) and slowly poured the varnish over it.
- Continued to pour while lifting and rotating the candle to make sure that it was fully coated.
- Let the excess varnish drip off completely.
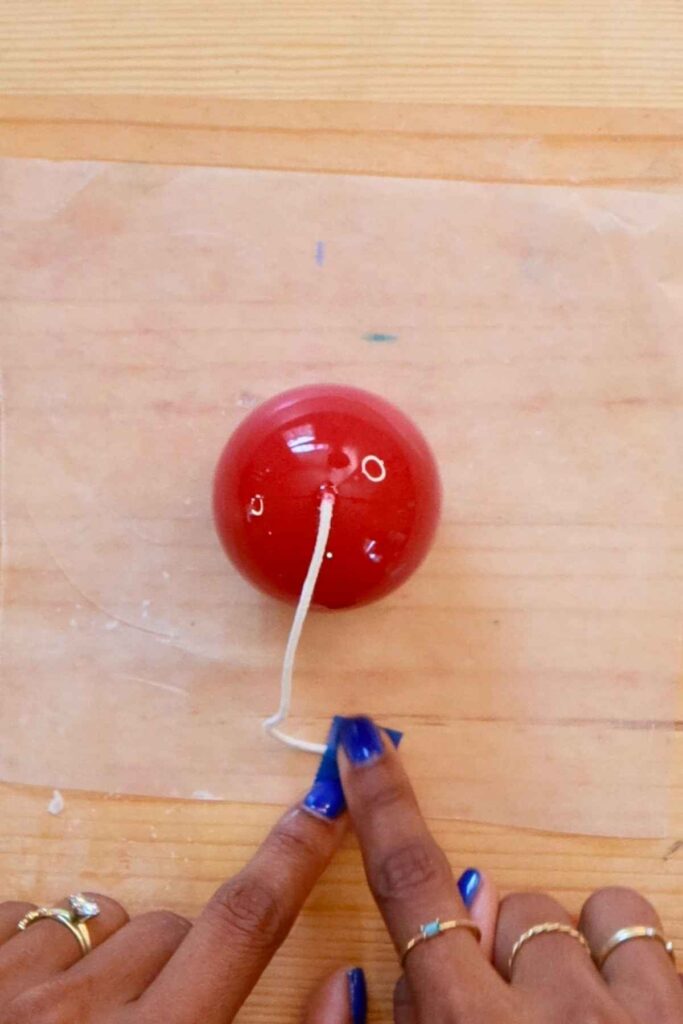
- Set it on wax paper to dry.
- Left it alone for 24 hours.
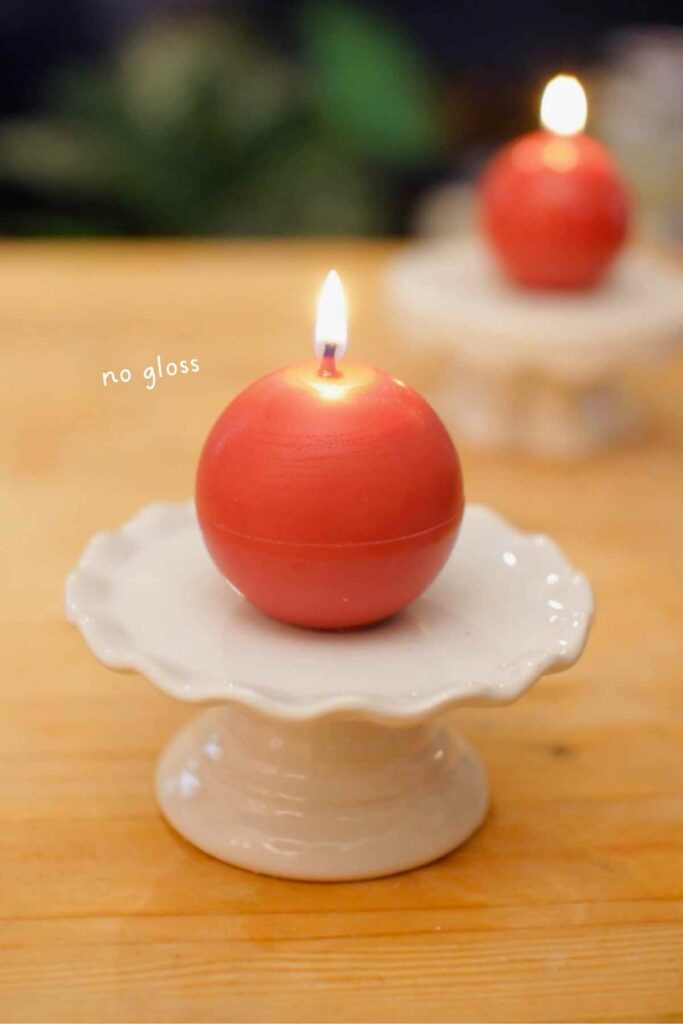
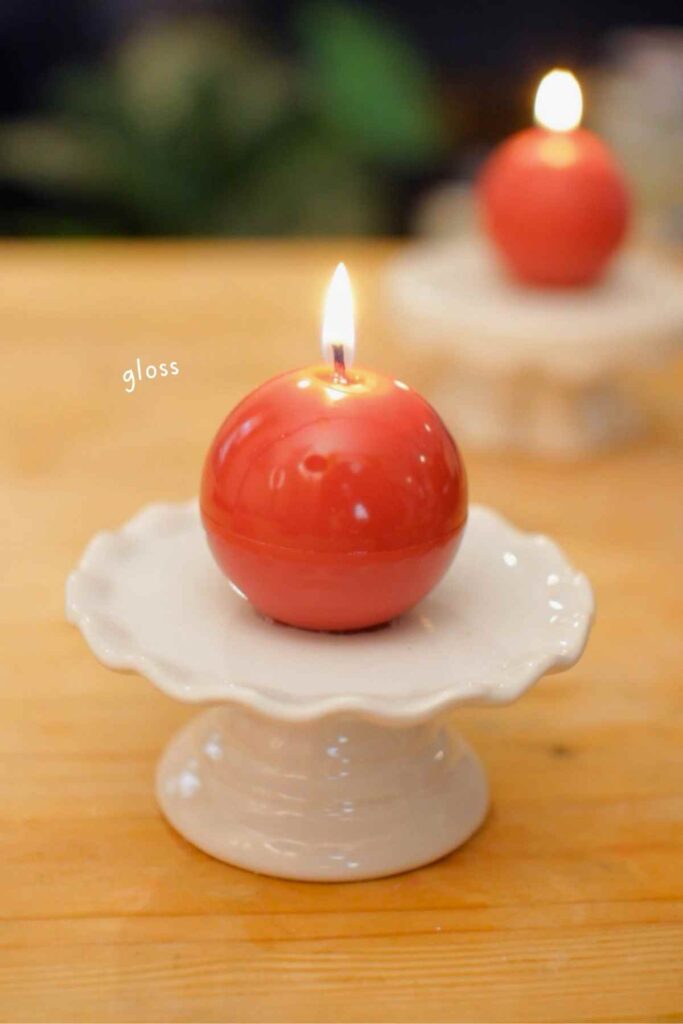
I came back to a super glossy candle. This method worked much better than brushing.

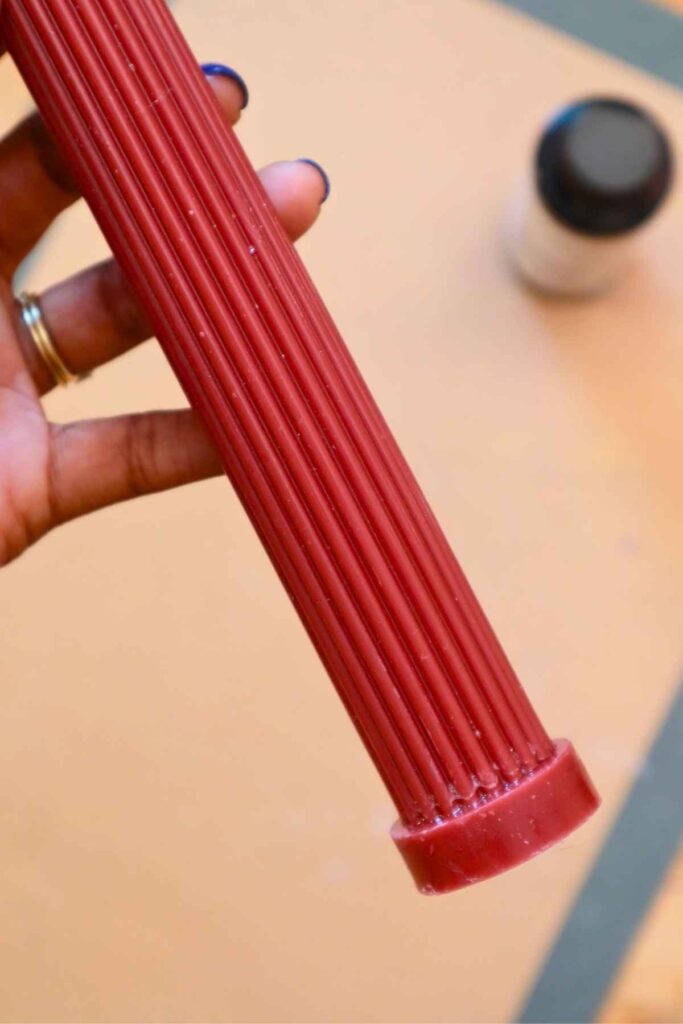
Test 3: Glossing a Textured Candle (mixed results)
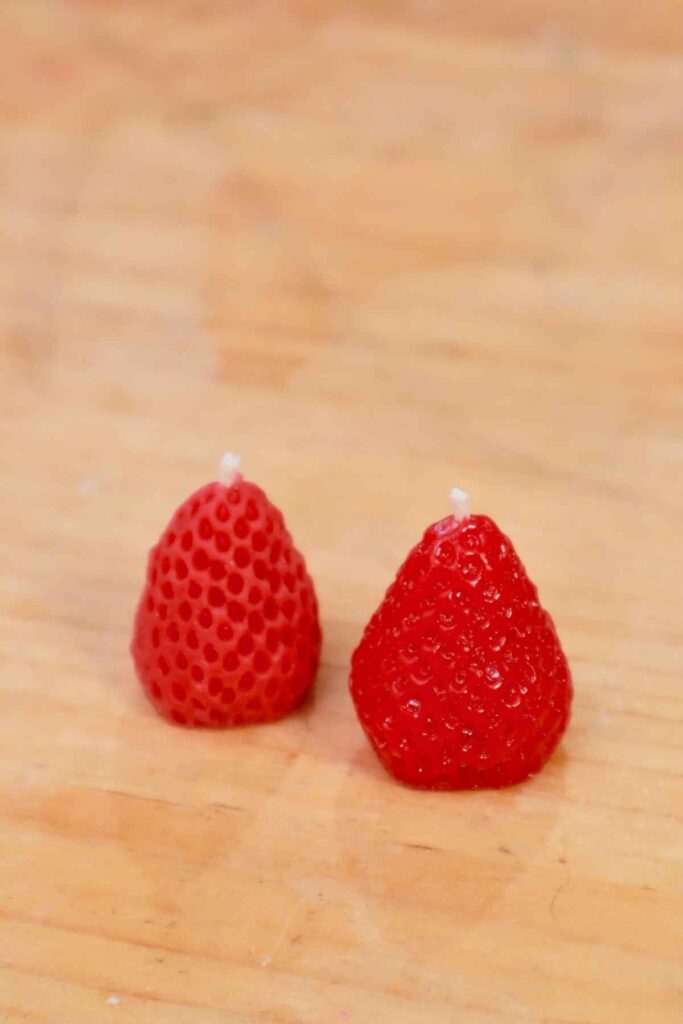
I wanted to see what gloss would do to a candle with more texture so I dipped some of the strawberry candles I made back in January. Dipping was easy because the candles are so small. The gloss turned a matte strawberry into a much juicier one. I love it. Now I want to try this with a bunch of my other food candles.
I also added gloss to a ribbed taper candle and unfortunately, a lot of it gathered in the grooves at the bottom of the candle. I painted the gloss on rather than pouring or dipping and I think that probably has a lot to do with the result. Overall, I still think that the gloss works better on candles that have a mostly smooth surface area (like the sphere), but if you want to use a textured candle just watch out for areas where the gloss might be pooling or drying unevenly.
Tips, Tricks & Things to Know
Based on my tests, here’s a few things I learned:
- You won’t see the full impact of the gloss immediately. It develops as it dries.
- Work in good lighting to avoid missing any spots.
- The shape of the candle will determine the best method to use.
- Dipping and Pouring > Brushing (in my experience)
- If you dip, factor in the size of your candle. You’ll need a pretty tall container to dip a taper.
- If you pour, use a catch container so you can reuse the varnish.
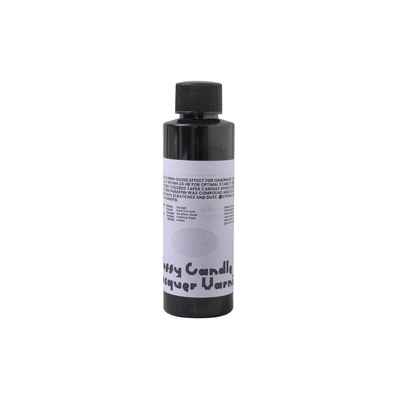
My Boowan Nicole Glossy Candle Lacquer Varnish Review
I went with the Boowan Nicole Glossy Candle Lacquer Varnish because I’ve purchased several BN candle molds and I love them. They’re on the pricier side, but the quality is wonderful. This post is not sponsored. A few of the links are affiliate links, but all products were purchased by me and all thoughts are my own.
Performance – Did It Work?
Yes. It was easy to use and I’m surprised at how glossy the candle becomes even after just one coat (with the pouring or dipping methods).
I can’t stop staring at the before & after’s of the matte candle versus the glossy one. It was actually very hard to photograph because of how reflective the surface of the candle became. It is so beautiful that I don’t think I actually want to burn this candle.
As I said before, I wouldn’t recommend gloss for some textured candles but for smooth candles, it absolutely works.
Price – Is It Worth It?
If you’re making everyday candles, probably not. But for gifts, decorative pieces, or “statement” candles, it’s absolutely worth it. A little goes a long way, especially if you use a container to catch and reuse the excess.
A 4 ounce bottle of the Boowan Nicole candle gloss is currently $9.99. Using the pour over method, I’ve made about a dozen glossy candles and I still have at least half of the bottle left.
Smell – Just a Heads Up!
There is a noticeable chemical smell during application. It’s not overwhelming, but you’ll definitely want to work in a room with good ventilation. The smell fades after the varnish dries, but it’s something to keep in mind.
FAQ
Does glossy candle lacquer change the candle color?
No, it doesn’t change the color. It just adds shine. It’s just like putting on a clear coat of nail polish.
How long does glossy candle lacquer take to dry? Do I really have to wait 24 hours?
I touched the surface of one of the candles about 14-15 hours into the drying process and left a smudge so I would recommend just waiting the full 24 hours to let it dry. I’m not a very patient person so this is my least favorite aspect of the glossing process, but it is necessary.
Can you use glossy candle lacquer on any candle?
Yes, you can use a candle made out of any wax type. The red ball candle featured in this post was a para-soy blend, but the strawberry candles were beeswax. Any finished candle is suitable for candle gloss.
Do you have to do a second coat a few hours later?
If you’re brushing it on, yes. If you’re dipping or pouring, no. If you’re a lazy candle maker like me, one coat is plenty!
Will you use this again?
Absolutely. Just not on every candle.