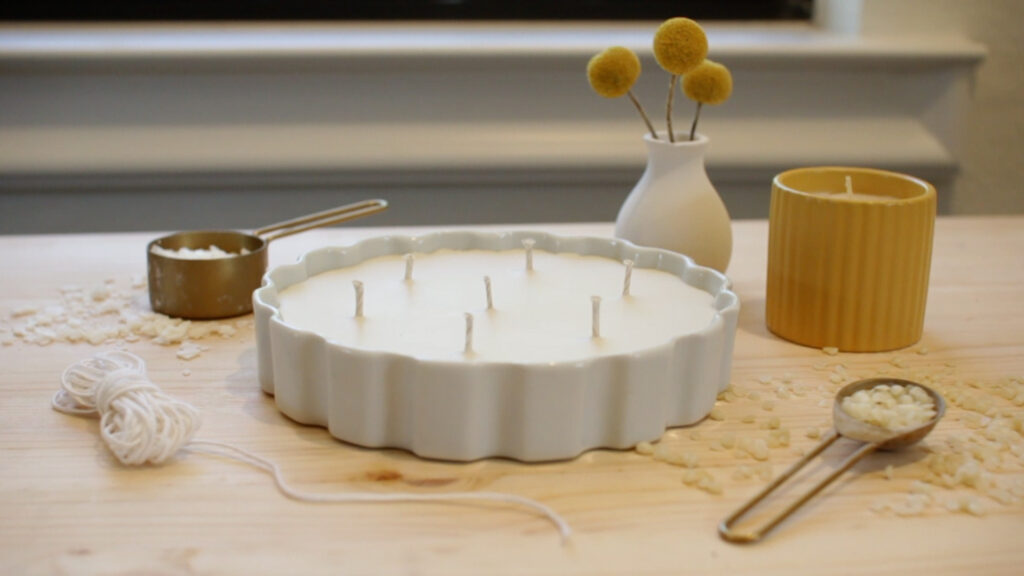
I found a large tart pan at a resale shop and decided that it would make the perfect candle container. It’s a very wide container so it required multiple wicks. I filmed the entire process of making the candle and I also put together this guide to using multiple wicks. I’m going cover when to use multiple wicks in a candle, determining how many wicks to use, and figuring out where to place those wicks.
If you’re a visual learner, you may want to skip to the YouTube video below where I demonstrate an easy way to place wicks in a large candle WITHOUT measuring.
When to Use Multiple Wicks in Candles
Small candles can typically burn just fine with one wick but for large candles, you’ll either need to use a large wick or multiple wicks. A larger wick will generate more heat so it’ll burn a wider surface area, but there are limitations to how much one wick can burn. That is why some candles require multiple wicks.
The easy way to figure out whether you’ll need multiple wicks is to measure your candle container. If the diameter of your container is less than about 3.5 inches, you can probably get away with using one wick. If the diameter of your container is larger than 3.5 inches, I’d recommend using multiple wicks.
The goal when wicking a candle is to make sure that all of the wax burns. The melt pool needs to cover the entire surface of the candle. A melt pool is just the circle of melted wax around the wick. If it doesn’t reach the edge, you’ll have a ring of leftover wax when you’re done burning. This is such a waste of wax! If you’ve ever burned a candle that ends up tunneling, the issue may be that it is under-wicked. To avoid this, read the tips in the next section.
Determining How Many Wicks to Use in a Candle
Here’s how to determine how many wicks to use:
- Measure your candle container to find out the diameter.
- Pick the wick type (e.g. cotton, hemp, or wood) that is best for the wax type you’re using and examine the available sizes. A good candle supplier will tell you what size candle container each wick size corresponds to. Here’s an example of a wick size guide for a line of wicks that is great for soy candles:
- Now all you need to do is match the measurements provided by the candle supplier with the diameter of your candle container.
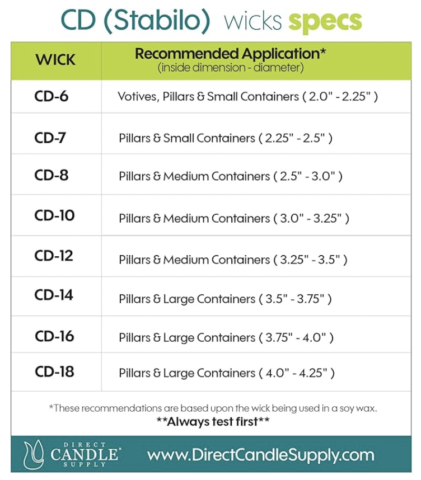
If you’re making a small candle, you can use one wick. FOR EXAMPLE: If I’m making a candle that is 2 inches in diameter, I would use one of the CD-6 wicks since it works best for 2-2.25 inch containers.
If you’re making a large candle, you’ll have to size up or add up the individual measurements of multiple wicks to cover the full diameter of your candle. FOR EXAMPLE: If I’m making a 4 inch diameter container, I would either try one CD-18 wick OR I would double wick the candle with two CD-6 or CD-7 wicks.
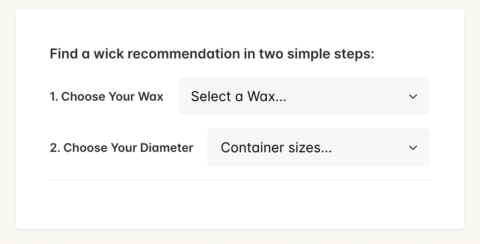
PRO TIP: CandleScience has a super useful wick recommendation engine. All you have to do is enter (1) the type of wax you’re using and (2) the diameter of your candle and it will recommend which type of wick and which size of wick you should use. Their wick guide will even tell you whether to double or triple wick based on the size of the container you want to use.
You will also have to do some testing to make sure that you’ve picked the correct number of wicks. Wicks can perform differently based on what the wick is made of, what type of wax you put the wick in, and what type of container you use. That’s why a good candlemaker performs a lot of burn tests before gifting or selling candles. Place the number of wicks you think you’ll need and then after the candle is done curing, do a test burn. If the melt pool never reaches the edge of the container, the candle is under-wicked. You should either upgrade the size or the number of wicks. If the flames are large or the candle container is way too hot to the touch, the candle is over-wicked. You should downgrade the size or number of wicks.
It is so important not to over-wick (fire hazard!) or under-wick (tunneling issues and wasted wax). The only way to know for sure is to test. I know that is a frustrating thing to hear for candle makers who want to quickly gift or sell their creations, but you should never skip testing. Candle safety is crucial. You don’t want to be the reason for someone else’s house fire.
Where to Place Wicks in a Multi-Wick Candle
The easiest way to place wicks is to use a wick centering tool. It looks like a wheel with measurements on each spoke to help you place the wicks the same distance away from the center:

With this set, the larger tool works with containers up to 8.66 inches in diameter and the smaller tool is for candles up to 5.91 inches in diameter. After you’ve done the math to determine how many wicks you need, just place this tool over the top of your candle and pick slots that are evenly spaced apart and that will allow the estimated melt pools to touch or slightly overlap.
Let’s say I wanted to make a 4.5 inch candle with 3 wicks. If I knew that each wick would produce a 3 inch melt pool, this is where I would place them:
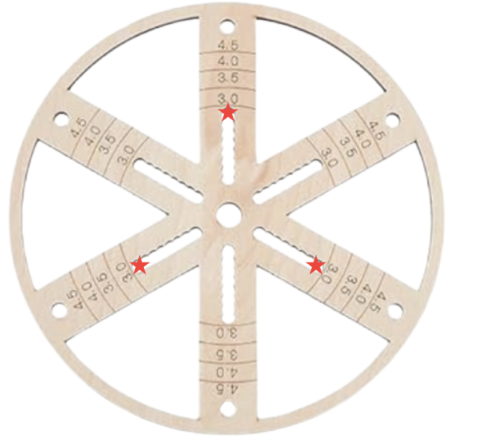
Placing 1 wick on every other spoke ensures that they’re evenly spaced apart from each other. Each star is 1.5 inches from the center while also being about 1.5 inches from the edge. This will allow the melt pool to cover the entire surface of the candle.
Multi-Wick Candle Video Tutorial
If you are using a very large container and you can’t find a centering tool that is big enough, you may want to try the method I use for the tart pan candle I make in the YouTube video below. I use a paper circle method to determine the number of wicks I will need. By cutting out circles of paper in the same size as the estimated melt pool, I can visualize how much of the surface area will burn and determine not just the right number of wicks to use but also where to place them.
I didn’t have a wick centering tool that was large enough for this tart pan and I was too lazy to measure so I used an easy method involving paper circles:
Choosing the Right Candle Container
You can get creative with your containers as long as the container is heat-safe. I get nervous when I see people re-purposing wine glasses for candles because that glass is so thin and definitely at risk for overheating, then exploding. Since this tart pan is made to withstand the heat of an oven, I knew that it would be fine for a candle.

Choosing the Right Wax Blend
If you want a “cleaner” option, choose soy, coconut, or a coconut apricot wax blend. Otherwise, go with paraffin wax. Paraffin wax is rumored to be less “clean burning” than some of the other wax types, but personally, I think the science around that is not convincing. I don’t use it often, but it’s a wax type I have no problem using for certain candle types (especially taper candles or anything made in a mold). There is a reason that paraffin wax is widely used in a lot of big candle brands. It has good hot throw. It’s less expensive. I also think it’s easier to use so it’s good for beginner candlemakers.
The candle I made in this YouTube video was a citronella candle that will live outside so I didn’t want to use 100% soy wax. Soy has a lower melting point so it would end up sweating outside in the Houston heat. Because of that, I blended soy wax and beeswax together to make this candle.
Candle Ingredients
- Heat-safe Container
- Pre-tabbed Candle Wicks
- Candle Wax (I used 16 ounces of soy wax blended with beeswax)
- Fragrance Oil (I used 0.5 – 1 oz. of citronella fragrance oil)
- Optional: Stearic Acid (I used 1.6 ounces)
Step-by-Step Guide to Making a Multi-Wick Candle
1. Determine how much wax your container will need. I do this by filling the container with water. Leave a little empty space at the top. Measure how much water it took to fill your container. I usually use the same amount of wax so if my container holds 16 ounces of water, I’ll use 16 ounces of wax. Technically, the wax weight is about 80% of the water weight so you can use that percentage if you want to be more exact.
2. Determine how many wicks to use. Start by figuring out the size of the melt pool that your wick will create. You can usually find this on the wick packaging or the website you ordered it from. Use this information to trace circles of this size onto a sheet of paper and cut them out. Spread the circles out in the container so that the majority of the surface is covered and then count how many circles you used. This is the number of wicks you’ll need.
3. Make cuts in the center of these circles. Fold the paper in half once and then fold it in half a second time to find the center. Make a small cut and slip the wick through.
4. Mark the center of the container.
5. Add a wick sticker to the metal tab and place the first wick in the center of the container.
6. Continue to add the wicks using the paper circles to guide you.
7. When you are happy with the way this looks, remove the paper.
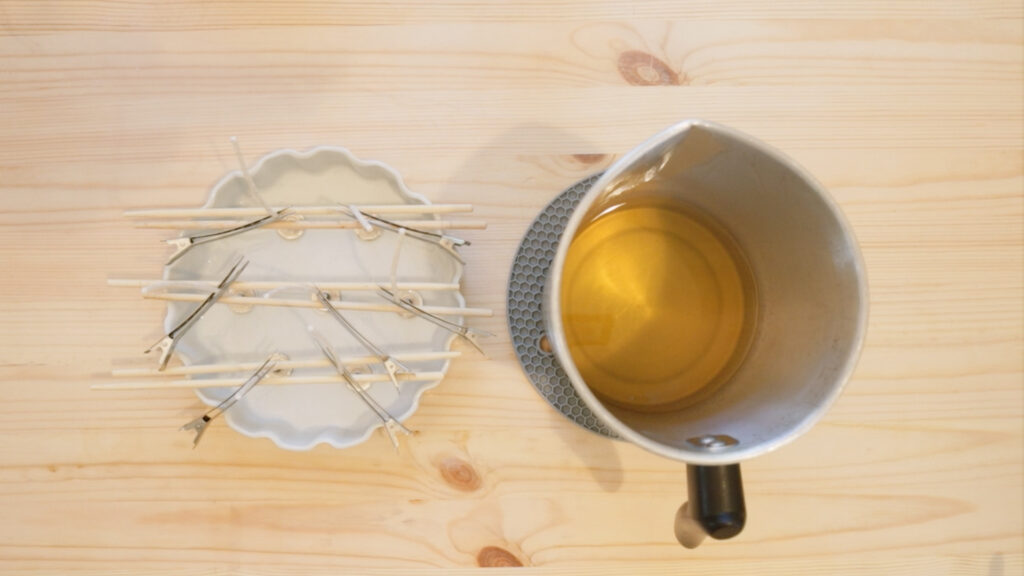
8. Straighten up the wicks and secure them in place using a wick bar, chopsticks, or any other item that fits across the container.
9. Measure out the wax and any candle additives you want to use (like stearic acid). Add to a melting pitcher.
10. Put the melting pitcher on a double boiler setup and turn on the heat. Add a thermometer to track the temperature. Monitor to make sure it doesn’t exceed 185. The temperatures I mention may differ depending on the wax type you use. Always check the melting point of the wax before you get started
11. Once the wax is melted, add the fragrance oil. Remove from the heat and stir for 2-3 minutes.
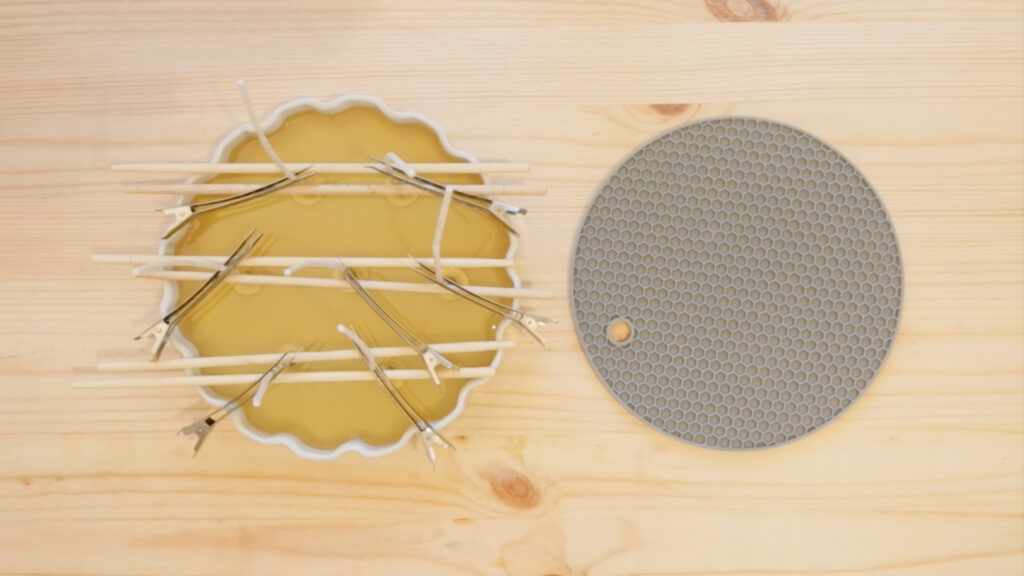
12. When the wax cools down to 165, pour into the container slowly.
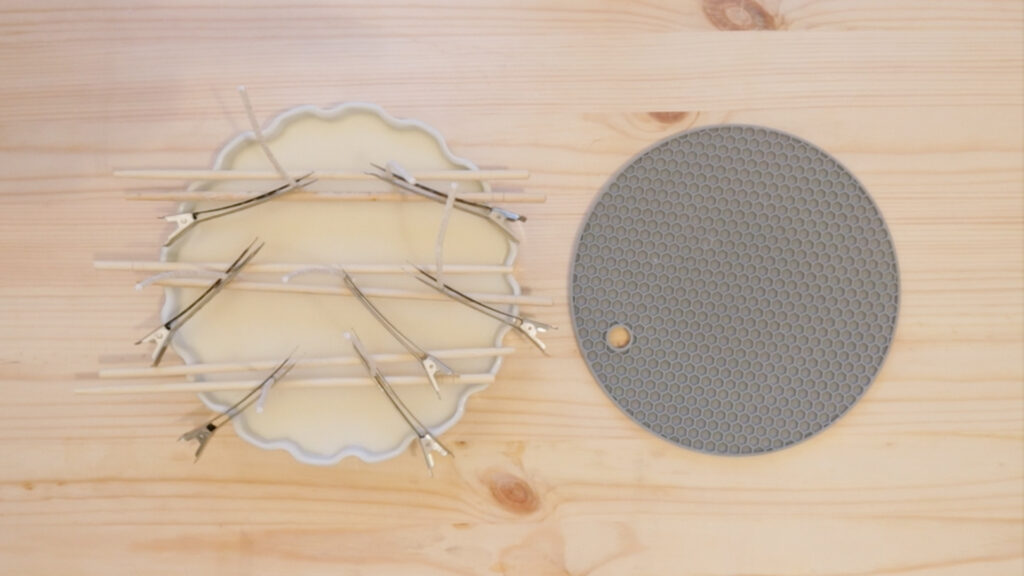
13. Don’t move the candle until the wax has completely hardened.
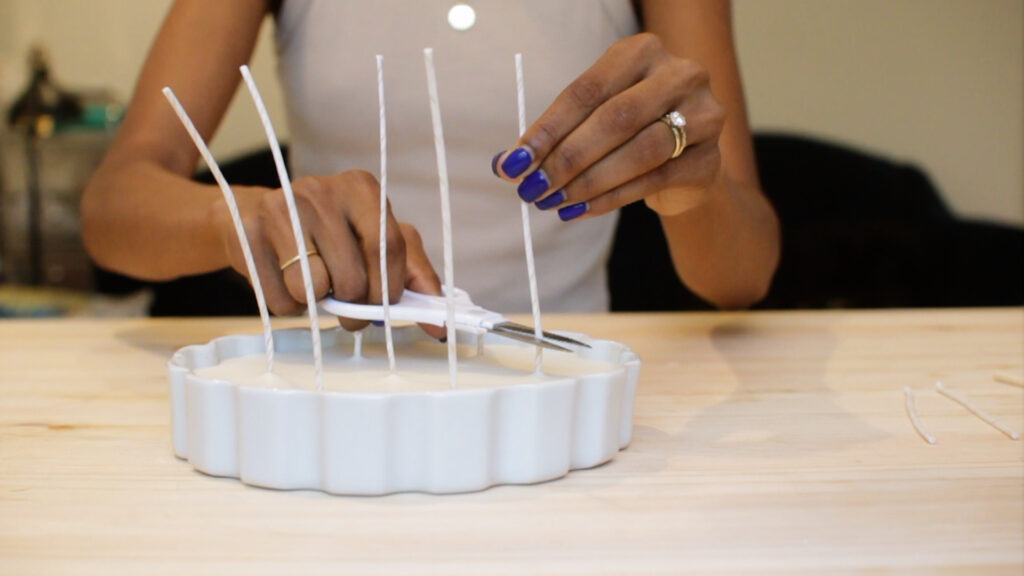
14. Trim the wicks.
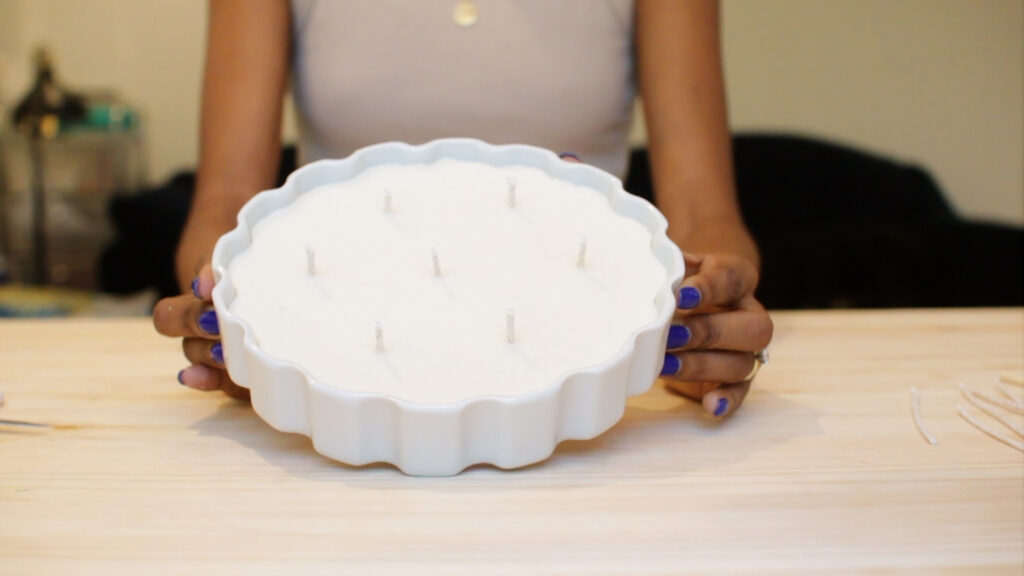
15. Let your candle cure for anywhere from 3 days to 2 weeks. Again, this depends on the wax type. You can Google the wax type to find the ideal curing time.
Final step – enjoy your candle!