After 7 years of candle making, I have finally perfected my scented candle recipe and I’m sharing it here today. You can swap out the fragrance oil with any scent you like, but if you stick to my advice about the best wax type to use, the easiest trick for measuring the correct amount of wax, and the optimal pouring temperature, you will end up with an amazing scented candle. If you are a beginner candle maker, this post is for you.
In my opinion, candle making comes down to just four steps: measuring, wicking, melting, and pouring. There is no need to make it any more complicated than that, but of course there are details that you’ll need to know so first I’ll share helpful information about what ingredients you will need to make the candle and how to set up a candle making space. Then, I’ll walk you through every step you need to know to make the perfect scented candle. If you’ve already gathered all of your materials and you want to skip to the candle making steps, click here!
Best Candle Wax for Beginners
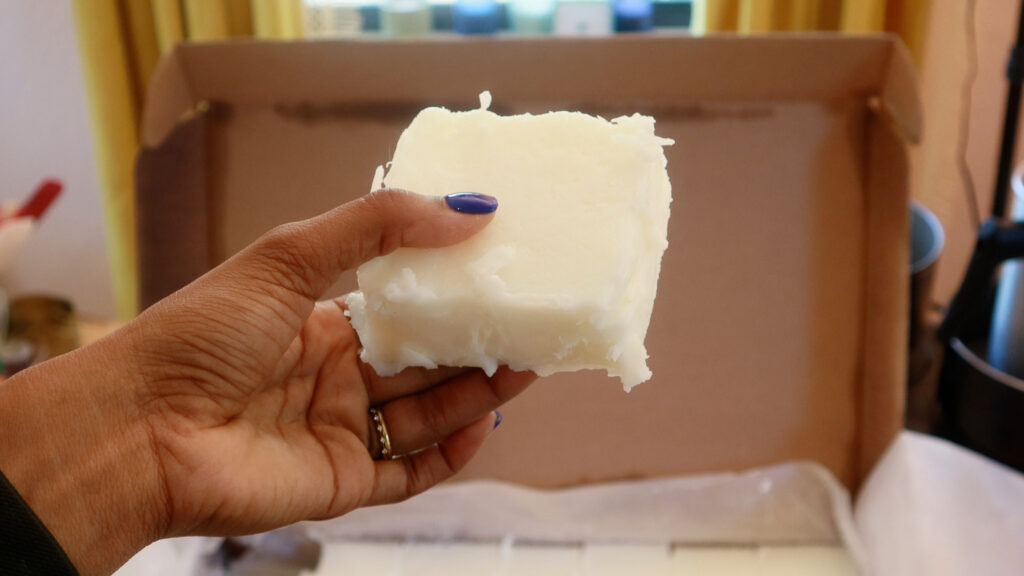
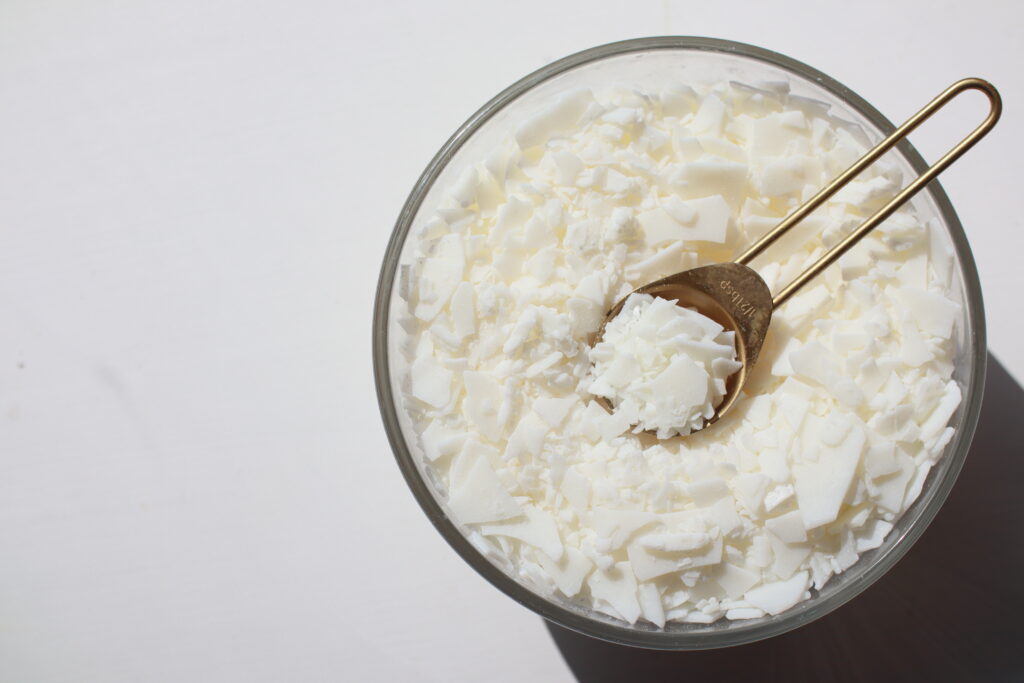
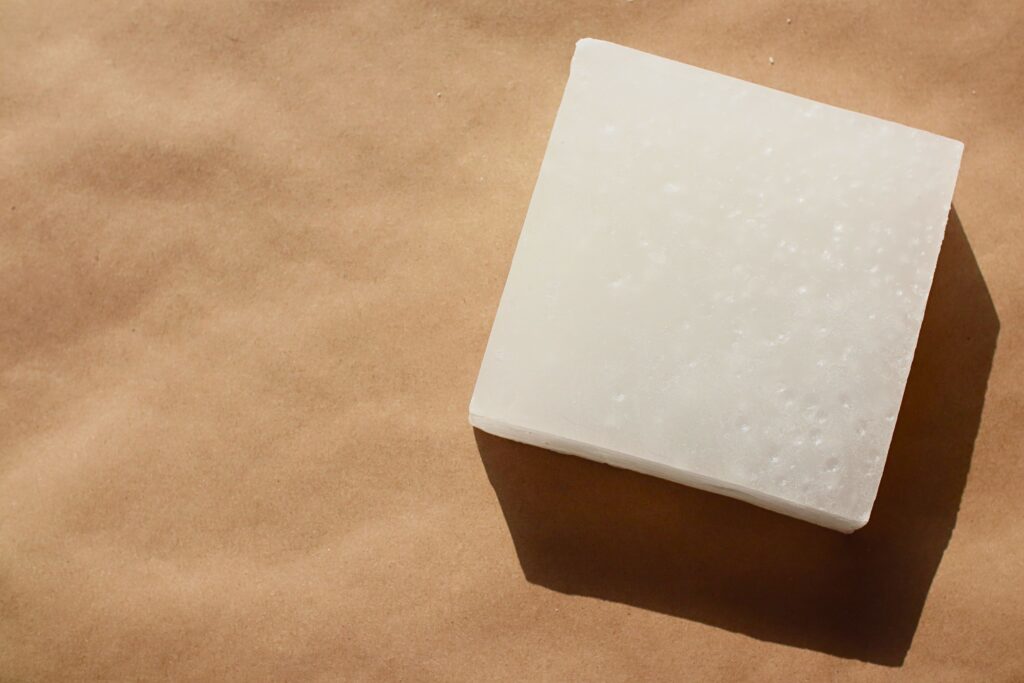
I’m going to recommend the one wax type that I personally believe every beginner should start with and it is probably not the one you were thinking of when you clicked on this post – it’s coconut apricot candle wax. It is not as commonly used as soy or paraffin, but in my opinion, coconut apricot wax is the perfect candle wax for beginners. Here’s why:
- Coco apricot wax creates smooth tops every time. With other wax types, I usually have to use my heat gun to fix surface imperfections like sinkholes (especially with paraffin wax) or dimples (with soy wax). I have never struggled to get a smooth top with coconut apricot wax. As long as you pour it at the right temperature, you should have no issues making a smooth, creamy, beautiful candle.
- Coco apricot wax holds fragrance very well. In my experience, coconut apricot wax candles have a much better scent throw than soy wax candles. Paraffin wax does hold fragrance very well so it is a good option for scented candles, but I think it’s harder to work with so I do not recommend it for beginners.
There are only 2 things that I need to warn you about –
- Coconut apricot wax is more expensive than other common wax types. Currently, you can purchase a slab of coconut apricot wax for $3.74 per lb. at CandleScience compared to $3.05/lb for soy wax and $2.88/lb for paraffin wax. If you’re buying a 10 lb slab, that difference really does add up. Candle making is an expensive hobby so if you’re trying to save money, you may want to avoid buying a more premium wax.
- Coco apricot wax is very soft so it tends to sweat in hotter climates. Be aware of this if you are ordering it (or shipping coco apricot candles) during the summer. If you live in a hotter climate like me, you know how risky it can be to order candles or candle making supplies in the summer. I’ve received many melted or heavily sweating candles even if I grab them from my front porch right away. If I were shipping coco apricot candles as part of a business, I would keep this in mind when it comes to the candle packaging.
You probably hear a lot about soy wax and paraffin wax. I do not think that either one of these is optimal because:
- Soy wax doesn’t hold fragrance as well as other wax types so if you’re trying to make a great scented candle, you might be disappointed. It also tends to have a lot of cosmetic issues (like frosting, discoloration, and uneven surfaces after the first burn).
- Paraffin wax is prone to sink holes if you don’t get the pouring temperature just right. It also tends to contract more than other wax types so it can pull away from the edges of a container candle in a way that I do not find aesthetically appealing.
Candle Making Supplies and Ingredients
Here is everything else you will need to make a scented candle:
Candle Container or “Vessel”
Options include glass jars, metal tins, and ceramic or concrete containers. Some people like to get creative here, but please keep in mind that you should always use heat-safe containers. Candles are fire hazards. Avoid anything with thin glass (like wine glasses!). The safest way to go about choosing a container is to buy one from a candle supplier because you know that it will be appropriate for candle making.
Fragrance Oil
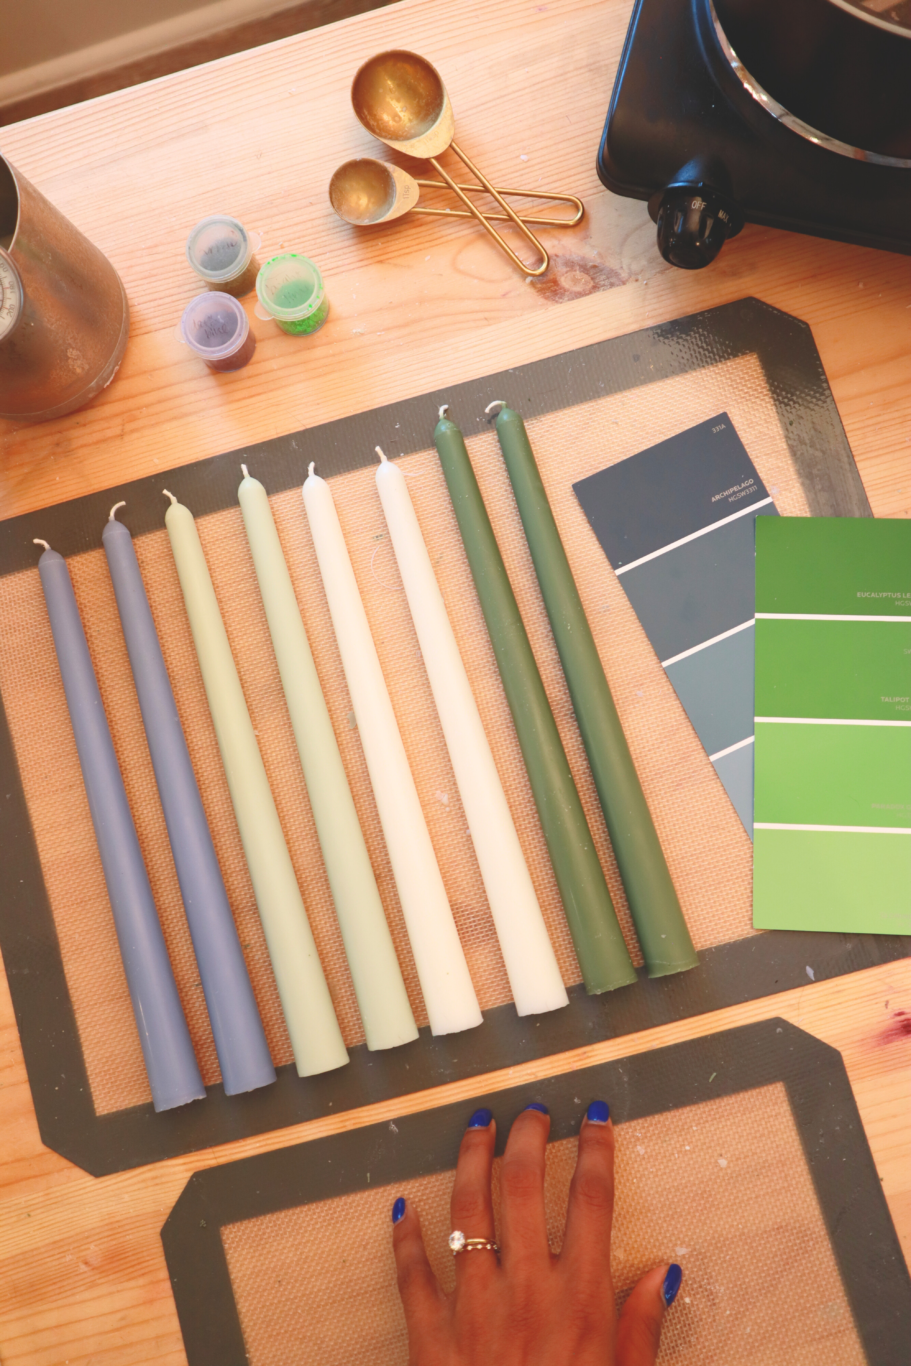
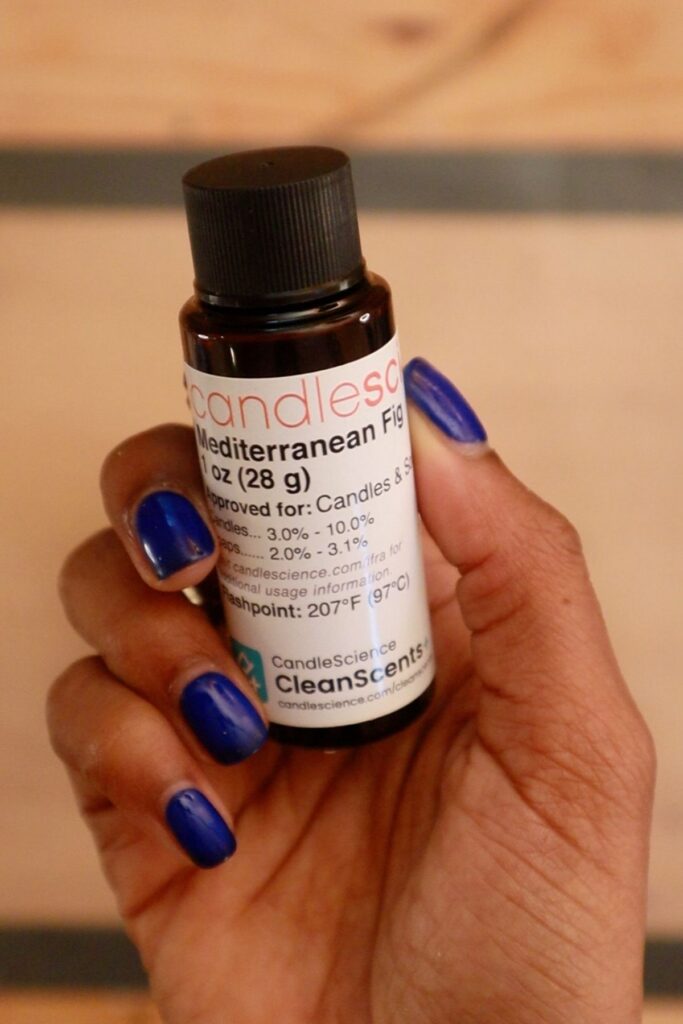
I recommend fragrance oil rather than essential oil because fragrance oils are specifically formulated to be used for candle making. In my experience, essential oils are more expensive and less fragrant. They are also not always well formulated for candle making and can smell bad when burned. Pick whatever fragrance oil appeals to you. I’m using Mediterranean Fig today.
Wicks
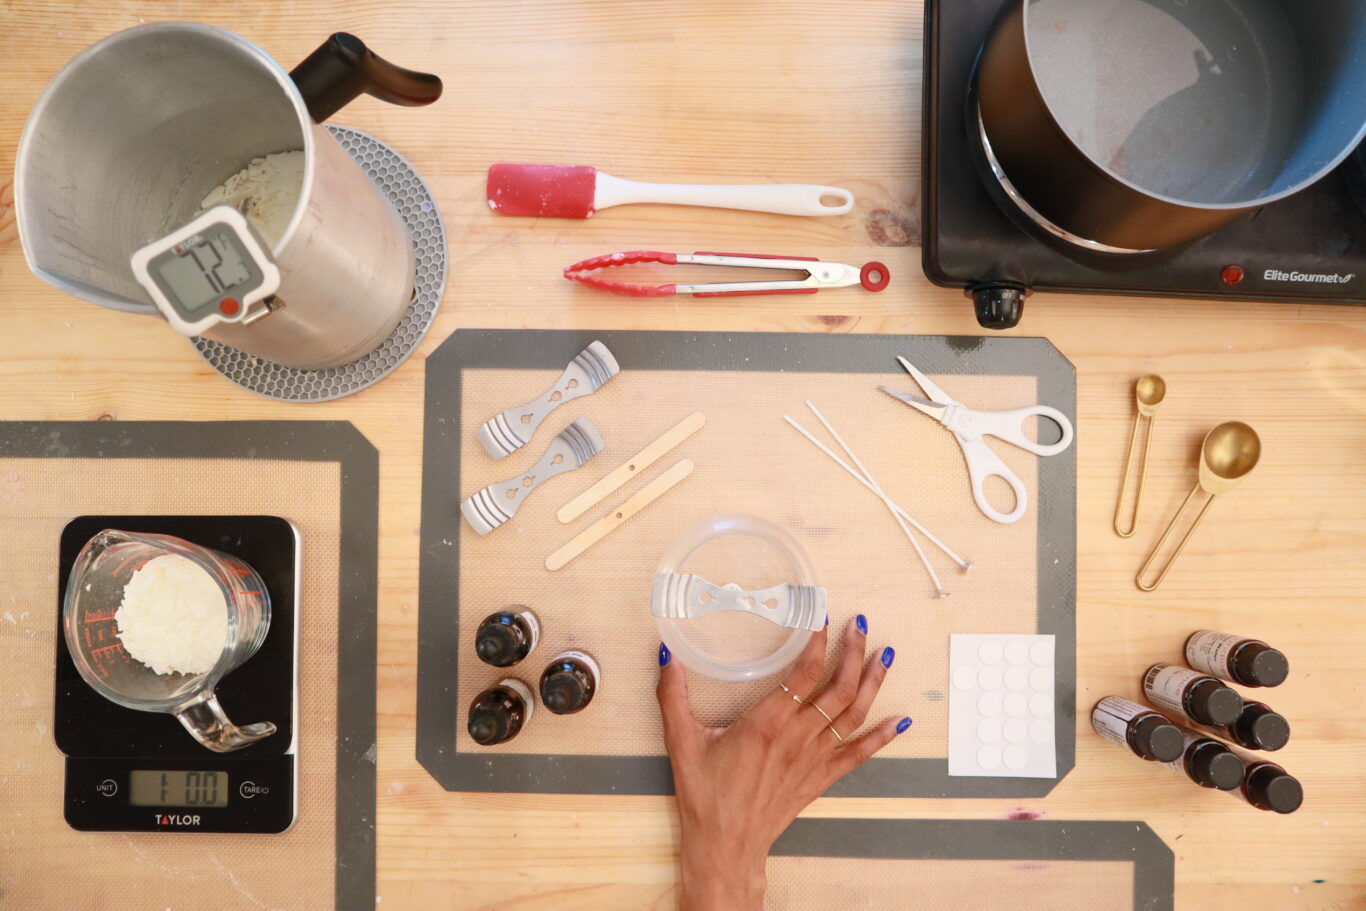
Pick either a cotton wick or a wooden wick. Make sure you pick the appropriate size for the candle container that you chose earlier. The candle supplier should indicate what size container each wick corresponds to. (This is not a sponsored post, but if you get wicks from either CandleScience or Makesy, they have very handy charts that tell you exactly what size wick to get based on the container size and the wax type). To help place the wick, you’ll need:
- Wick Bar: This is to keep the wick centered while you pour the wax. You can use metal wick bars, wooden wick bars, or your own DIY option (like chopsticks).
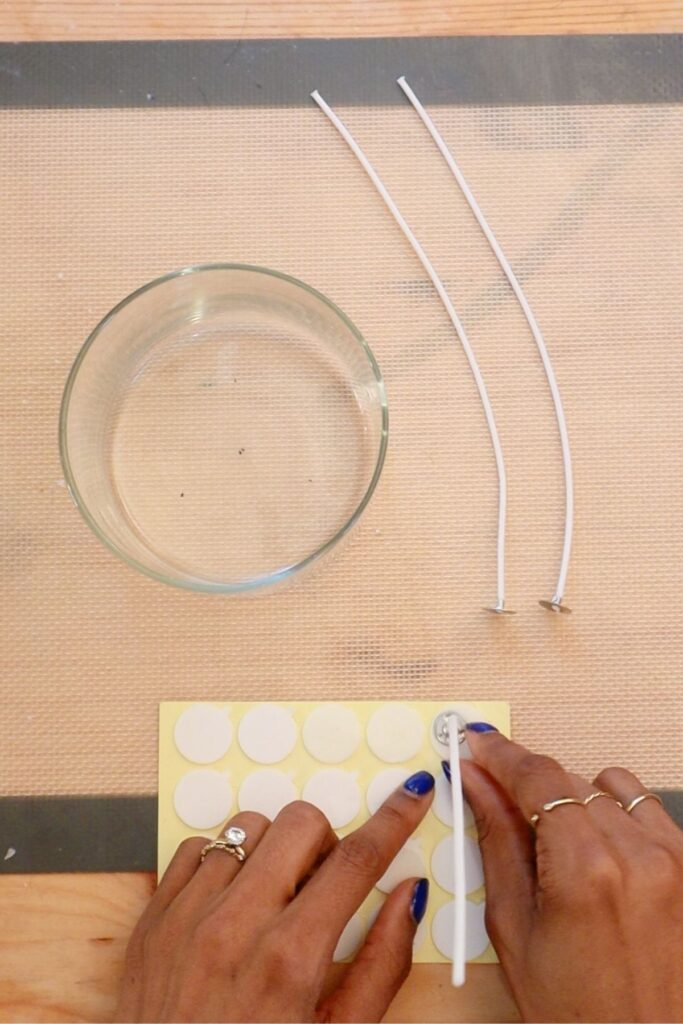
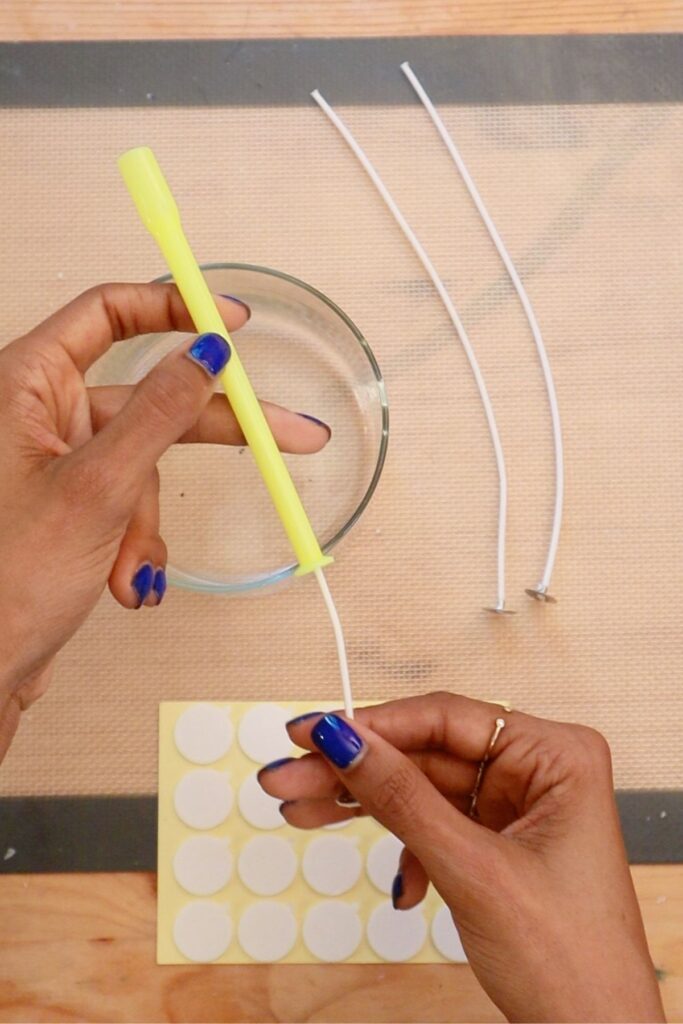
- Wick Stickers (or other adhesive): To secure the wick to the bottom of the candle container, you can either use a wick sticker, a glue dot, a hot glue gun, or a dab of melted wax.
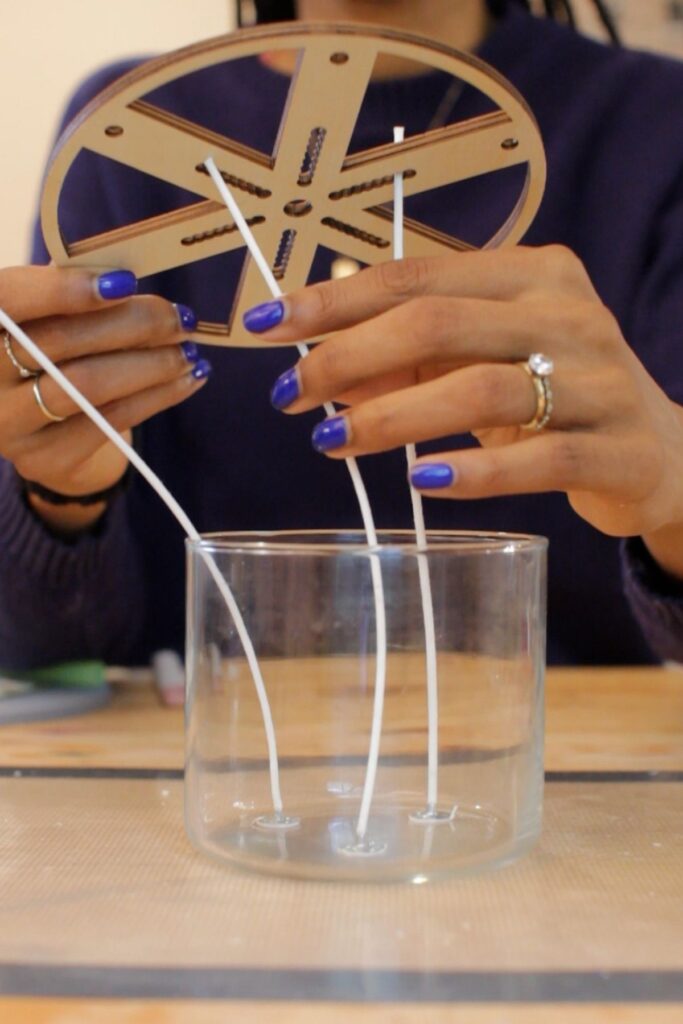
- Wick Centering Tool: This tool is optional, but very helpful for placing the wick in the right spot. It’s especially handy for multi-wick candles like the three wick candle I’m making today.
Additional Tools
- Pouring Pitcher: To melt the wax in and to pour the wax from.
- Digital Scale: To measure the wax, fragrance oil, and any other additives.
- Thermometer: To monitor wax temperature accurately. I recommend a digital thermometer.
- Stirring Utensil: To stir in the fragrance oil. I recommend a silicone spatula, but a wooden one would also work. Never re-use candle making utensils for food later on!
Candle Making Setup
The last thing you need to figure out before you get started is how you plan to melt the wax. Some people use a microwave (which I do not recommend). Others use wax melters. I use a double boiler setup. In my opinion, a wax melter is pricier, but better for beginners because it gives you better control over the temperature. A double boiler is less expensive to set up, but requires you to pay closer attention to the temperature because you have to depend on boiling water to control how much heat is applied.
Basically, ask yourself whether you want to use an electric option (wax melter) or a manual option (double boiler). Here’s a brief overview of both choices:
Use a wax melter if you want easier control over the temperature. Better for beginners, but more expensive.
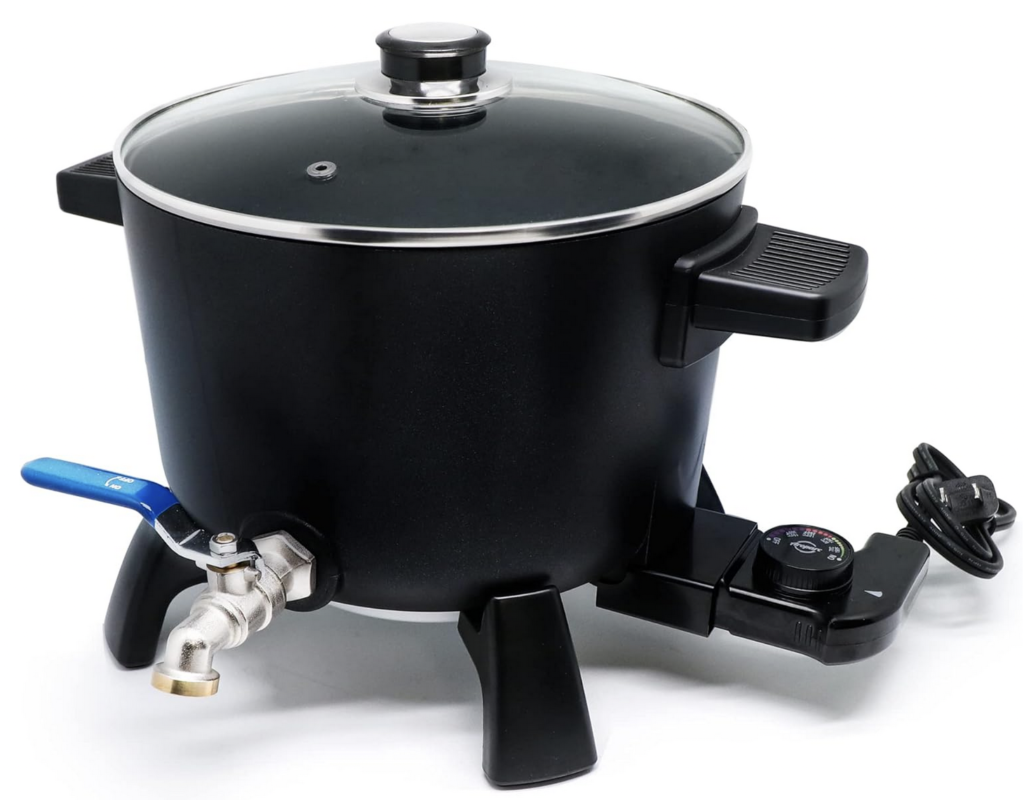
- Wax Melter: A wax melter is a large pot with a dial that allows you to control the temperature. Once you melt the wax, it has a spigot that allows you to dispense the wax into a pouring pitcher. Wax melters come in various sizes (a 10L wax melter will cost you around $100). Look for a size that makes sense based on how many candles you intend to make (5L would be good for a hobby candlemaker; 10L or up for anyone who wants to make bigger batches).
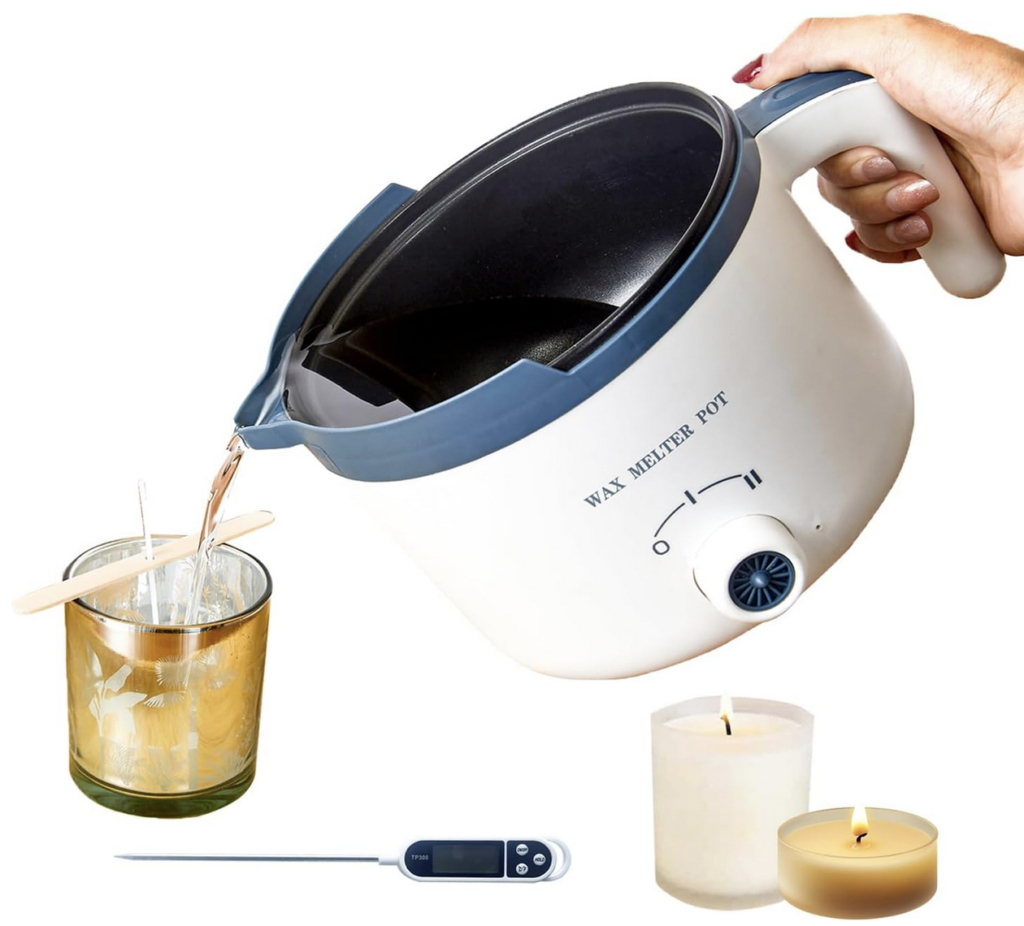
- Wax Melter Pot: This is the same concept as a wax melter. It’s an electric pot with a dial to control the temperature, but instead of dispensing the wax through a spigot, it has a pouring spout that allows you to pour directly into the candle container. This obviously has a much smaller capacity for wax than a wax melter, but it may be a good option for a beginner who wants to try out candle making without investing in a bigger, more expensive piece of equipment. You can get one for $30-$40.
A double boiler setup requires more attention, but it’s cheaper.
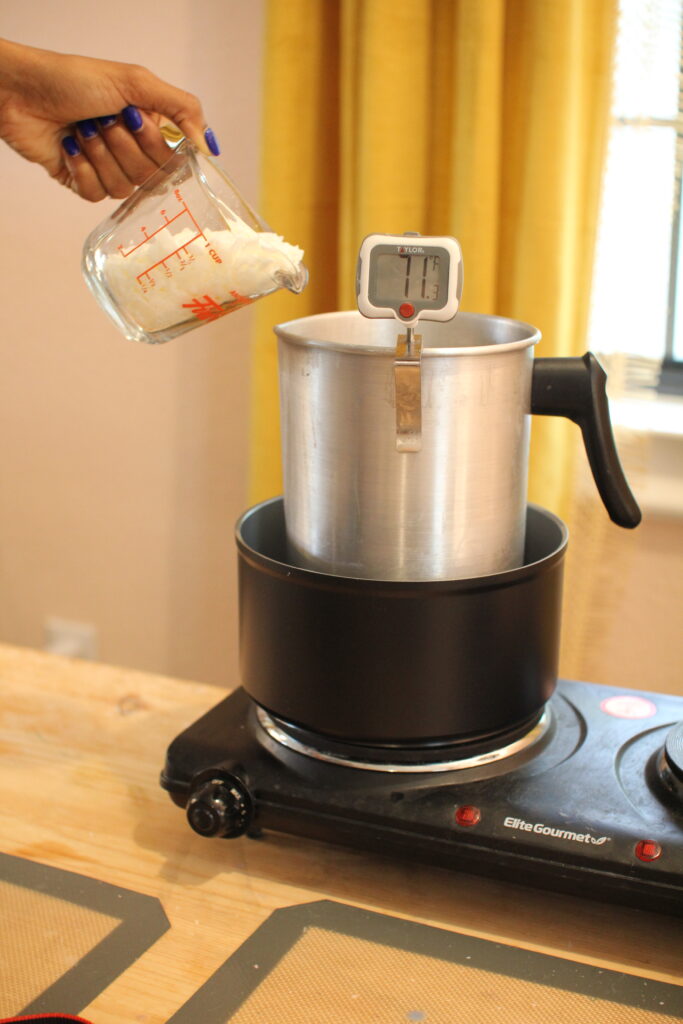
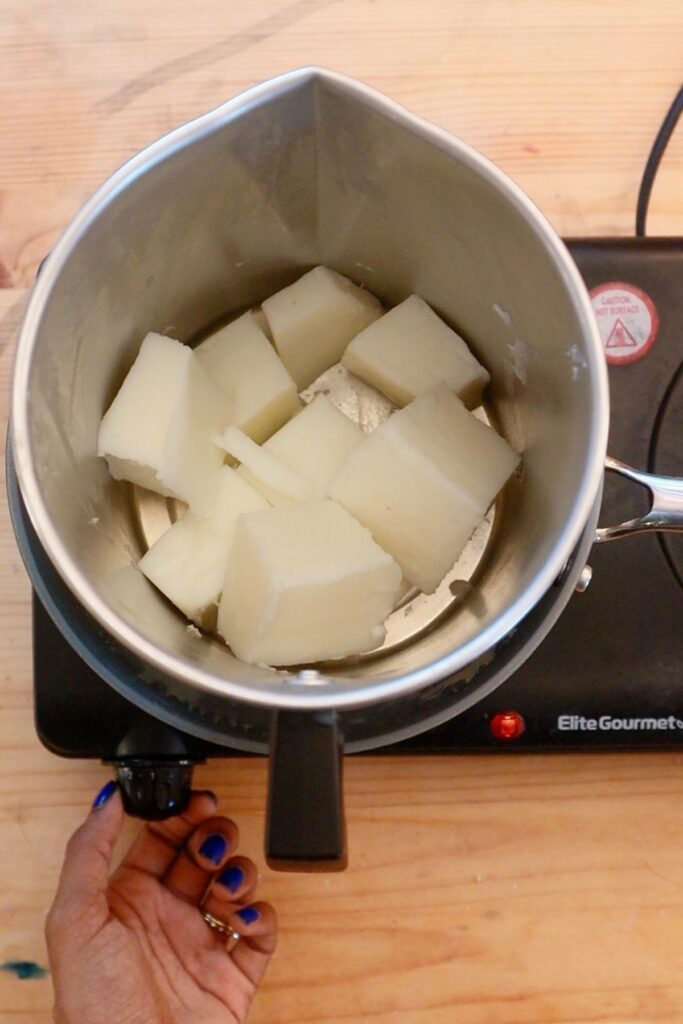
A double boiler is just a heatproof container inside of a larger pot that is filled with water and placed on top of a burner. When you turn the heat on, the water will simmer/boil and will gradually heat and melt the wax. This setup prevents the wax from overheating. You can set up a double boiler on top of the stove in your kitchen. I use a countertop burner (which cost me about $25) so that I can make candles in my “candle studio”/home office.
This is what my set-up looks like:
Step 1: Measure
You’ll need to measure two ingredients to make a scented candle: the wax and the fragrance oil.
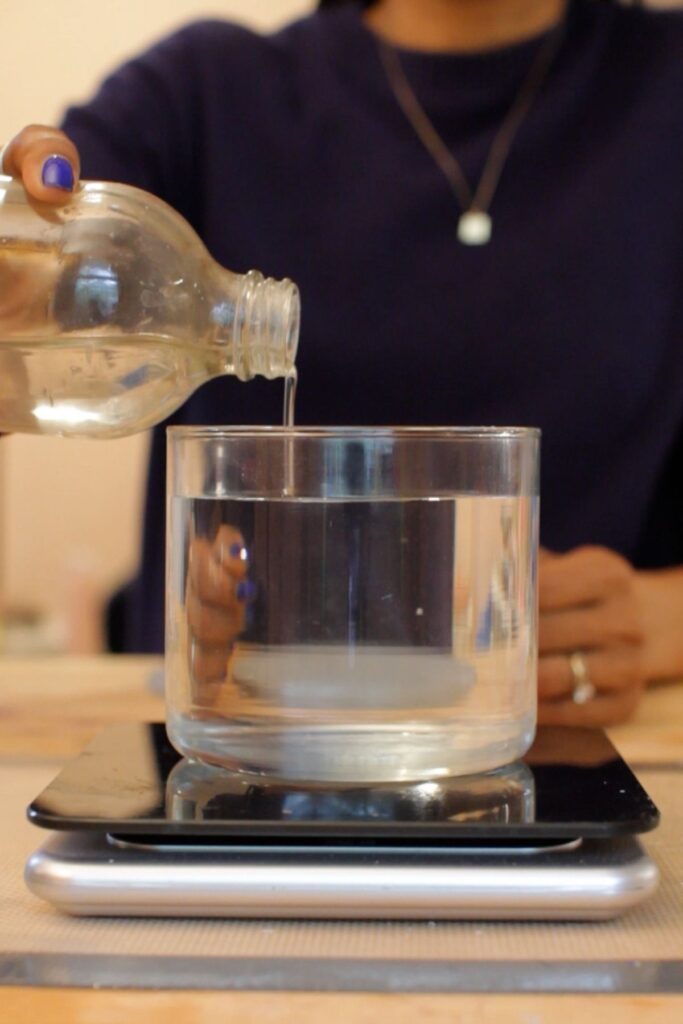
To figure out how much wax you will need, use this water to wax trick.
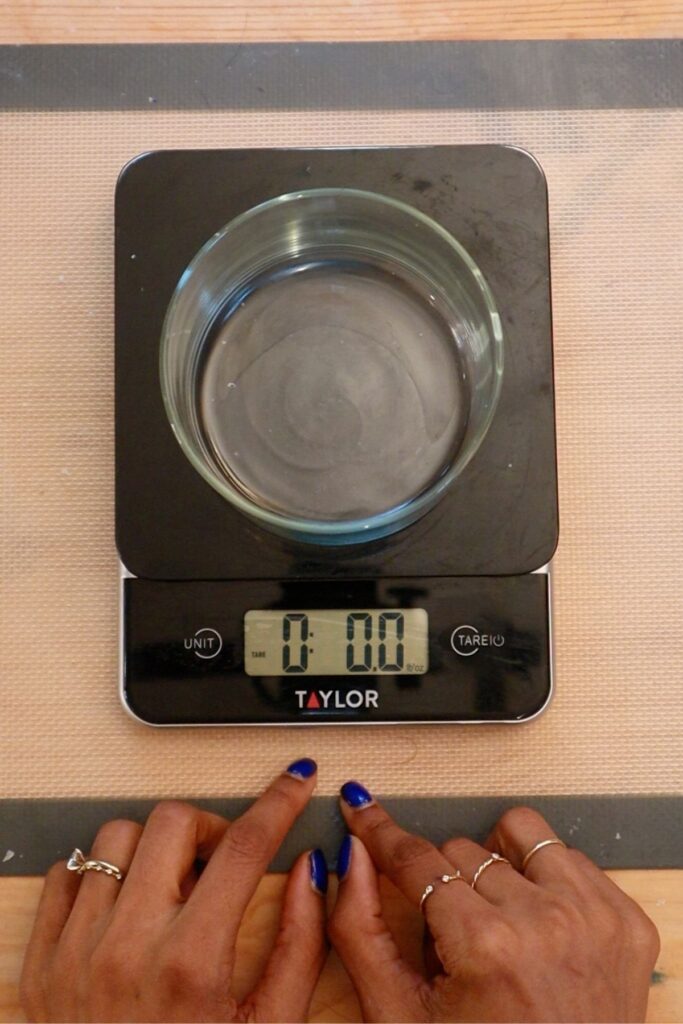
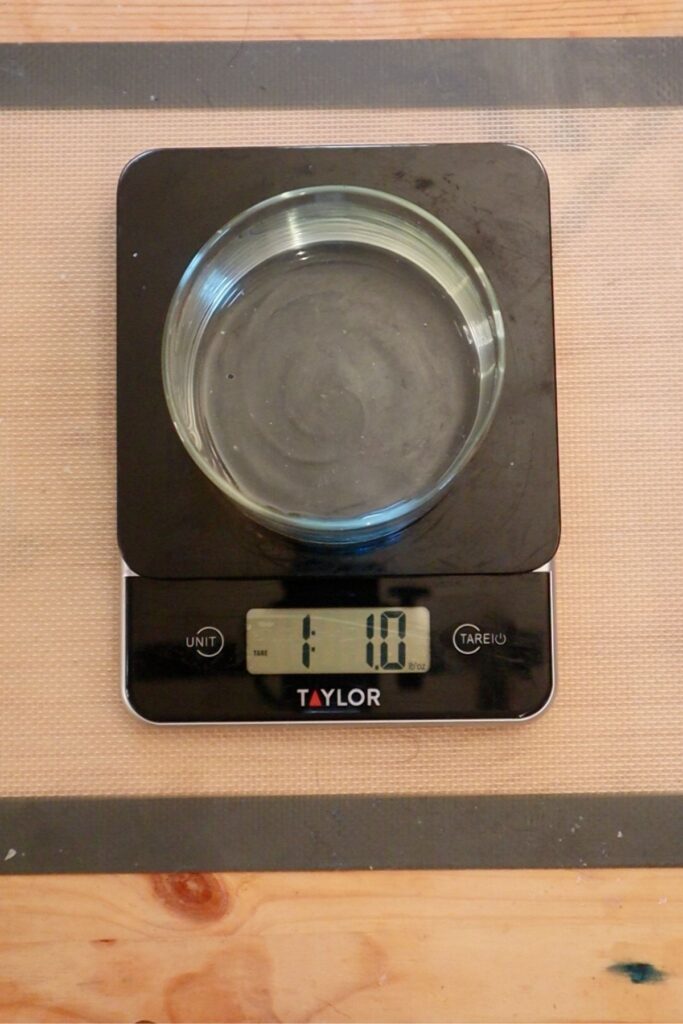
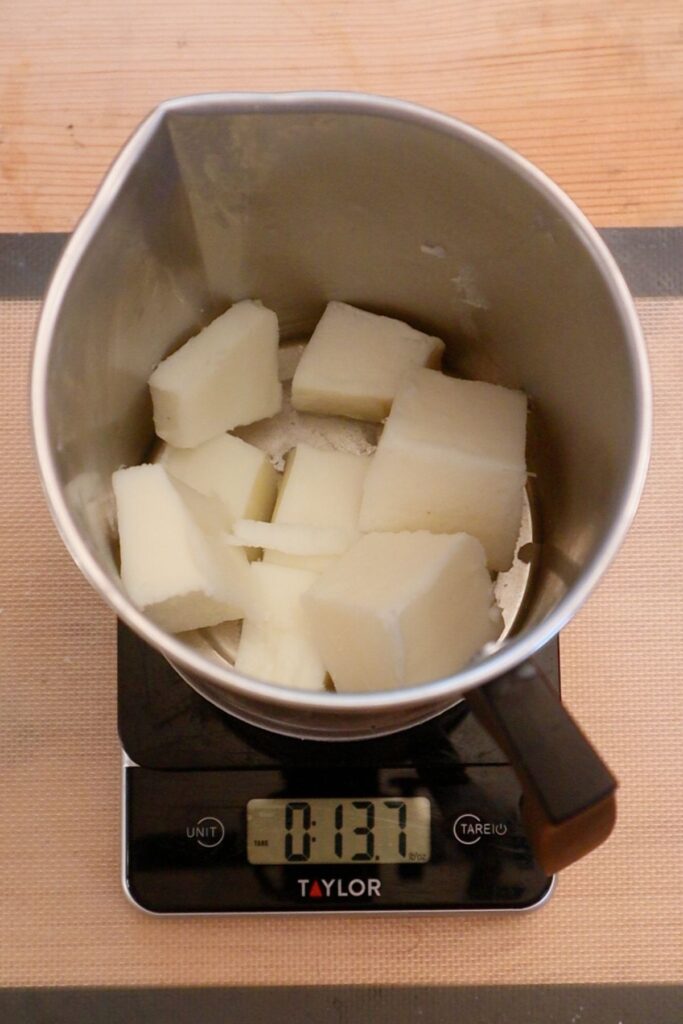
Here’s an easy trick for figuring out how much wax you need to fill any container. Place the container on a digital scale and hit the tare button so that you’re starting out at 0.0 (ounces). Fill the container with water until you reach the level where you’d like the wax to go. Write down this water weight. The formula for converting water weight to wax weight is:
Water Weight (oz.) x 0.86 = Total Candle Weight (oz.)
The number that you get is actually going to be the weight of the wax and the fragrance oil that you will need to fill the candle container to the same spot as the water.

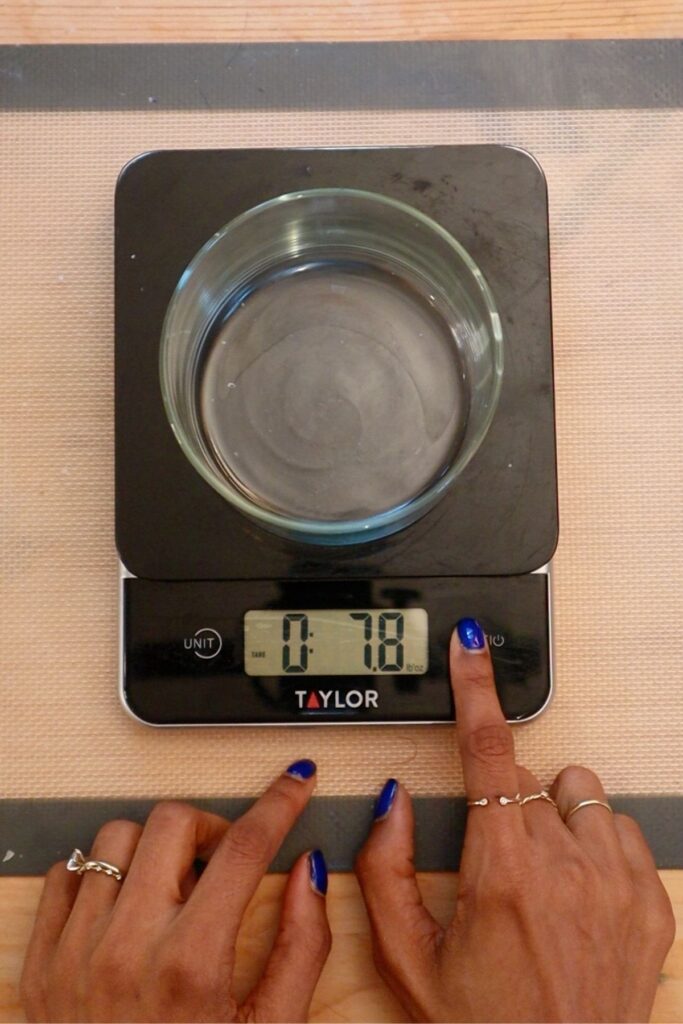
Here’s the math I did for the scented candle I’m making today:
17 oz. of water (to the fill line) X 0.86 = 14.62 oz. of total weight (wax + oil)
Since I want to use a 7% fragrance load (which I’ll explain in the next paragraph), I will need to use 13.6 ounces of wax and 1 ounce of fragrance oil. I measured out slightly more wax (13.7 ounces) which I always do to account for spills.

Use my fragrance load calculator (or a formula) to determine how much fragrance oil to use.
You may have seen the term ‘fragrance load’ – it’s just the percentage of fragrance oil in the candle relative to the total weight of the candle (wax and fragrance oil). The recommended fragrance load is typically between 5-10%. Your candle supplier should indicate a safe fragrance load range on the packaging of your fragrance oil.
If you don’t want to do math, I created a handy calculator that you can use to figure it out here (or you can bookmark my calculator page for future use). Just enter the total wax weight that you figured out with water and then enter your desired fragrance load. The calculator will tell you how much fragrance oil and how much wax is needed.
Fragrance Load Calculator
Fragrance Oil Needed: 0 oz
Wax Needed: 0 oz
If you want to do your own math, the formula is: Total Candle Weight (oz) x Fragrance Load (%) = Fragrance Oil Weight
So if I use 1 ounce of oil and 9 ounces of wax, my fragrance load is 10%: it's the 1 ounce of oil divided by the 10 ounces of total weight (wax + oil).
I chose a 7% load for my candle. When I entered 14.62 ounces for total wax weight and 7% for the fragrance load, the calculator told me to use 1.02 ounces of fragrance oil + 13.60 oz of wax.
You may be tempted to dump a bunch of fragrance oil in the candle to make it smell stronger. Don’t do this! Above a certain amount, the oil will stop binding to the wax and it will just sit on the surface. Not only does this look bad, but it’s a fire hazard. This makes the surface of the candle very flammable leading it to overheat or even explode. That’s why Trader Joe’s had to do a candle recall last summer - too much fragrance oil. Stick to the recommendation on whatever brand of fragrance oil you purchase. It should be specified on the packaging.
Step 2: Wick the Candle Container
Wick placement is my least favorite step, but it’s very important. An off-center wick will lead to a bad burn so take your time.
If you’re making a single wick candle, all you need to do is find the center. You can use a ruler or measuring tape to do this. If you're using a clear container, you can place it over something with grid lines or measurements on it to easily find and mark the center.
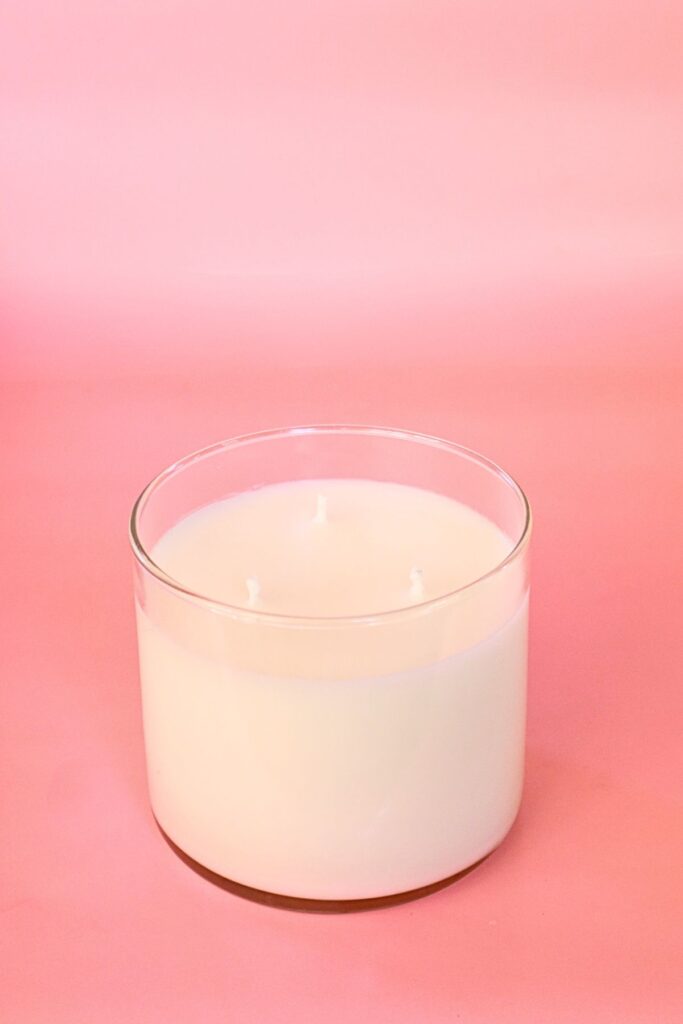
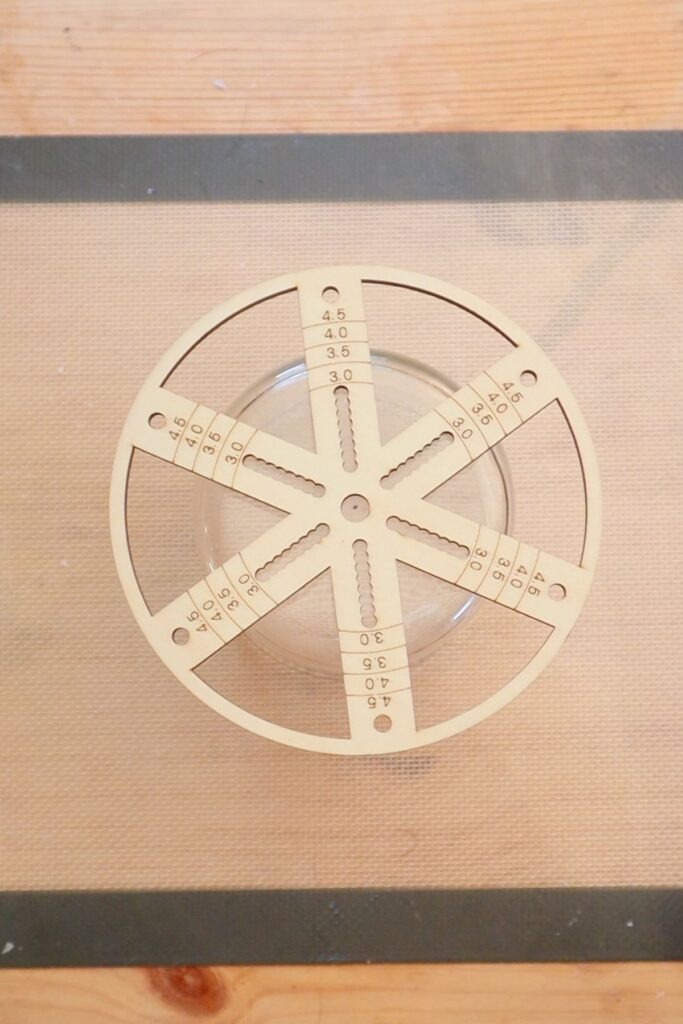
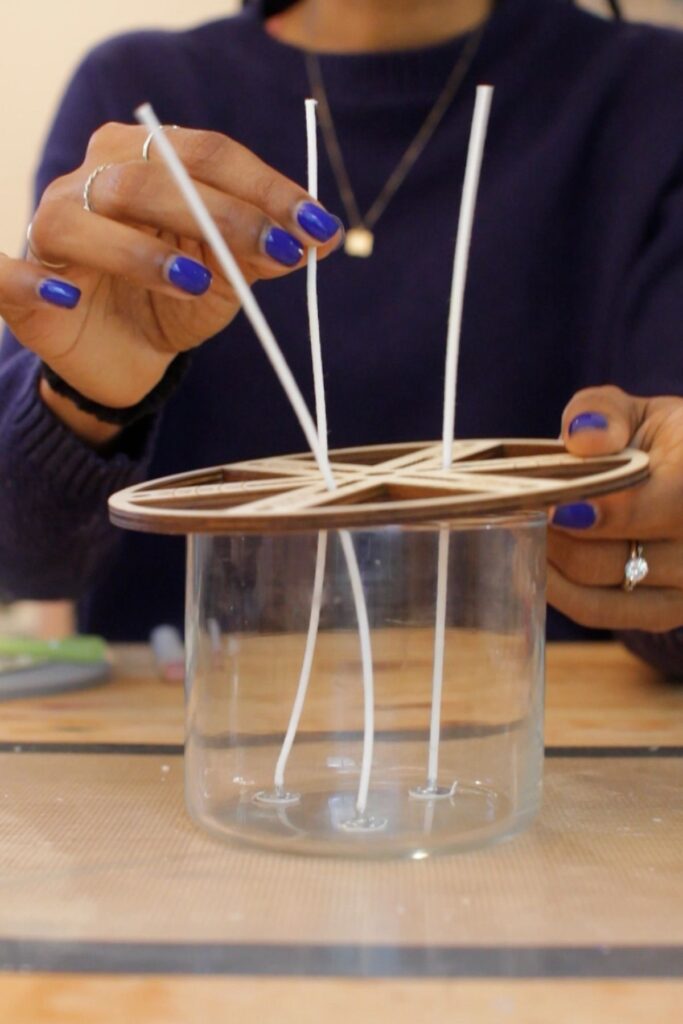
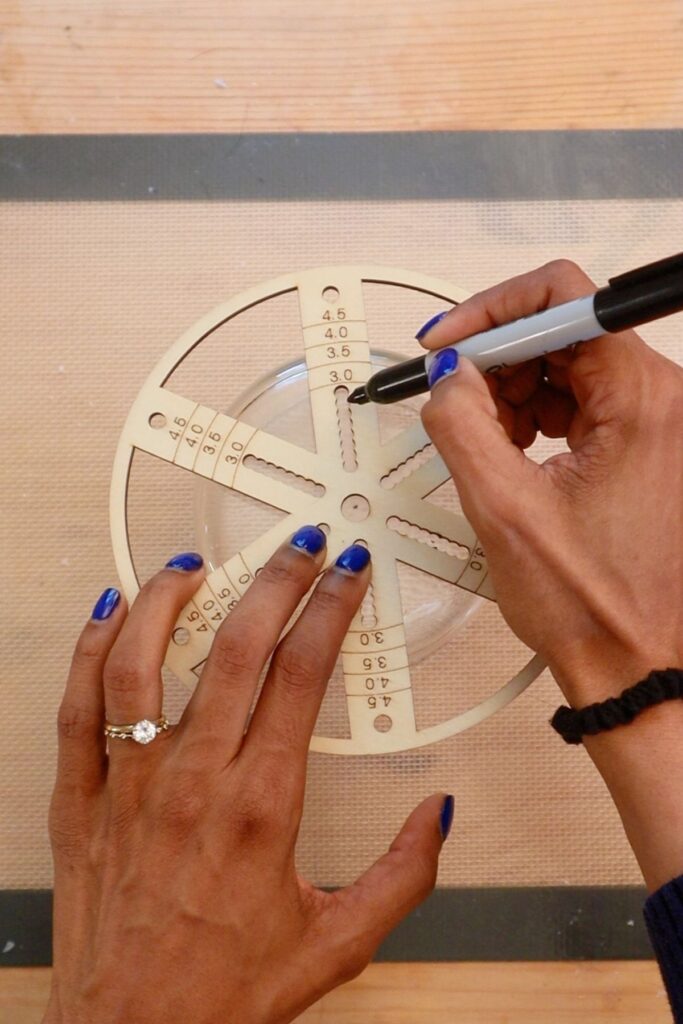
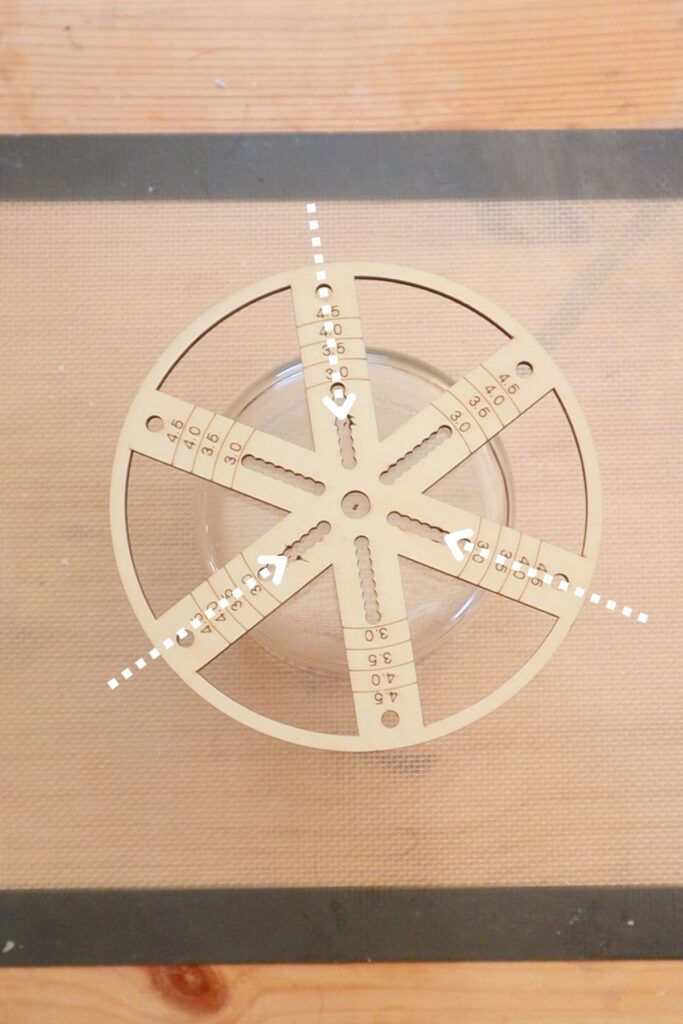
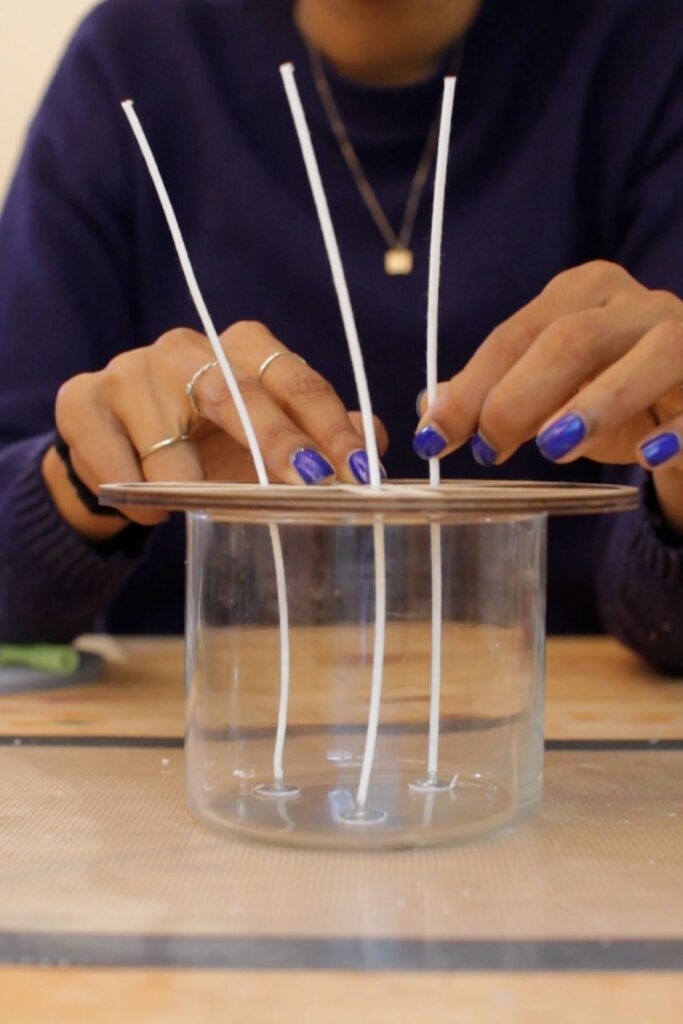
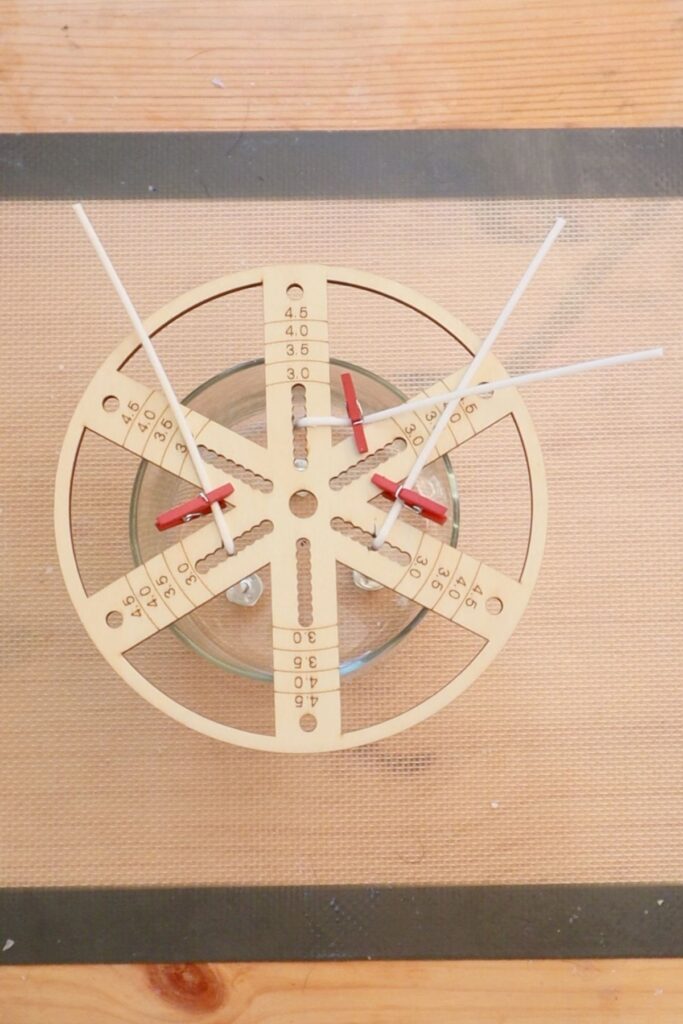
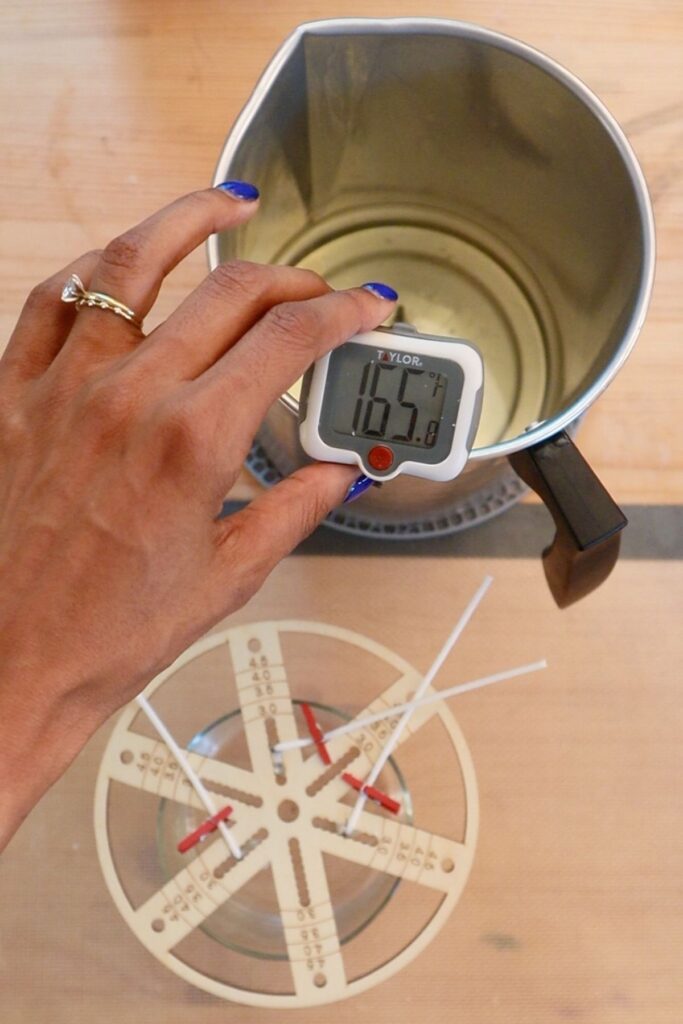
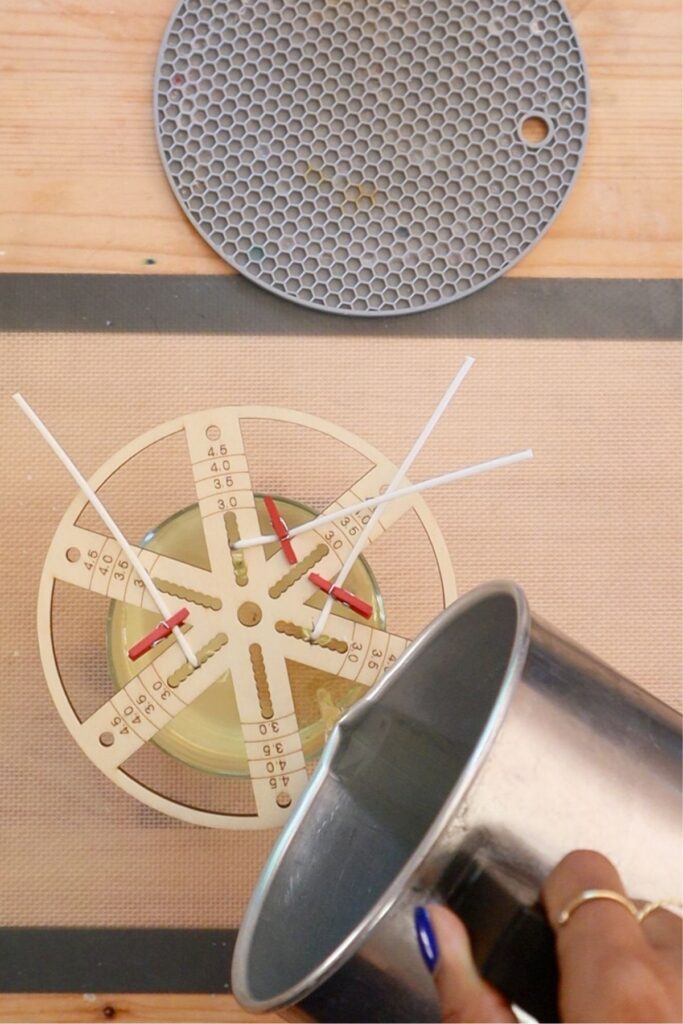
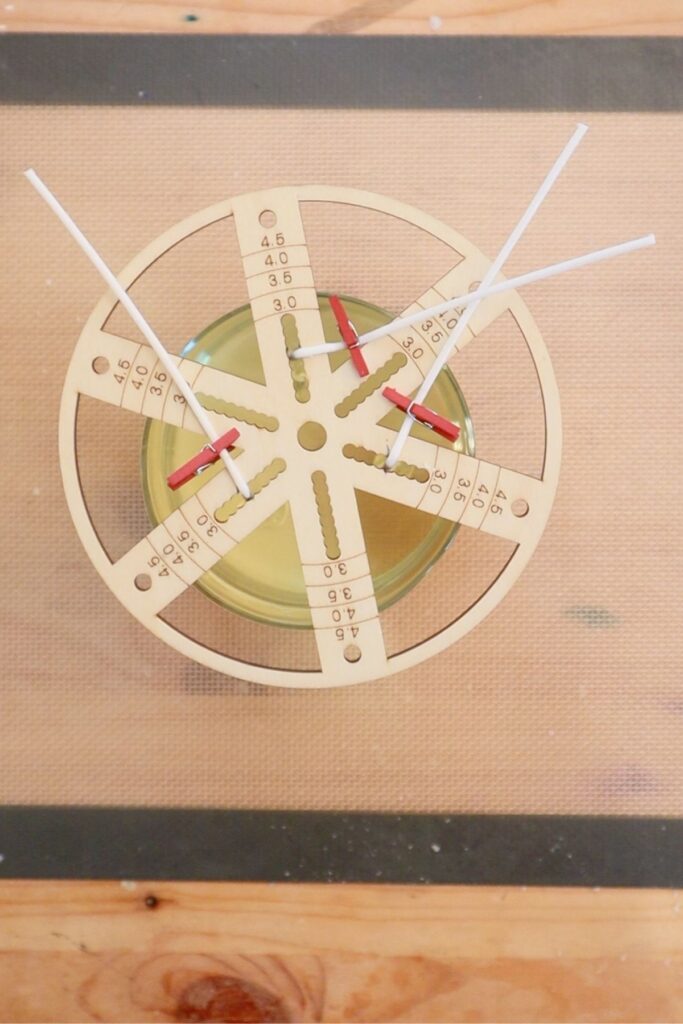
If you’re making a multi-wick candle, use a wick centering tool like this one to mark points that are equally spaced apart from each other. My candle is 4 inches in diameter. Since each wick will create a melt pool that is about 2 inches in diameter, I'm placing them about 1 inch away from the edge of the container and 1 inch away from the center. By placing each one on an alternating spoke of this wick centering tool, I'm ensuring that they're evenly spaced apart.

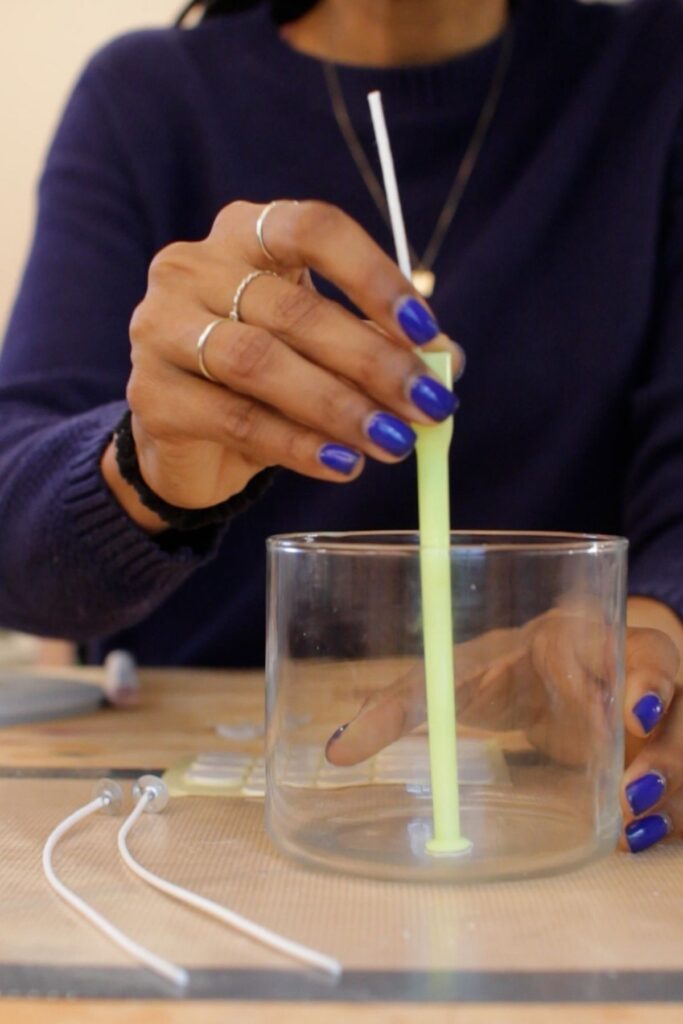
Attach the wick. Add whatever adhesive you’ve chosen (wick sticker, glue dot, hot glue, or dab of melted wax) to the bottom of the metal wick tab and then press it firmly into the spot that you’ve marked. This yellow wick setter tool that I'm using is optional, but it does make it easier to place the wick and press it firmly into place.
Center the wick. Use a wick bar (or a DIY option like chopsticks) to hold the wick upright and as straight as possible. Wicks can shift easily during the pouring process so make sure this is as secure as possible. I'm using the same wick centering tool to keep mine upright.
If you are making a batch of candles, I recommend wicking all of the containers before you start melting. Since you’ll want to be precise with wick placement, you don’t want to have to rush this step. If you’re just making one or two candles, you can wick the container while you wait for the wax to melt.
Step 3: Melt the Wax
Now it’s time to melt the wax! Temperature is going to be the most important factor and there are 3 temperatures you’ll need to pay attention to: (1) the melting point, (2) the temperature at which fragrance oil is added, and (3) the temperature at which the melted wax is poured into the candle container. All of the temperatures I reference below are for candle makers who are also using coconut apricot wax. If you are using a different wax type, please refer to the instructions from your candle supplier for recommended temperatures.
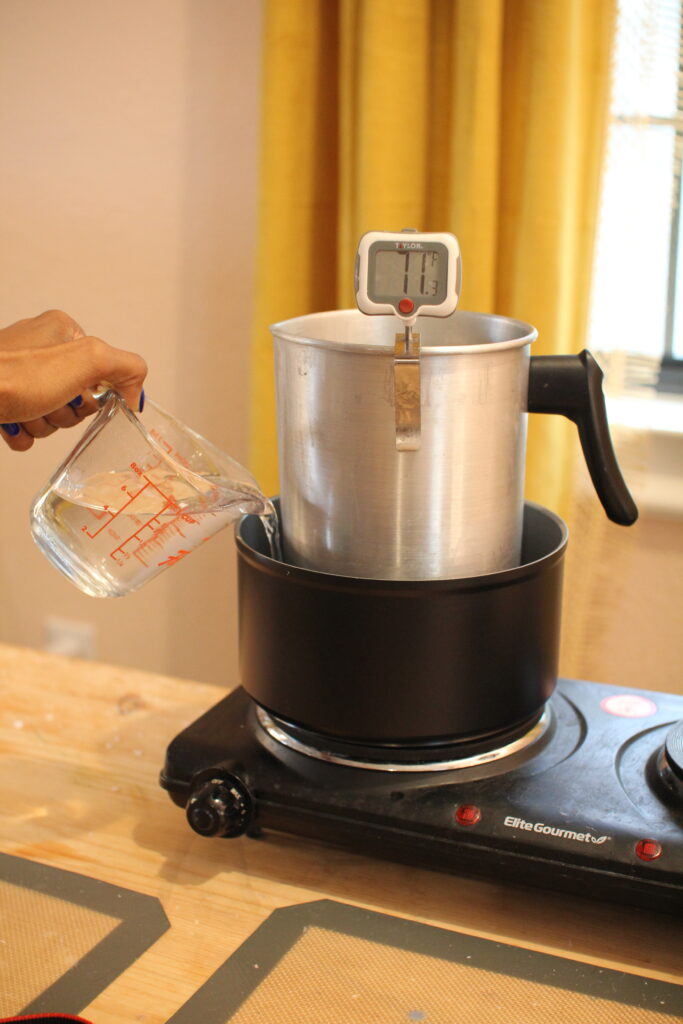
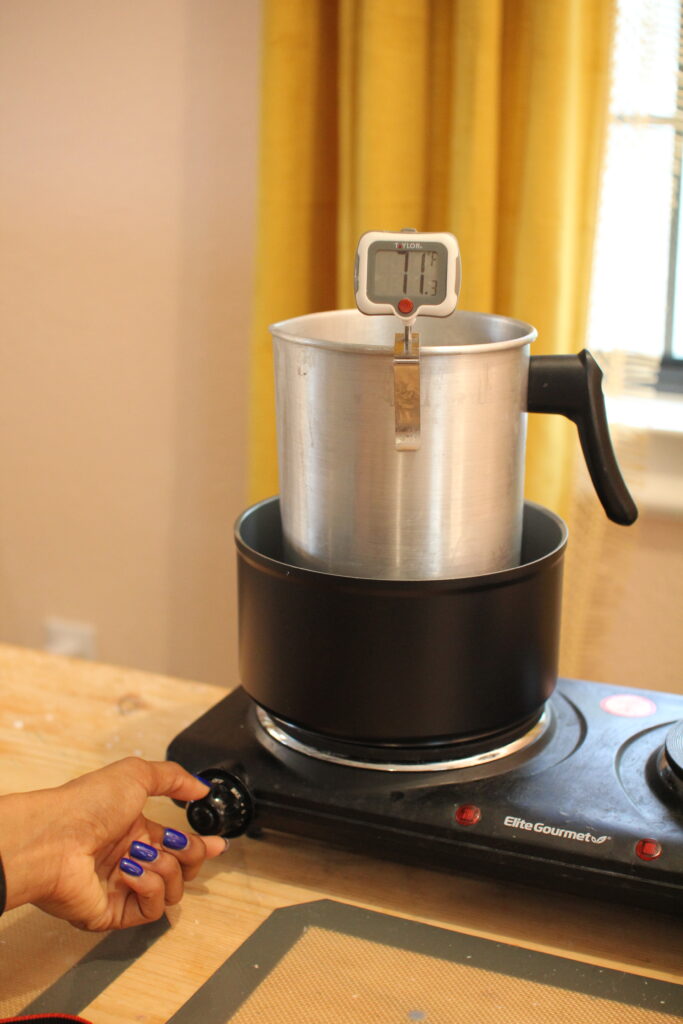
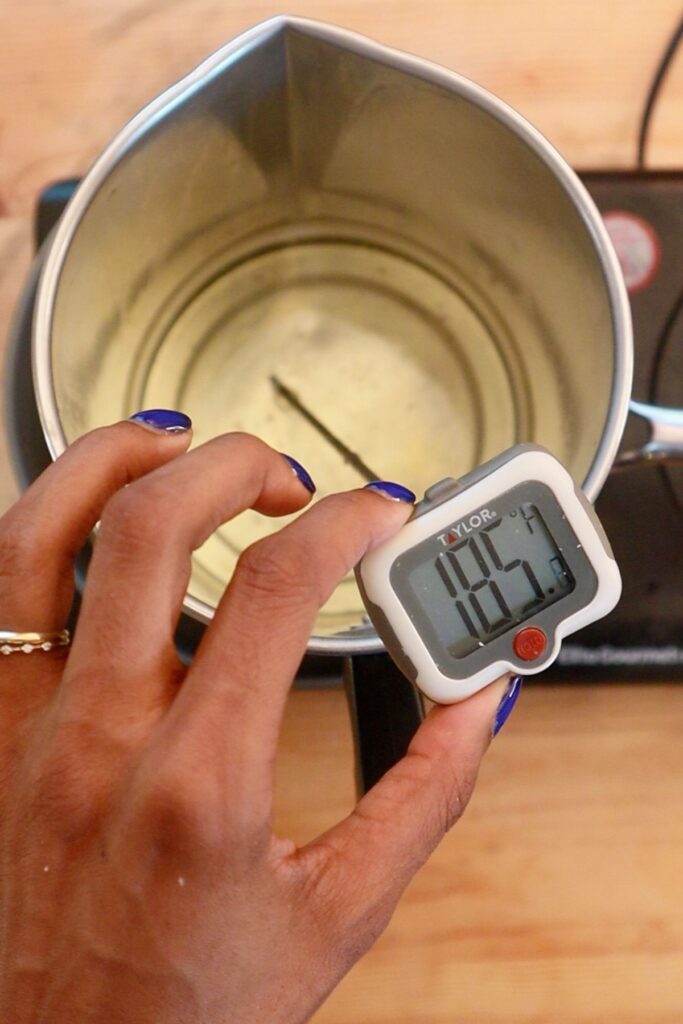
- Melt the wax: Place the pouring pitcher into the double boiler setup over medium heat. If the water starts boiling too vigorously, I’ll either turn down the heat or add a little more water or both. If you’re using a wax melter, adjust the dial to change the temperature. The coconut apricot wax should be fully melted around 120-130 degrees Fahrenheit, but you’ll keep warming until you reach 180-185 degrees Fahrenheit.
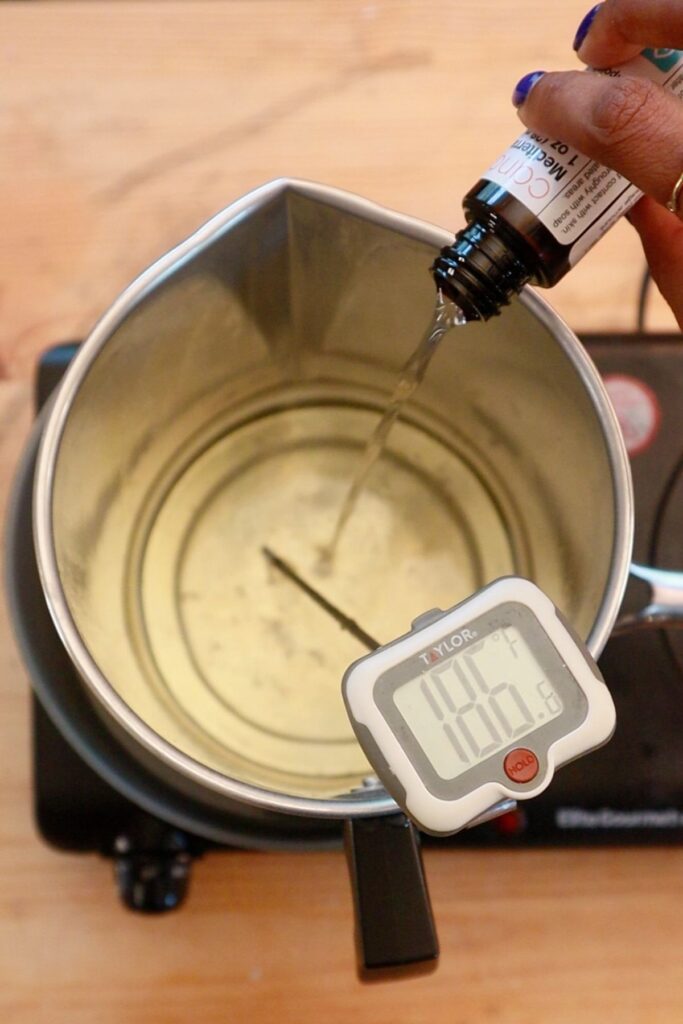
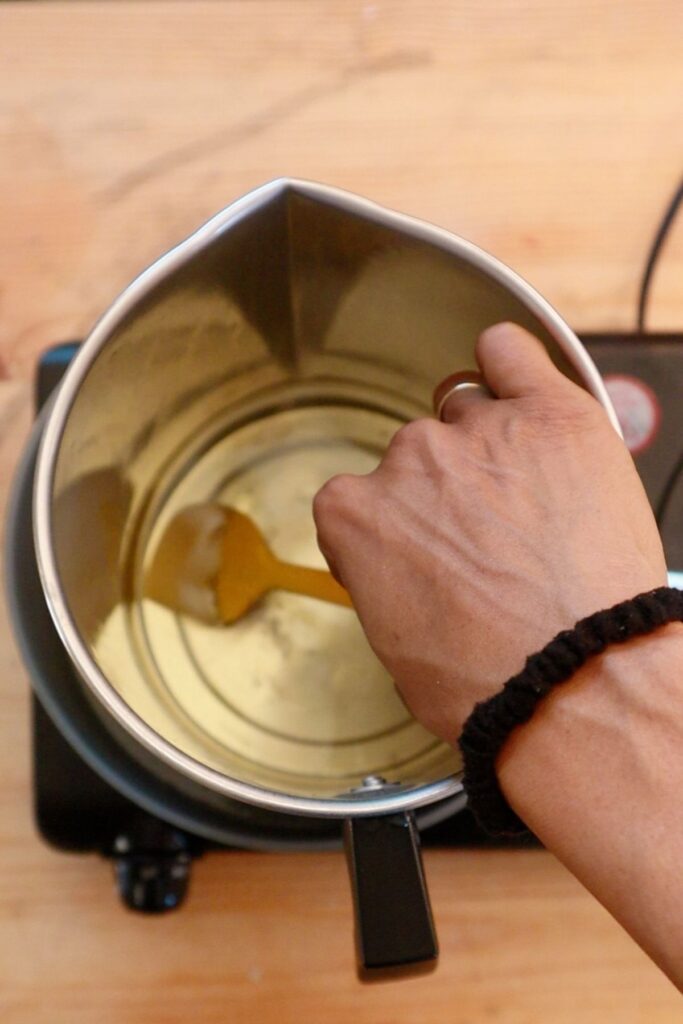
- Add fragrance oil when the temperature reaches 185. Pour in the fragrance oil, then stir. Stir gently so as not to introduce too many air bubbles. Then, remove the pouring pitcher from the heat. You'll wait for the melted wax to cool down slightly before you pour. I'll go over the pouring temperature in the next section.
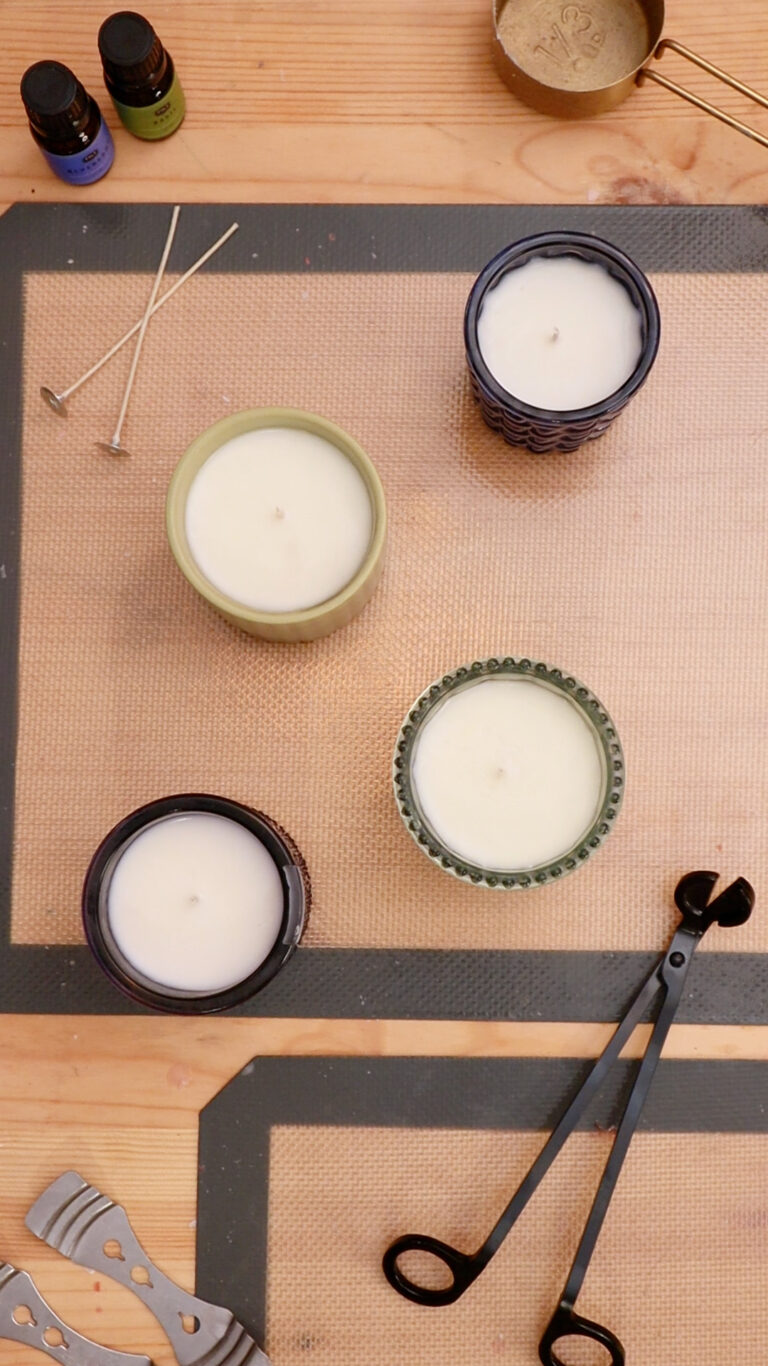
Step 4: Pour the Wax
This is my favorite part!
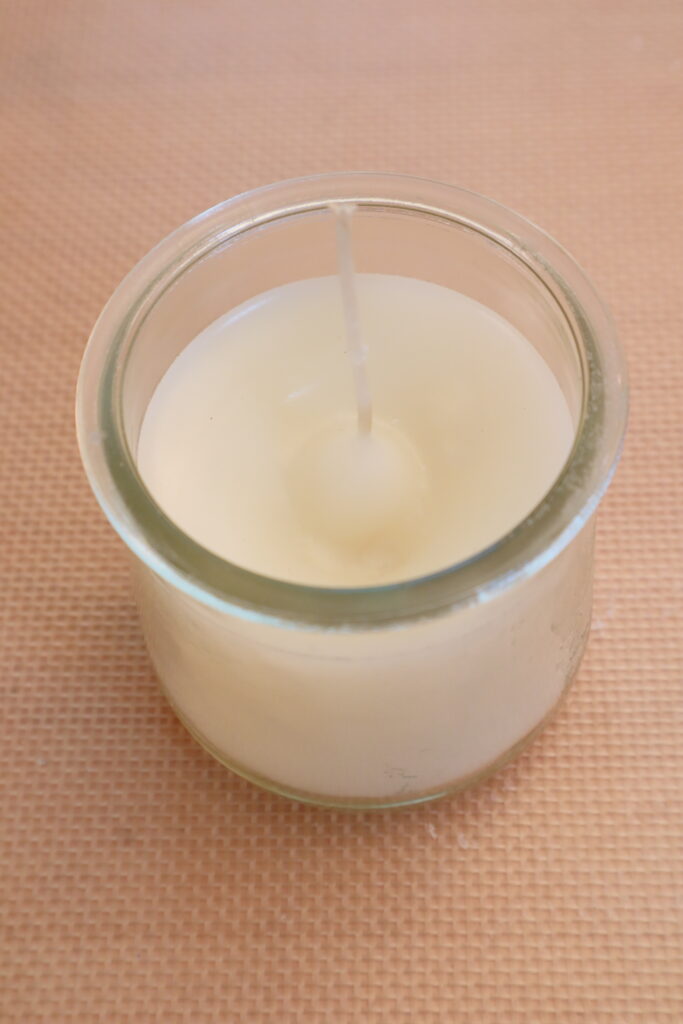
- Allow the wax to cool down to 165. I’ve found that this is a great pouring temperature for coconut apricot wax. You’ll get a smooth top and you’ll avoid sinkholes (which can happen if you pour the wax when it is too hot).
- Pour the melted wax into the candle container slowly. Don't dump the wax in quickly. Pouring slowly is key for avoiding air bubbles (which would show up as imperfections on the surface of the candle).
- Allow the candle time to cool. While you wait for the melted wax to go from a liquid yellow to a solid white, do not attempt to move the candle. Just leave it alone. I let my candles cool overnight before I move them.
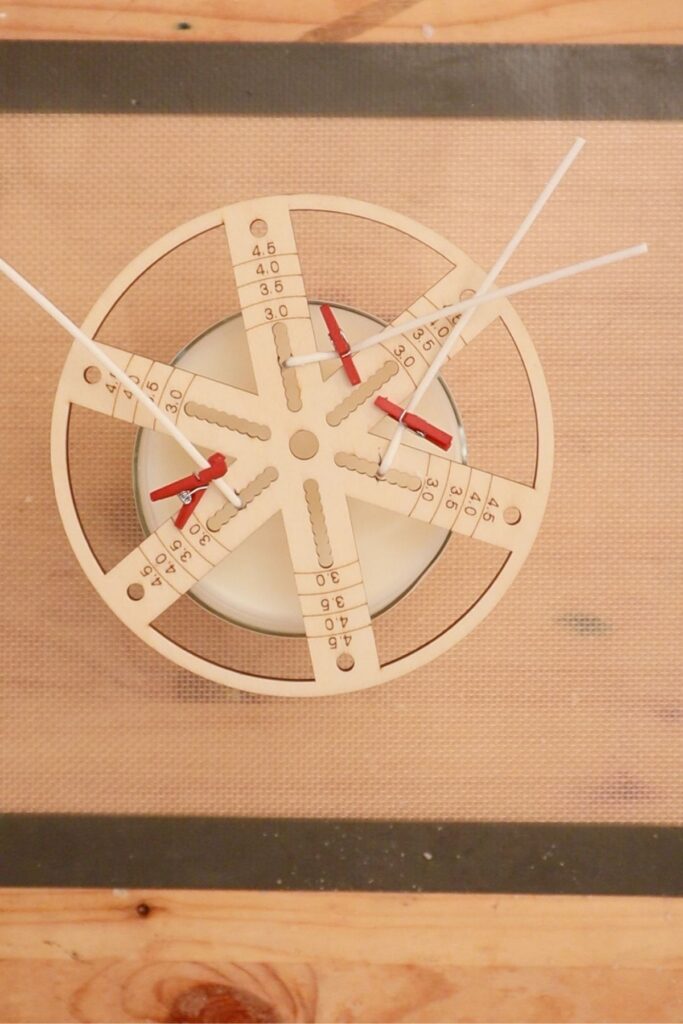
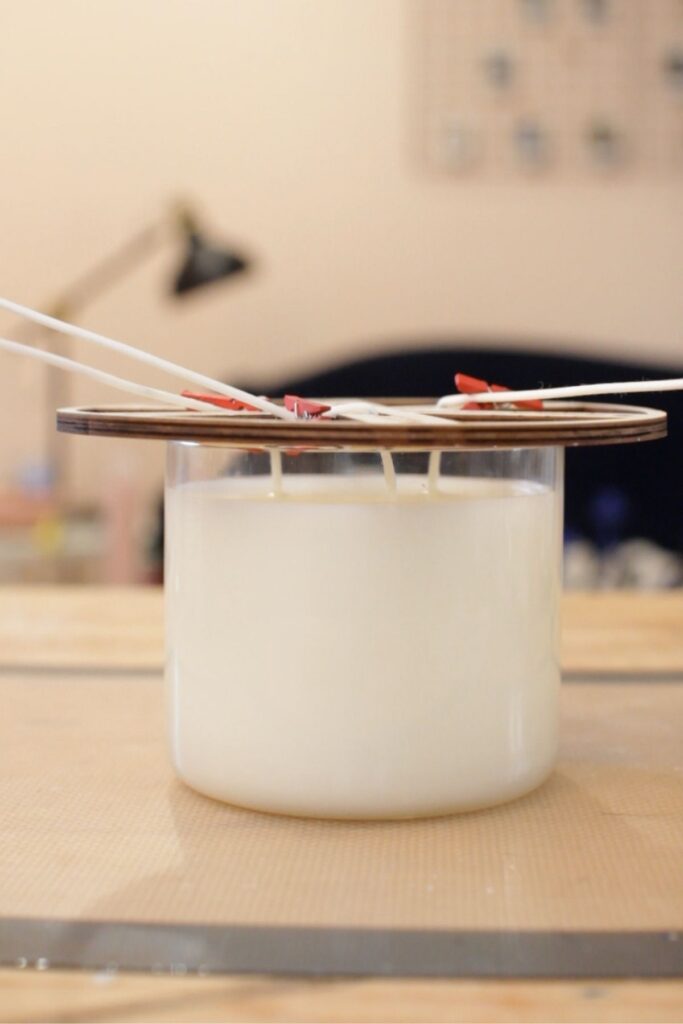
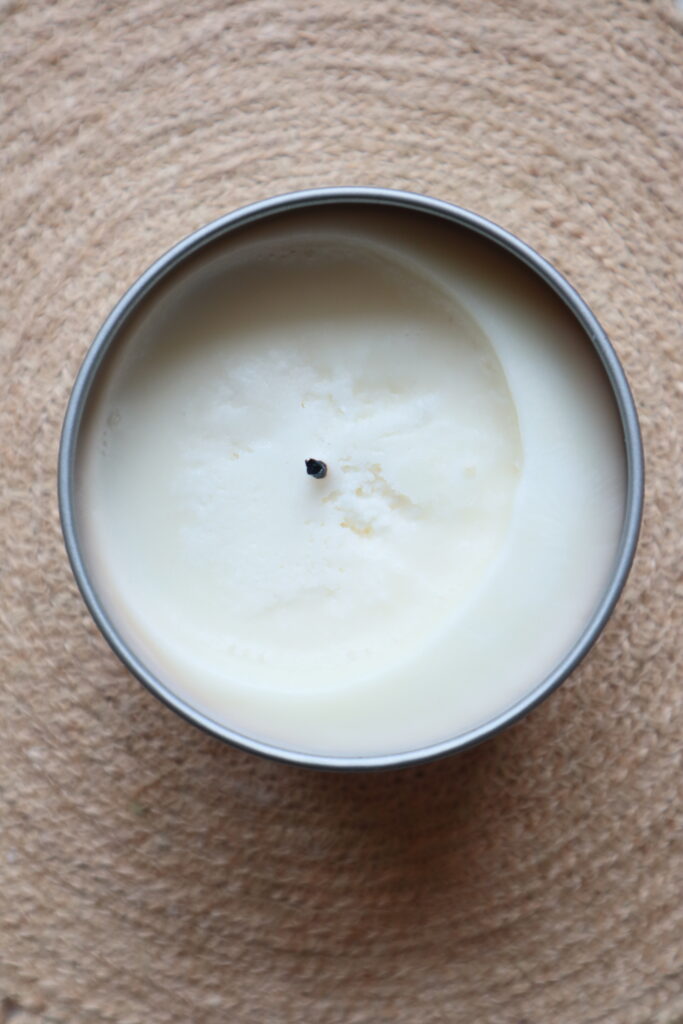
Don’t forget to trim your wicks! Trim to ¼ inch.
Why You Should Let Your Candle Cure
Technically, you’re done making the candle and you may be tempted to burn it immediately. Don’t! Candles need time to cure.
All this means is that you are leaving the candle alone in a spot that is away from direct sunlight. It gives the fragrance oil time to fully bind with the wax and it allows the wax time to completely harden. I know it’s hard to be patient, but curing makes the candle even better.
How long should you let a candle cure? The answer is that it varies by wax type. If the candle supplier does not indicate a recommended curing time on the packaging of the wax that you purchased, here’s a guide:
| Wax Type | Recommended Candle Curing Time |
| Paraffin Wax | 3-5 Days |
| Soy Wax | 14 Days |
| Soy / Paraffin Wax Blends | 5 Days |
| Beeswax | 14 Days |
| Coconut Wax Blends | 14 Days |
More Scented Candle Making Resources
If you found this post helpful, you may also want to check out:
- Everything You Need to Start Making Candles Today – The Ultimate Candle Kit for Beginners
- Where to Buy Candle Making Supplies
- How Much It Costs to Make Your Own Candles