Silicone candle molds are perfect for beginner candle makers. They’re a great place to start because (1) they’re easy to use (2) they’re more affordable than acrylic candle molds and (3) candles are less likely to get stuck inside of them. Keep reading for everything you need to know about how to use silicone candle molds. If you want to skip the tips and go straight to the tutorials, click here!
Best Candle Wax for Silicone Molds
For container candles, you can use any wax type but for molded candles, you should use one of the harder wax types. There are 2 reasons for this. First, you’ll have to de-mold these candles and that process can be a little bit rough. You want a candle made of wax that can withstand the de-molding process without breaking, chipping, or becoming deformed. Second, these candles also have to stand up on their own while they burn. If you make a taper candle or a pillar candle with 100% soy wax, it may collapse in on itself at some point.
With that in mind, here are the best wax types to use for silicone candle molds:
- Paraffin Wax: Paraffin wax is a great option for molded candles. It gets bonus points for being one of the more affordable wax types.
- Beeswax: I think that beeswax is a little more difficult to work with than paraffin, but it is also a good option for molded candles because it is one of the harder wax types.
- Pillar Wax Blends: Most candle supply companies sell blends that are specifically made to be used with molded candles. Blends like this paraffin/soy option are good because the paraffin gives it the hardness it needs to be suitable for molds and the soy gives it a creamier look. You get the best of both worlds.
I do not recommend using a softer wax like soy unless it is blended with something else. For most of my molded candles, I use a 70/30 ratio of a harder wax and a softer wax. For the flower candle in the tutorial below, I used 70% beeswax and 30% soy wax. In my opinion, the soy makes the beeswax a little bit easier to work with. If I’m not using this blend, I’ll typically use 70% paraffin and 30% soy. Again, you can just buy a pillar wax blend so you don’t have to measure out different wax types like I do.
Where to Buy Silicone Candle Molds
You can find silicone candle molds on:
- Etsy: Etsy is my favorite place to buy silicone candle molds because there is so much variety.
- Amazon: Amazon has a decent selection of molds, but the quality can be hit or miss so read the reviews! I have received a few molds that were misshapen (either because they weren’t packaged well or because they weren’t made well).
- Boowan Nicole: Boowan Nicole is where I got one of my favorite molds of all time – the asparagus candle mold! If you’re looking for unique molds, I highly recommend checking them out. I think they make better taper candle molds than any other retailer.
- Makesy: Makesy also sells molds, but they only had a few options the last time I checked. I hope they expand their selection.
- Other Retailers like Temu, Alibaba, etc: I personally don’t shop on Temu or Alibaba, but they do offer candle molds. Just keep in mind that shipping times are generally very long if you are also in the U.S. like me.
Keep in mind that you can buy 2 different types of silicone candle molds:
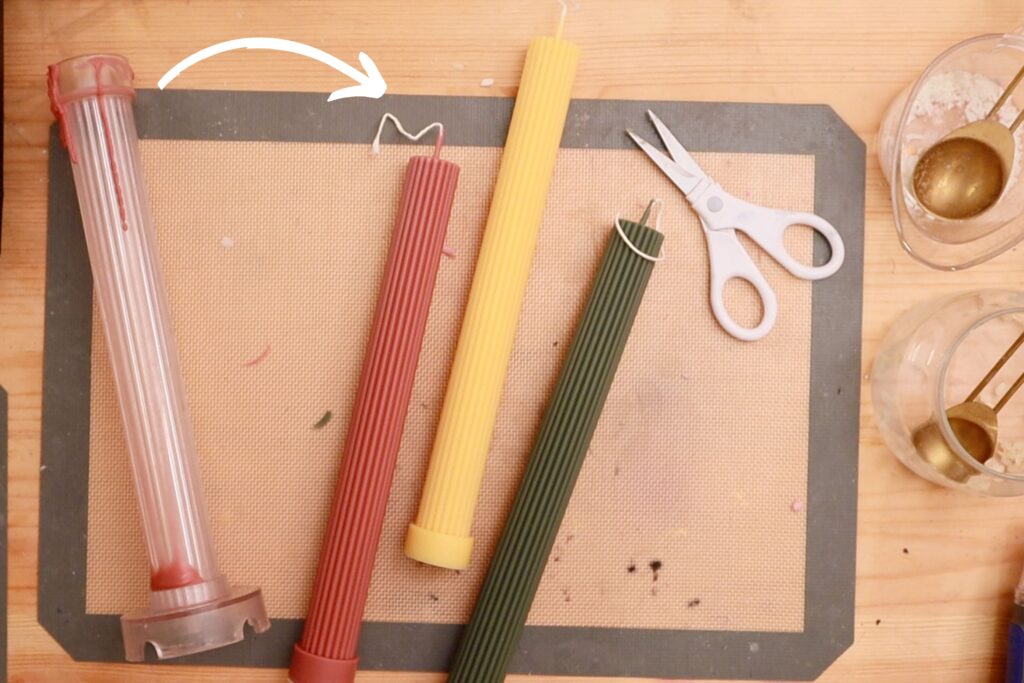
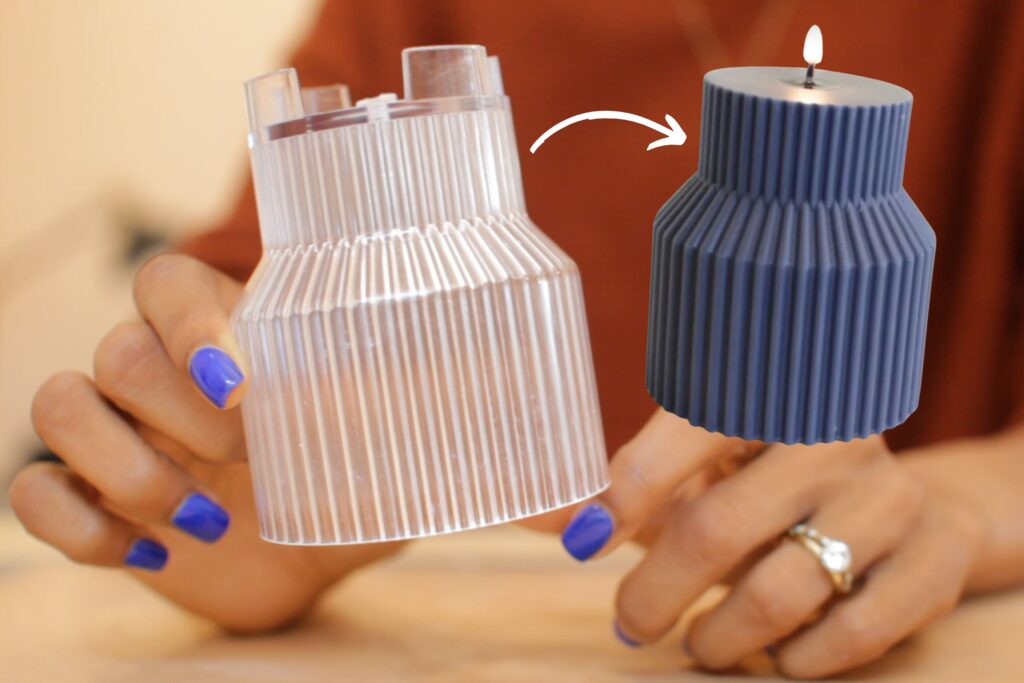
(1) The most common type has one opening at the top to pour the melted wax into. This type has to be flipped inside out to de-mold the candle. Here’s an example of what that looks like:
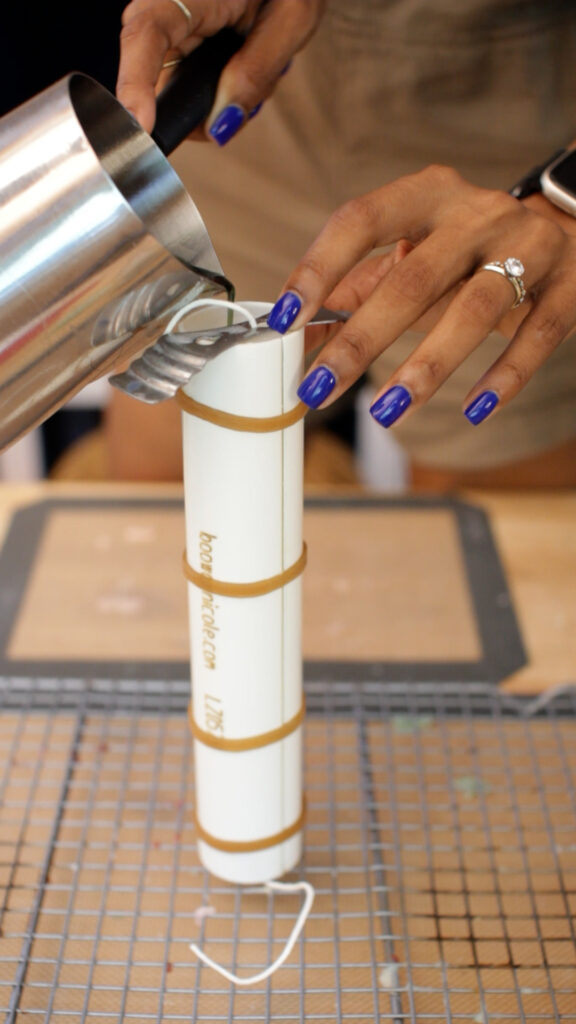
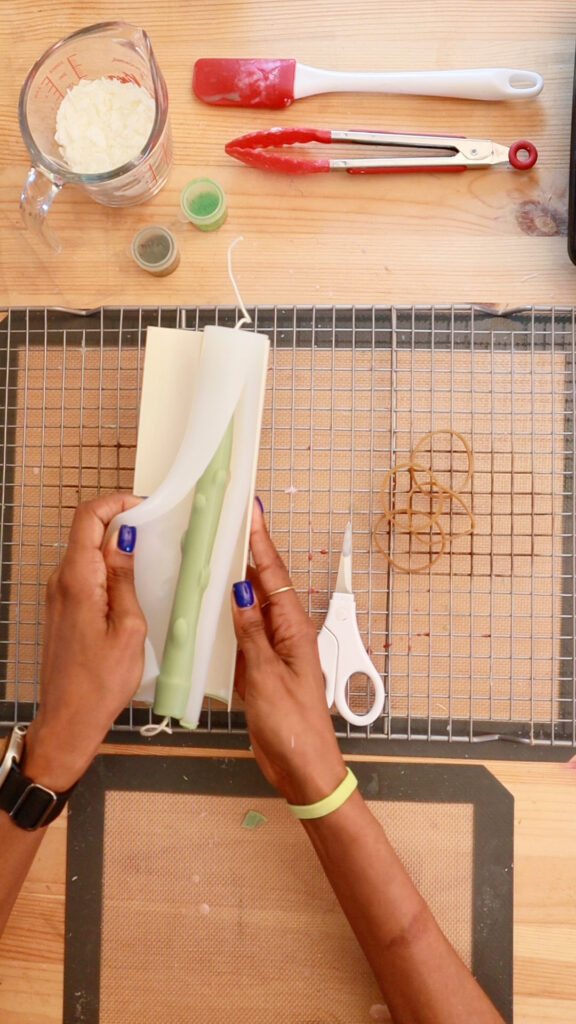
(2) The second type has a cut along the length of the mold so that you can de-mold the candle from the side. This requires rubber bands and a hard shell to hold the mold together while you pour. Here’s what that looks like:
Silicone Candle Molds versus Hard Acrylic Candle Molds
As you’re shopping for molds, you’ll also find hard acrylic candle molds like these:
I think that the acrylic candle molds are less suitable for beginners, but they’re not super complicated. They just involve more prep work. The extra steps I take when using an acrylic candle mold include:
(1) spraying the inside of the mold to prevent stuck candles,
(2) plugging up the wick hole to prevent candle wax from leaking, and
(3) pre-heating the candle container to prevent sinkholes and stuck candles.
Technically, steps 1 and 3 are optional, but they help to prevent candles from getting stuck so I always do them. I do not have to worry about any of these steps with a soft silicone candle mold so I can make candles much faster.
I think silicone molds are easier to use, but harder molds are better at maintaining a good candle shape. It can be easily to accidentally create an uneven or slightly warped candle with flexible molds and if you store them incorrectly, they can get misshapen. That said, you can avoid this issue if you store them upright and with enough space in between them. Don’t squish or stack them too closely together. They can lose their shape.
Silicone Candle Mold Tutorial: Ingredients List
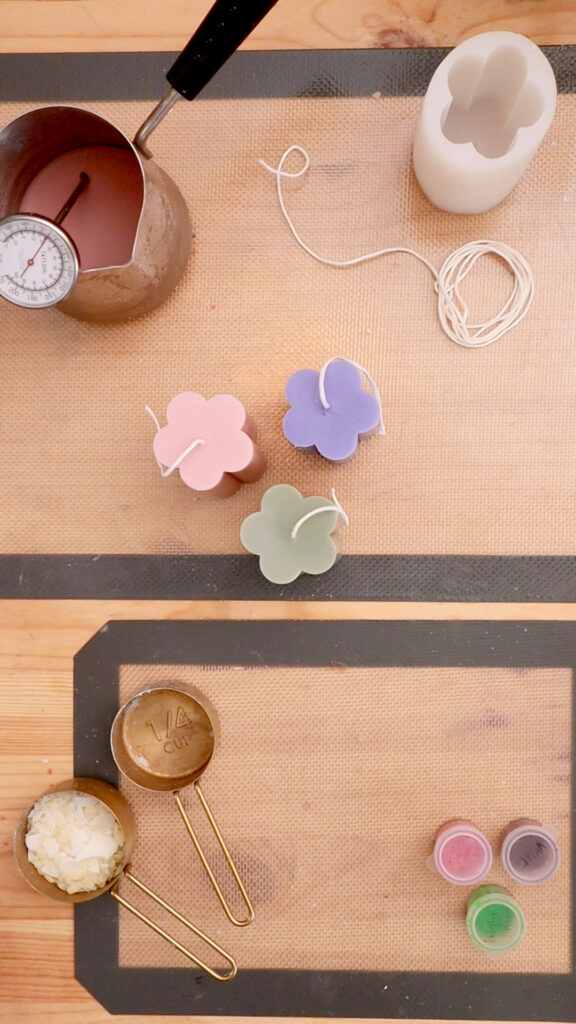
I made several flower shaped pillar candles using a silicone mold. Here’s a list of all of the ingredients I used:
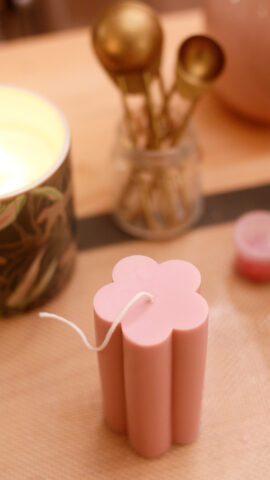
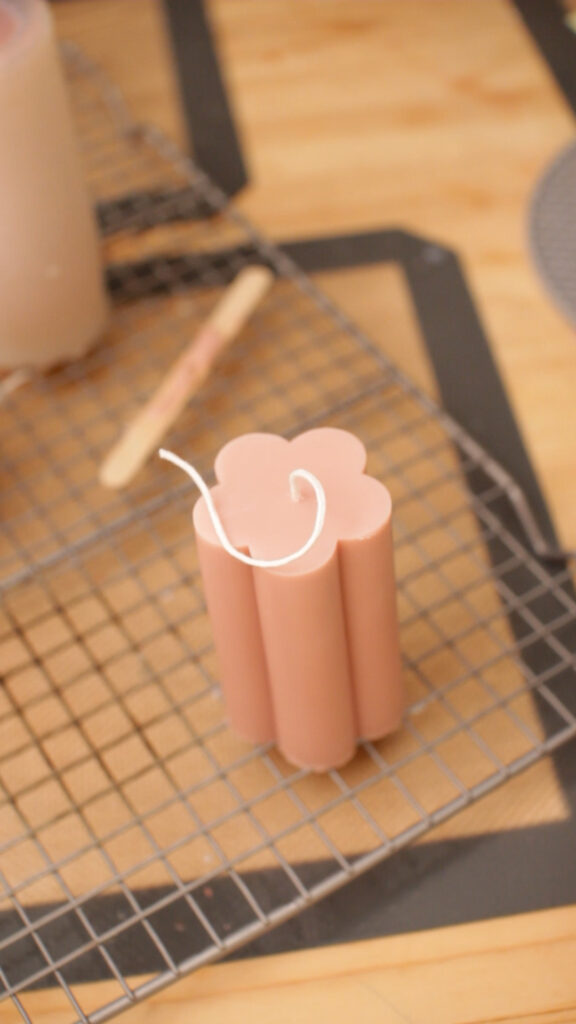
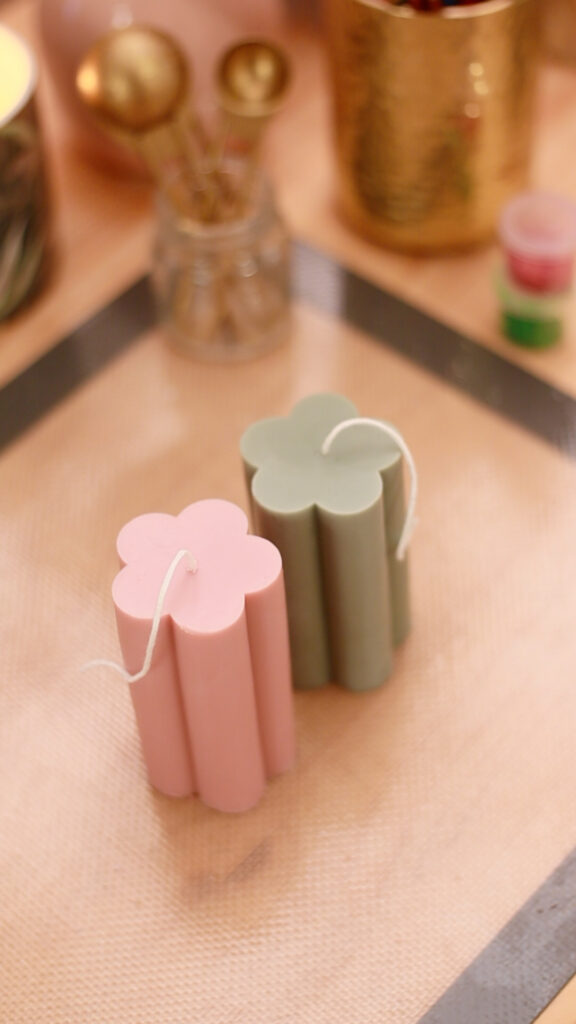
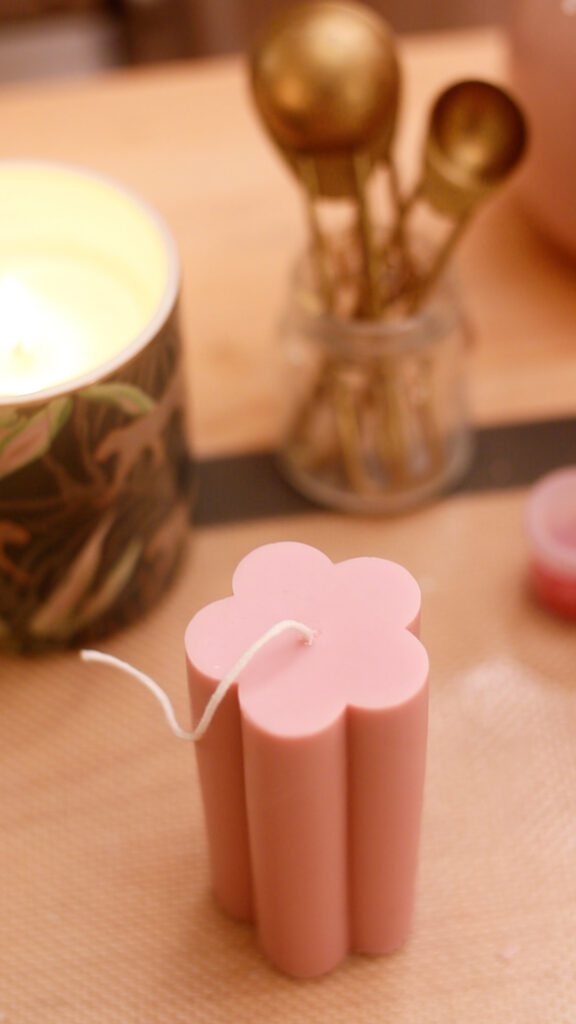
- Candle Mold: This is the silicone candle mold I used. It makes a pillar candle shaped like a flower that’s about 2.3 inches wide and a little less than 4 inches tall. If you prefer acrylic candle molds, here is one with the same flower shape.
- Candle Wax: I used a blend of beeswax and soy wax in a 70/30 ratio.
- Candle Wick: Pick a size appropriate for the diameter of the mold. For this candle, I used a size 1/0 cotton wick which is made for candles that are up to inches in diameter.
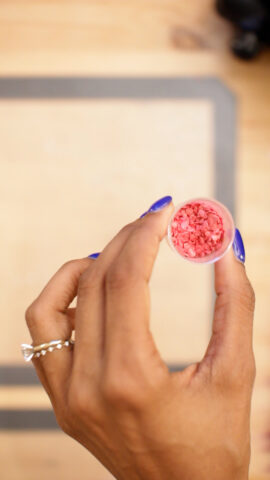
- Dye: I used wax dye chips for a lighter pastel pink color. Liquid dye is also fine and if you’re looking for a more intense color, that’s what I’d recommend.
- Stearic Acid (OPTIONAL): Stearic acid is an additive I use in most of my candles. It helps to make the color more opaque and improves burn time. You do not need this, but if you choose to add it – I add 10% of the candle weight.
Silicone Candle Mold Tutorial: Step-by-Step Guide
Here’s how to make candles using silicone molds:
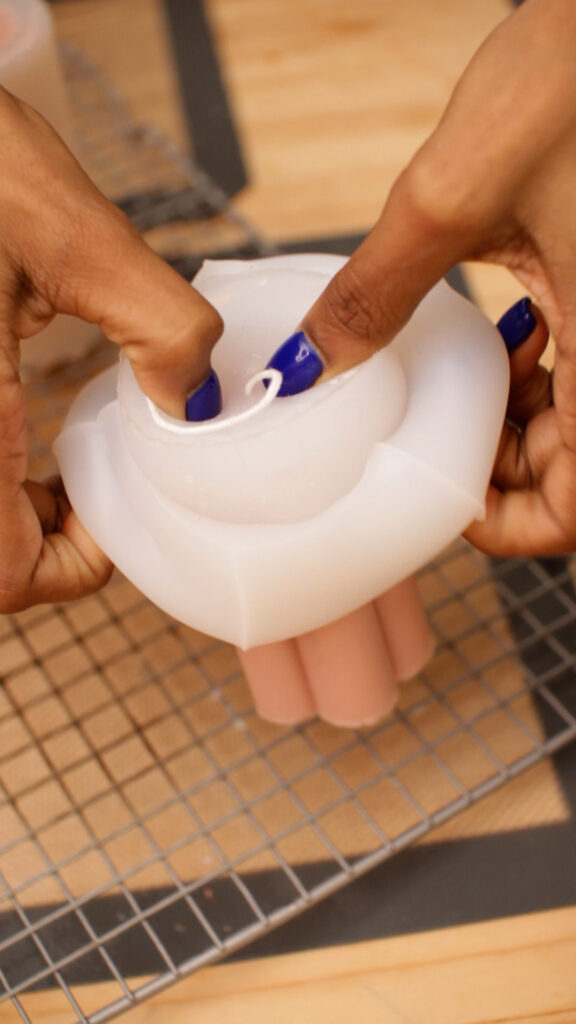
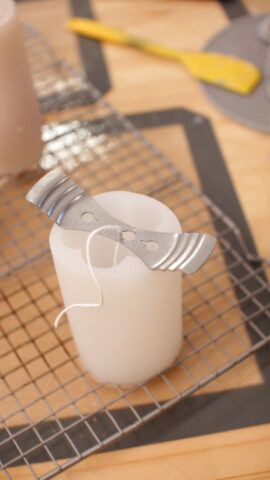
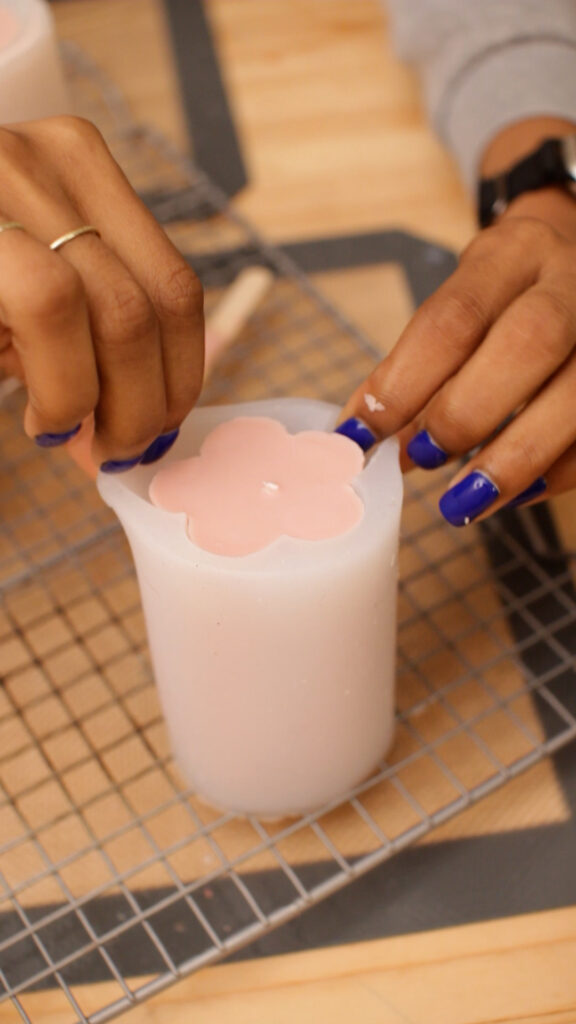
1. WICK THE MOLD: If this is your first time using the mold, you’ll need to poke a hole for the wick. I used a toothpick. You could also use a needle. It’s not that hard to pierce the silicone. Just find the center of the mold and poke a hole. Then, thread your wick through this hole. Center the wick with a wick bar.

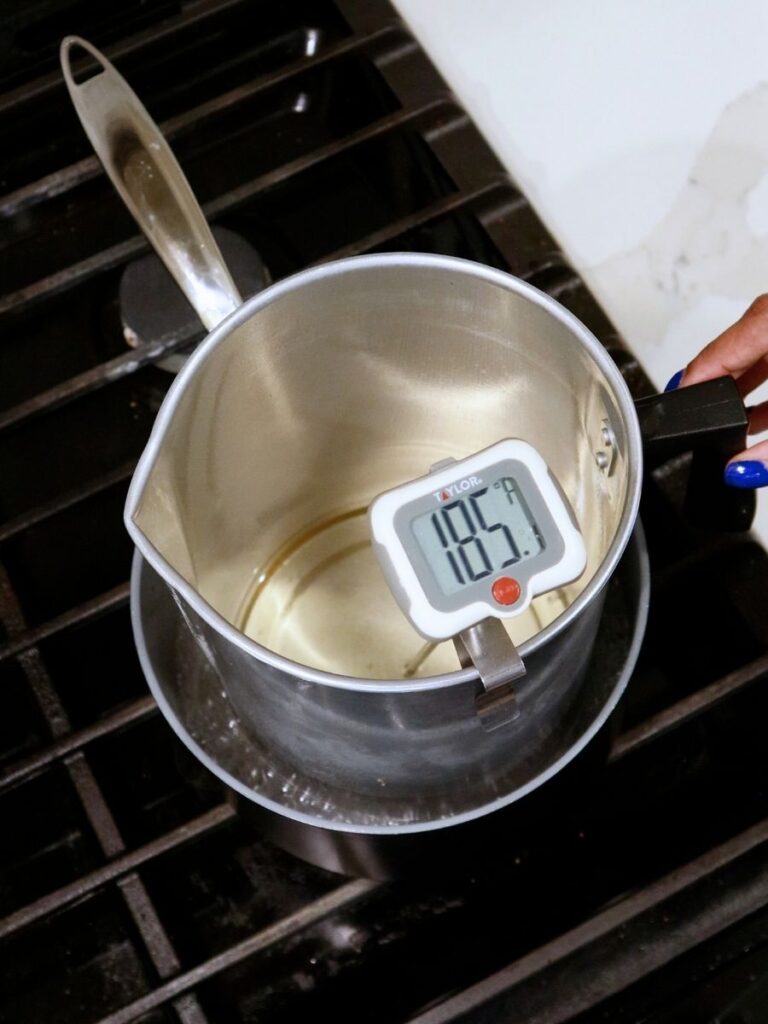
2. MELT THE WAX: Put your preferred wax blend into a melting pitcher or wax melter and heat until the wax reaches its melting point. In my case, I heated my beeswax/soy wax blend until the temperature reached 185 degrees Fahrenheit. The melting point does vary by wax type so make sure to read the packaging to get the correct numbers for your candle.
3. ADD COLOR / SCENT (OPTIONAL): I don’t scent my molded candles, but I did add a few wax dye chips to get the pastel pink color. Once I had thoroughly mixed the dye into the wax, I removed it from the heat.

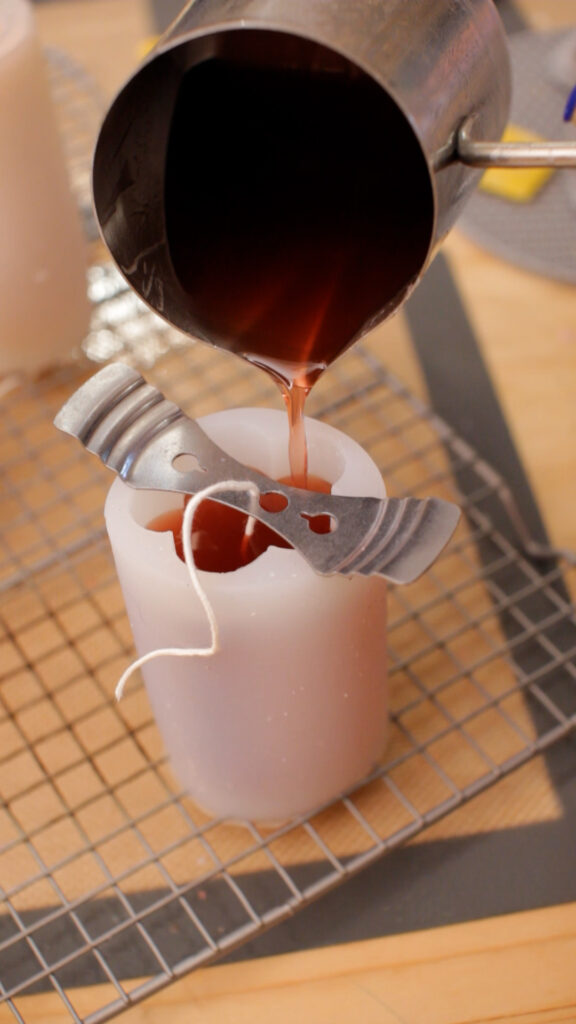
4. POUR THE WAX: I always let my wax cool down to between 155-160 degrees Fahrenheit before I pour. Pouring piping hot wax leads to sink holes so let the melting pitcher rest for a little bit and monitor the temperature while you wait. Once it gets down to the right temperature, pour slowly until you fill the mold.
5. WAIT: After you fill the candle mold, wait for at least 12 hours before you de-mold the candle. I like to wait 24+ hours because I want to give the candle as long as possible to cure before I touch it. I’ve accidentally snapped a candle in half when I was too impatient so now I give it a day or so before I pop the candle out.
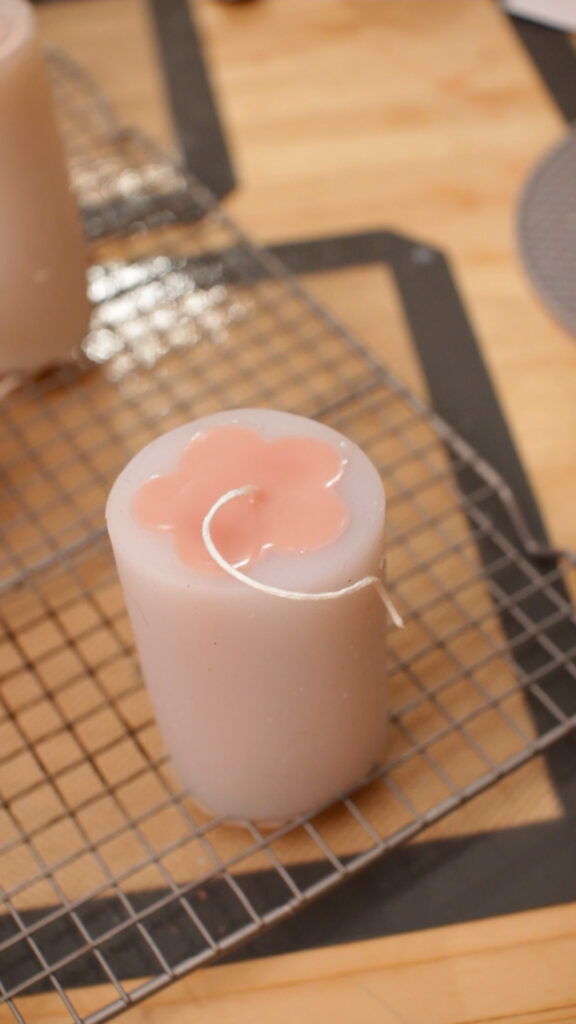
6. CUT THE WICK AT THE BOTTOM OF THE CANDLE: You do not need a long wick on both sides of the candle. Cut the wick at the bottom of the candle as close to the wax as possible so that it will lay flat. After you de-mold the candle, you’ll have access to the wick on the other side – that is the wick that will be lit.
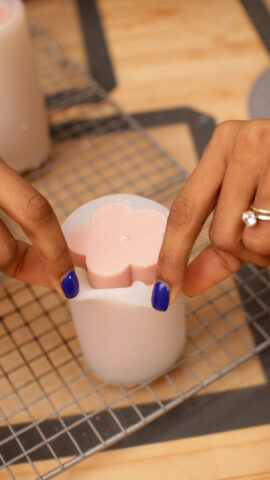
7. DE-MOLD THE CANDLE: I like to start this process by peeling the silicone away from the edges of the candle to loosen it up. Then, I flip the mold inside out to release the candle. Be very patient with this step. You don’t want to break the candle!
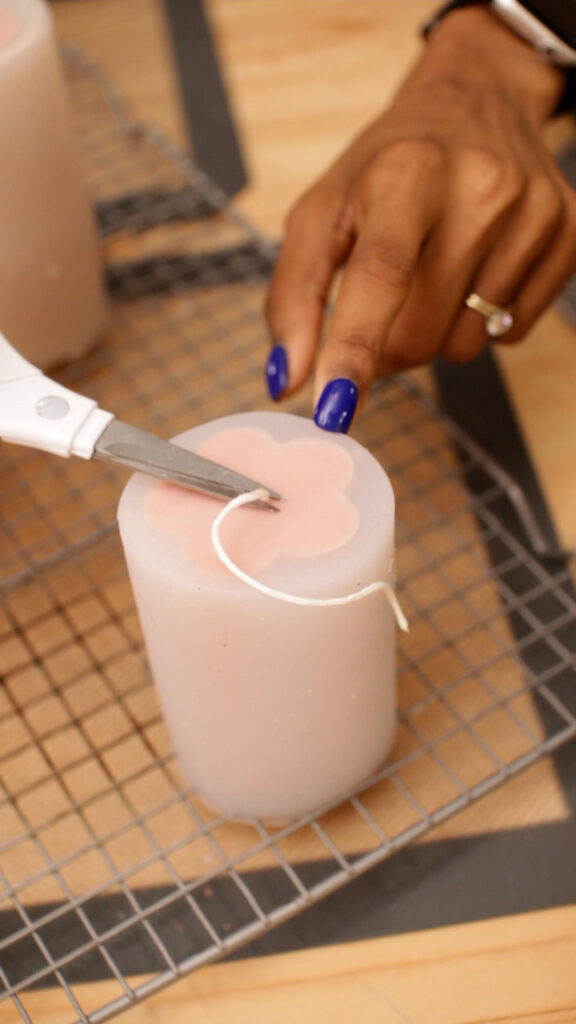
8. TRIM THE WICK: This is the final step. After you trim the wick to about 1/4 inch above the wax level, you’re ready to enjoy your candle!


Silicone Candle Mold Video Tutorials
I’ve also filmed 2 different video tutorials showing how to make candles using silicone molds.
The first one features this rainbow arch mold:
The second one features these cute little cactus molds:
More Candle Making Resources!
If you want to make candles in your kitchen, you’ll need to know how to double boil candle wax.
I also created a tutorial on how to make the perfect scented candle. It is super detailed and beginner friendly!
And don’t forget to bookmark my fragrance oil calculator for an easy way to calculate exactly how much wax and fragrance oil to use in any candle.
If you found this post helpful, you may also want to check these out: